
>>

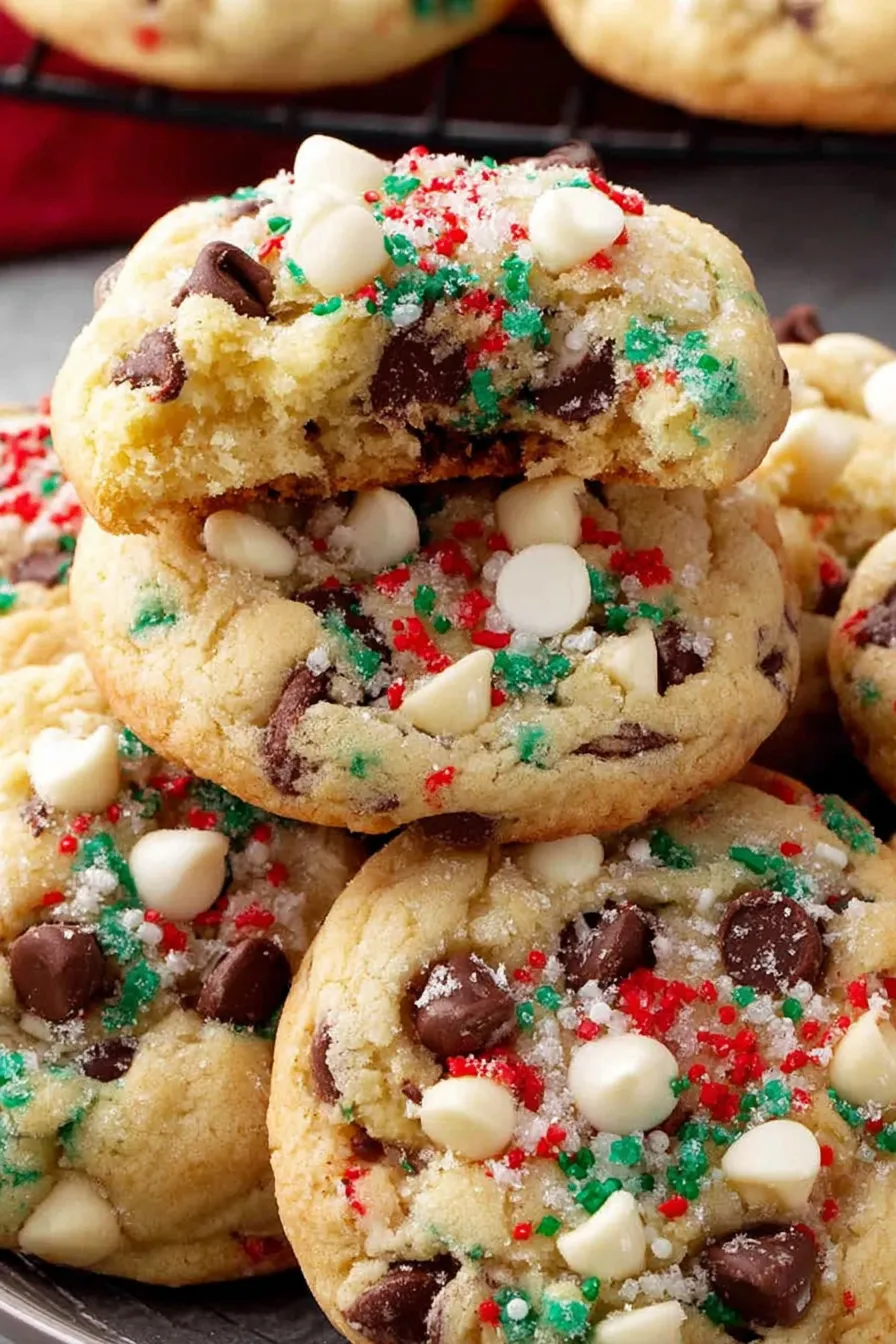
Soft, buttery chocolate chip cookies dusted with white chips and a sparkling finish — a festive favorite that turns holiday baking into a snow-kissed celebration.
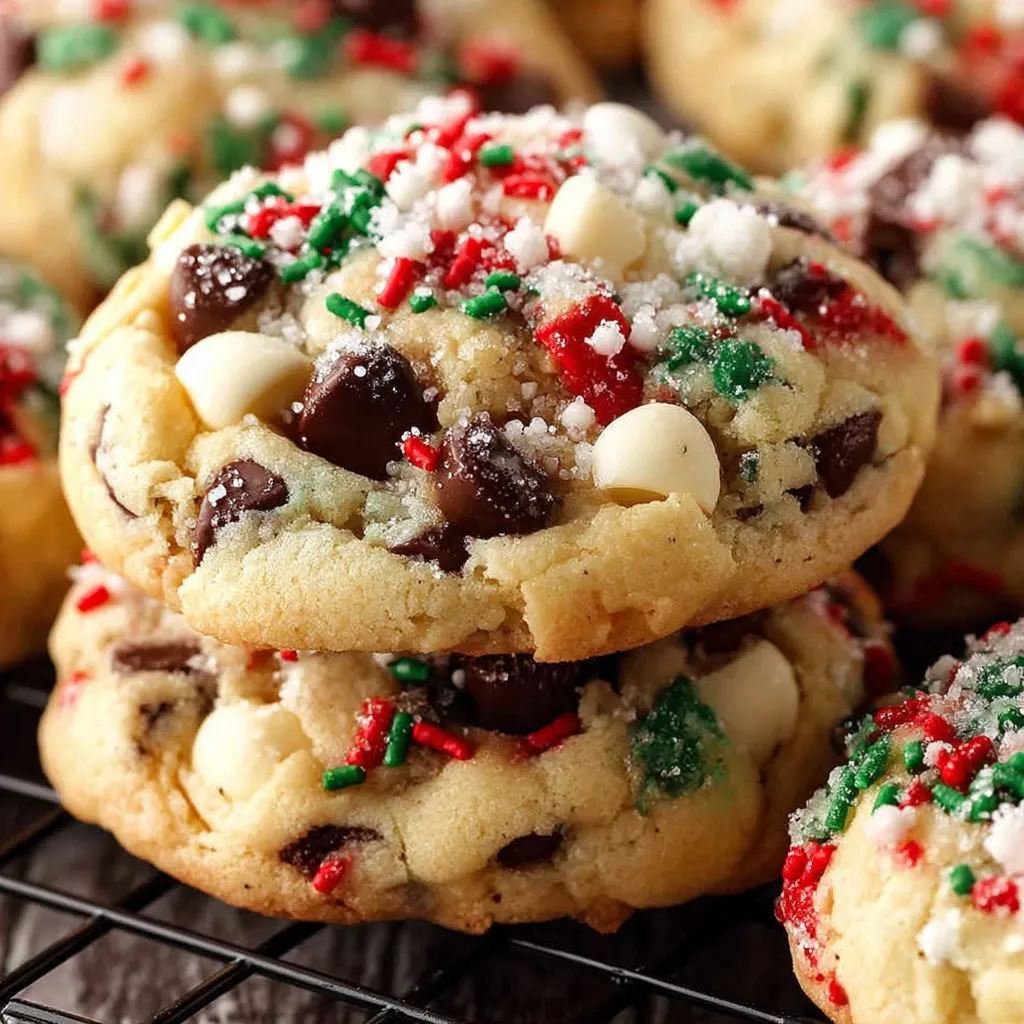
This batch of Winter Wonderland Chocolate Chip Christmas Cookies was born out of a December afternoon when I wanted cookies that tasted like classic chocolate chip but looked like a snowy holiday card. I discovered the simple trick of folding in white chocolate chips late in the mixing stage to create little pockets of snow that melt on your tongue beside the deeper cocoa notes of the semi-sweet chips. The texture is that perfect balance: slightly crisp edges and a tender, cakey center that keeps the cookie soft for days when stored properly.
I first made these for a neighborhood cookie swap and watched as neighbors commented on the soft chew and the festive sparkle from coarse sugar or edible glitter. The recipe is forgiving, uses pantry staples, and scales easily for a crowd. The aroma of butter, vanilla, and chocolate filling the kitchen is one of my favorite holiday memories; it always draws family to the oven, a small reminder that the best gifts often come warm from the oven.
I learned through several holiday trials that chilling the dough briefly is unnecessary for this formula because the butter is softened but not melted, producing those sought-after edges with soft centers right out of the oven. My kids declared these the "snow day cookies," and they are now a fixture on our holiday plate.

My favorite part is the morning after baking when the white chips look like tiny snowdrifts inside the cookie and the coarse sugar glitters like frost. At our holiday brunch, these were the first to disappear and the last to be replenished, a reminder that simple textures and straightforward technique can produce something unforgettable.
Store cooled cookies in an airtight container layered with parchment paper at room temperature for up to 4 days. To maintain that just-baked texture, add a slice of bread to the container for the first day; the bread will keep cookies soft by exchanging moisture. For longer storage, freeze baked cookies in a single layer on a tray, then move them into a freezer-safe container for up to 3 months. Reheat frozen cookies in a 300°F oven for 5 to 7 minutes to refresh their texture and melt the chocolate slightly.
For a dairy-free version, substitute plant-based butter sticks and choose dairy-free chocolate chips; expect a slightly different mouthfeel and flavor. To reduce sugar, replace up to a quarter cup of granulated sugar with a natural sweetener like allulose, but note changes to browning. For gluten-free, use a one-to-one gluten-free baking blend and add a teaspoon of xanthan gum if your blend lacks binder — texture will be slightly denser but still delicious.
Serve warm with a glass of cold milk or for an adult twist offer hot chocolate spiked with a splash of salted caramel liqueur. Plate them on a festive tin with red napkins for gifting or stack them with parchment between layers tied with baker's twine for a charming present. Garnish with a sprig of rosemary and a dusting of powdered sugar for a sophisticated holiday platter.
While the classic chocolate chip cookie is an American invention from the 1930s, holiday variations like these have become part of contemporary Christmas baking traditions. Decorating with white chocolate to mimic snow and adding sparkle mirrors European and North American practices of making sweets that reflect seasonal motifs. Cookie exchanges and tins of mixed cookies became popular in mid-20th century holiday culture, and recipes like this one fit comfortably within that custom as a modern staple that borrows both nostalgia and playful presentation.
In winter, add a pinch of ground ginger or cinnamon for festive warmth, or fold in candied orange peel for a citrus twist. For summer gatherings, switch to dark chocolate and add toasted nuts for a richer, nuttier cookie. Around Valentine’s Day, replace edible glitter with pink sanding sugar and press a few heart-shaped sprinkles into each dough ball before baking to suit the occasion.
Make a double batch and freeze half of the raw dough for future baking; portion dough into tablespoon-sized balls and freeze on a tray, then store in a resealable bag so you can bake fresh cookies anytime. Label bags with the date and bake directly from frozen for fresh results. If you’re prepping for a party, bake the night before and store finished cookies in a single layer in airtight tins to preserve presentation and texture.
Whether you bake these for a quiet snow day or a bustling holiday party, these cookies are simple to make, easy to share, and reliably festive. Try them with different chips or glitter for your signature twist, and enjoy the warmth they bring to any holiday table.
Use room-temperature eggs and softened butter so ingredients emulsify smoothly and produce a tender interior.
Measure flour by spooning it into the cup and leveling to avoid packing excess flour, which makes cookies dry.
For even cookies, use a 1-tablespoon scoop to portion dough and rotate the baking sheet halfway through baking.
Add white chocolate chips at the end to prevent them from melting into the dough and losing their snowy appearance.
Cool on the sheet for 2 minutes before moving to a rack so cookies finish setting without breaking.
This nourishing winter wonderland chocolate chip christmas cookies recipe is sure to be a staple in your kitchen. Enjoy every moist, high protein slice — it is perfect for breakfast or as a wholesome snack any time.
Yes. Freeze unbaked dough balls on a tray, then transfer to a freezer bag for up to 3 months. Bake from frozen adding 1-2 minutes to the bake time.
Store cooled cookies in an airtight container at room temperature for up to 4 days or in the refrigerator up to 10 days. Reheat briefly for a fresh-baked texture.
This Winter Wonderland Chocolate Chip Christmas Cookies recipe makes perfectly juicy, tender, and flavorful steak every time! Serve with potatoes and a side salad for an unforgettable dinner in under 30 minutes.
Preheat oven to 375°F (190°C). Line baking sheets with parchment paper. Use rimmed sheets for even heat circulation.
Whisk together flour, baking soda, and salt in a medium bowl to ensure even distribution of leavening.
Beat softened butter with granulated and brown sugars until creamy and pale, about 2 to 3 minutes. Scrape down the bowl.
Add eggs one at a time, mixing well after each, then beat in vanilla until fully incorporated.
Gradually beat in the flour mixture on low speed until just combined to avoid overdeveloping gluten.
Stir in semi-sweet and white chocolate chips gently so the white chips remain intact for the snowy effect.
Drop rounded tablespoons of dough onto prepared sheets, sprinkle with coarse sugar if desired, bake 9-11 minutes until edges are golden, cool 2 minutes on sheet then transfer to rack.
Last Step: Please leave a rating and comment letting us know how you liked this recipe! This helps our business to thrive and continue providing free, high-quality recipes for you.
Leave a comment & rating below or tag
@yumelle on social media!

Juicy chicken meatballs baked with Parmesan and herbs, spooned with marinara, and covered in melty mozzarella on toasted slider rolls. Irresistible for parties.

Twirl eerie-colored spaghetti and top it with gooey, cheese-stuffed monster meatballs complete with olive eyes for a delightfully spooky family dinner.

Silky egg ribbons swirl through savory chicken broth, scented with sesame and scallions. Simple pantry staples, ready in just 10 minutes.
Leave a comment & rating below or tag @yumelle on social media!
Enjoyed this recipe? Share it with friends and family, and don't forget to leave a review!
This recipe looks amazing! Can't wait to try it.
Comments are stored locally in your browser. Server comments are displayed alongside your local comments.

Join to receive our email series which contains a round-up of some of our quick and easy family favorite recipes.
