
>>

A luscious strawberries and cream cheesecake with a buttery graham crust, ribboned strawberry filling, and fresh berry garnish—perfect for celebrations and cozy gatherings.
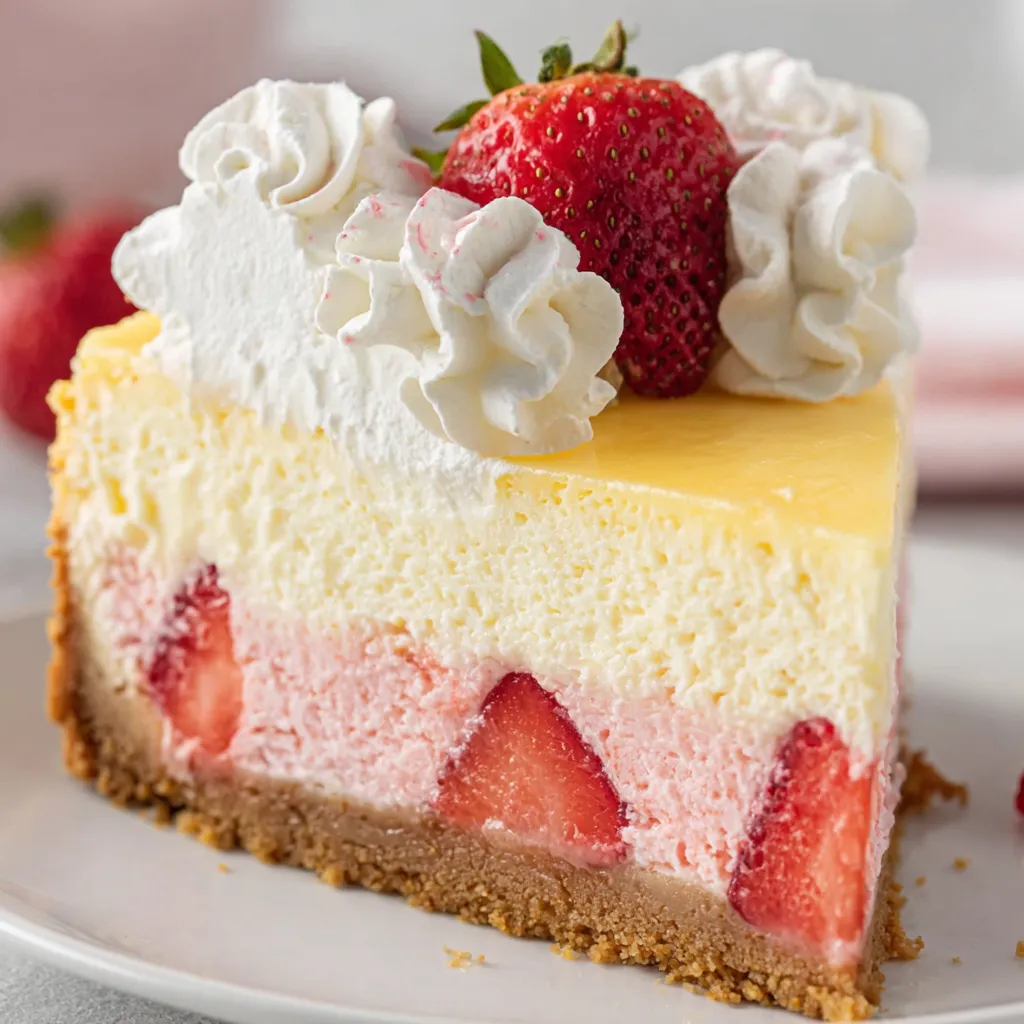
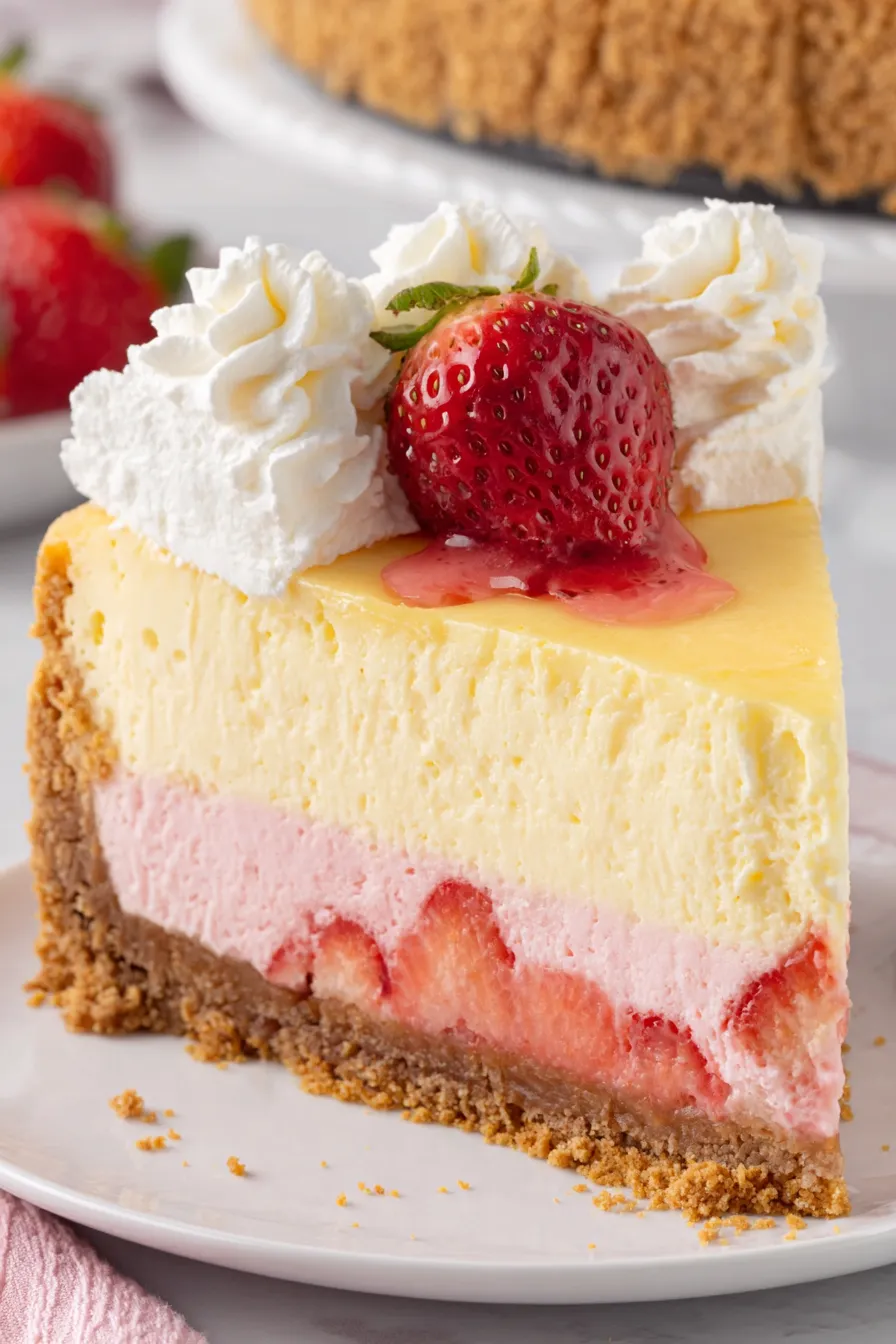
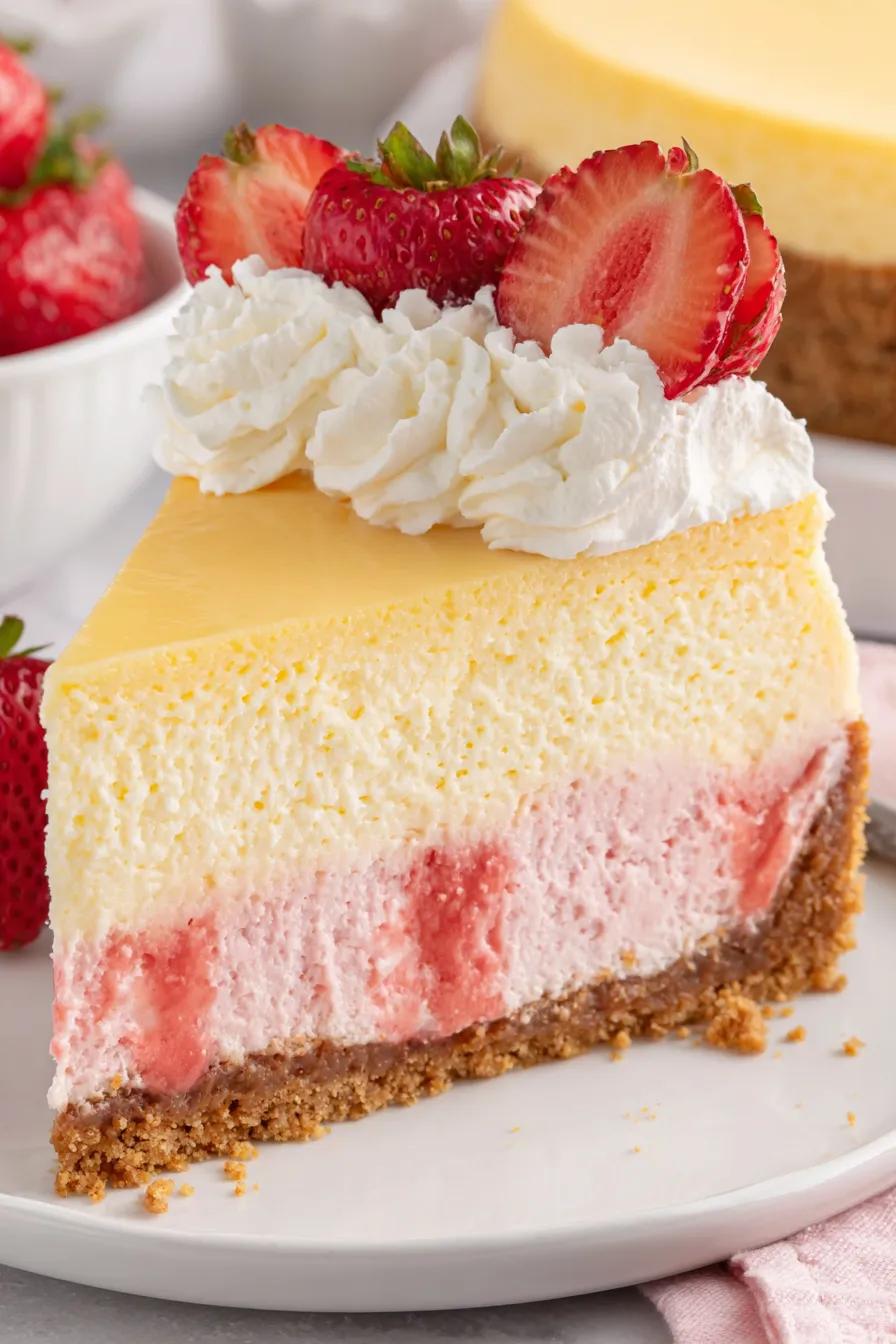
This strawberries and cream cheesecake has been my go-to dessert whenever friends ask me to bring something special. I first developed this layered version one spring when strawberries were at their peak and I wanted a dessert that showcased both their bright flavor and a classic creamy texture. The result is a two-tone cheesecake: a delicate, pale-pink strawberry layer beneath a smooth, traditional cream cheese layer, all sitting on a crisp graham cracker crust. It bakes gently in a water bath so the surface stays silky rather than cracked, and chilling it overnight gives it that perfect, sliceable firmness.
I remember bringing this to a family birthday and watching people circle the cake like it was a centerpiece rather than just dessert. The strawberry ribbon flavors are bright but not overpowering, while the cream layer balances richness and tang. The texture is dense yet tender—firm enough to hold clean slices, but each bite still melts on the tongue. Little decorative dollops of thawed whipped topping and fresh strawberries at the rim finish it beautifully, giving a bakery-worthy presentation that’s surprisingly simple at home.
I discovered a few small tricks the hard way—softening the cream cheese fully, adding eggs one at a time on low speed, and wrapping the pan well for the water bath make all the difference. Family and friends consistently ask for the recipe; the simplicity and the look combined are what make it memorable.
What I love most about this version is how reliably it pleases a crowd. The strawberry layer adds visual flair and a burst of berry flavor without overwhelming the creamy base. On holidays this cake becomes a focal point: it’s both nostalgic and polished, and guests always remark on how delicate the texture is.
Store the chilled cheesecake covered with a cake dome or wrapped tightly in plastic wrap in the refrigerator for up to five days. For longer storage, slice into portions, wrap each piece airtight in plastic, then foil, and freeze for up to three months. Thaw overnight in the refrigerator and avoid microwave reheating; instead, let slices sit at room temperature for 15–20 minutes before serving to soften slightly. If the whipped-topping garnish will be stored separately for travel, add it just before serving to keep the topping light and fresh.
If you prefer a lighter texture, swap half the cream cheese for Neufchâtel cheese, though the filling will be slightly less rich. For a gluten-free option, replace graham crumbs with gluten-free graham-style crumbs or crushed gluten-free cookies. If fresh strawberries are out of season, use a high-quality strawberry syrup or puree—reduce added sugar slightly if using a very sweet syrup. For a dairy-free adaptation, use a specialist dairy-free cream cheese and coconut cream, but note the flavor and texture will change substantially.
Serve this dessert chilled with a simple cup of dark roast coffee, Champagne for celebrations, or a citrusy herbal tea to cut through richness. Garnish with extra sliced strawberries, a light dusting of confectioners’ sugar, or a small drizzle of warmed strawberry syrup on each slice for dramatic plating. For summer patio meals, pair with lemon bars or a light green salad to keep the menu balanced.
Cheesecake has deep roots in many cuisines, but the modern American cheesecake with a graham cracker crust became popular in the early 20th century. Layered fruit variations celebrate seasonal produce—strawberries have long been a spring classic in American baking. This layered approach echoes patisserie techniques where visual contrast complements flavor, turning a familiar dessert into a centerpiece for holidays and family gatherings.
Spring and summer: use peak fresh strawberries and a light drizzle of warm berry coulis. Fall: swap the strawberry layer for a spiced apple or pear compote and add a cinnamon graham crust. Winter holidays: use a cranberry-orange syrup in place of strawberry for festive color and tartness. Adjust extracts and syrup quantities slightly to maintain balance and avoid overpowering the cream base.
I once made this cake for a bridal shower and received messages for days—people loved the clean slices and subtle berry flavor. Another time it was the hit of a backyard dinner where a guest said it was the best cheesecake they'd ever had because it combined the familiar creaminess with a fresh fruity note. Those moments confirm that a few careful techniques—room-temperature ingredients, gentle mixing, and a reliable water bath—pay off every time.
Prepare the crust and batters the day before and keep them chilled: assemble and bake the next day for fresher flavor. For transport, leave the springform latch closed and place the pan in a snug box with a non-slip mat; add garnish on-site to avoid squashed berries. If slicing for meal-prepped desserts, wrap individual slices and store in the freezer; thaw in the refrigerator before serving and top with whipped topping just before eating.
This strawberries and cream cheesecake is a wonderful blend of celebratory appearance and everyday technique—simple enough for weeknight baking when you plan ahead, special enough for holidays. I hope you make it your own, experiment with different syrups or crusts, and create your own memories around the table.
Soften cream cheese to room temperature for lump-free batter and mix on medium-low to avoid over aeration.
Add eggs one at a time on low speed, mixing just until incorporated to reduce bubbles and prevent cracking.
Double-wrap the springform pan with heavy-duty foil to keep water out of the pan during the water-bath bake.
This nourishing strawberries and cream cheesecake recipe is sure to be a staple in your kitchen. Enjoy every moist, high protein slice — it is perfect for breakfast or as a wholesome snack any time.
Yes. Chill at least 8 hours or overnight for best texture and clean slices.
Wrap tightly and freeze up to three months. Thaw overnight in the refrigerator.
This Strawberries and Cream Cheesecake recipe makes perfectly juicy, tender, and flavorful steak every time! Serve with potatoes and a side salad for an unforgettable dinner in under 30 minutes.
Preheat oven to 375°F. Wrap a 9-inch springform pan tightly with two layers of heavy-duty foil, place a parchment round in the bottom, and spray sides lightly with baker's spray to prevent sticking and keep water out during the water bath.
Mix graham cracker crumbs, sugar, and melted butter until the texture resembles wet sand. Press firmly into the bottom and halfway up the sides of the prepared pan. Bake 10 minutes on middle rack, then set pan in a roasting pan to cool while preparing filling. Reduce oven to 325°F and bring water to a boil for the bath.
Beat softened cream cheese with sugar until smooth. With mixer on low, add vanilla and eggs one at a time, mixing only until incorporated. Fold in sour cream and heavy cream on low speed until just combined.
Remove half the batter to another bowl. Stir strawberry syrup and optional strawberry extract into the batter remaining in the original bowl until the color is uniform and no streaks remain. Pour strawberry batter into the crust and smooth to an even layer.
Very slowly spoon the reserved plain batter over the strawberry layer, using an offset spatula to spread gently without mixing the two layers. Aim for an even top for consistent baking.
Place the roasting pan with the springform pan on the oven rack and carefully pour boiling water into the roasting pan until it comes about 1 inch up the sides of the springform pan. Bake at 325°F for about 1 hour 30 minutes until the center is set with a slight wobble.
Turn off the oven, crack the door 1–2 inches, and let the cheesecake sit 1 hour to finish cooking gently. Remove, run a thin knife around the edge, and refrigerate at least 8 hours or overnight before slicing.
Pipe thawed whipped topping around the edge in ten dollops and place a fresh strawberry on each. Slice so each portion includes a dollop and a berry, and serve chilled.
Last Step: Please leave a rating and comment letting us know how you liked this recipe! This helps our business to thrive and continue providing free, high-quality recipes for you.
Leave a comment & rating below or tag
@yumelle on social media!

Juicy chicken meatballs baked with Parmesan and herbs, spooned with marinara, and covered in melty mozzarella on toasted slider rolls. Irresistible for parties.

Twirl eerie-colored spaghetti and top it with gooey, cheese-stuffed monster meatballs complete with olive eyes for a delightfully spooky family dinner.

Silky egg ribbons swirl through savory chicken broth, scented with sesame and scallions. Simple pantry staples, ready in just 10 minutes.
Leave a comment & rating below or tag @yumelle on social media!
Enjoyed this recipe? Share it with friends and family, and don't forget to leave a review!
This recipe looks amazing! Can't wait to try it.
Comments are stored locally in your browser. Server comments are displayed alongside your local comments.

Join to receive our email series which contains a round-up of some of our quick and easy family favorite recipes.
