
>>

A simple, crusty Italian loaf with a golden crackly exterior and tender crumb — perfect for soups, sandwiches, or just torn and dipped in olive oil.
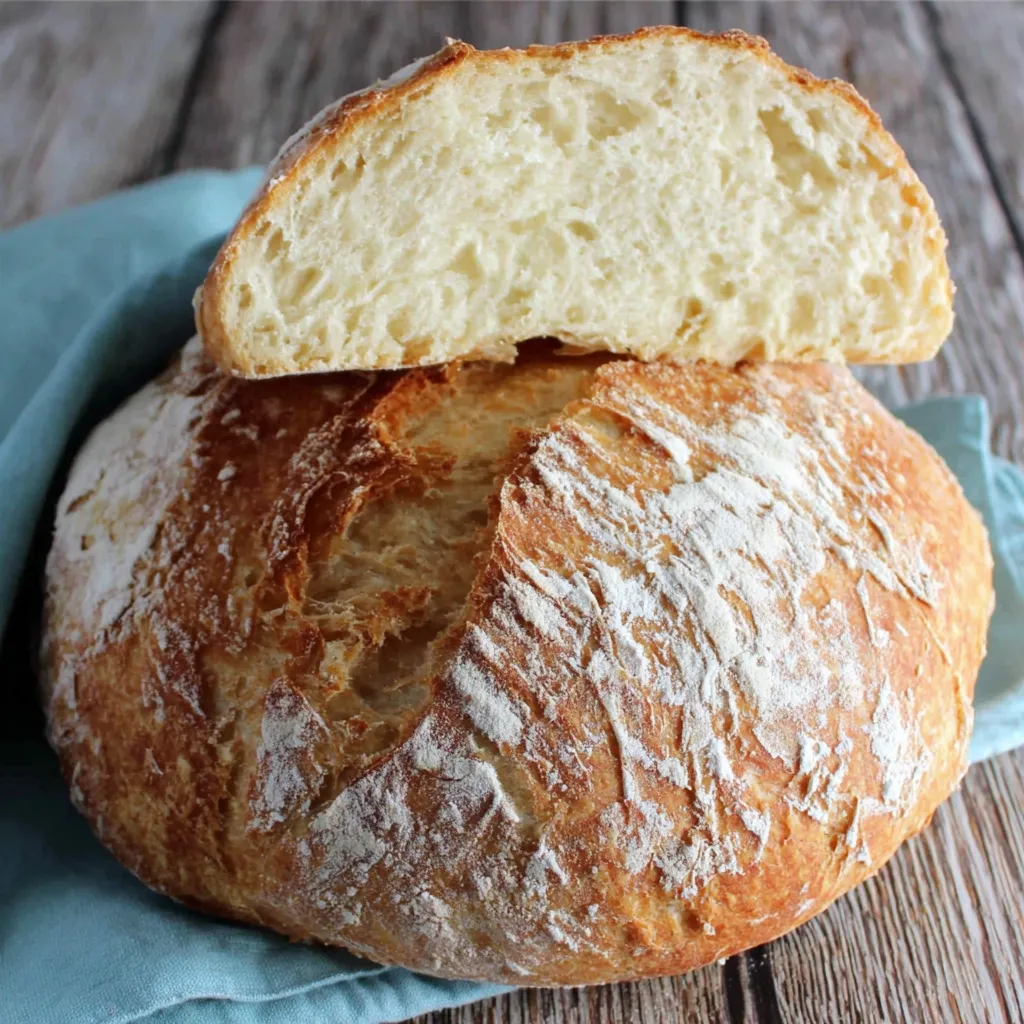
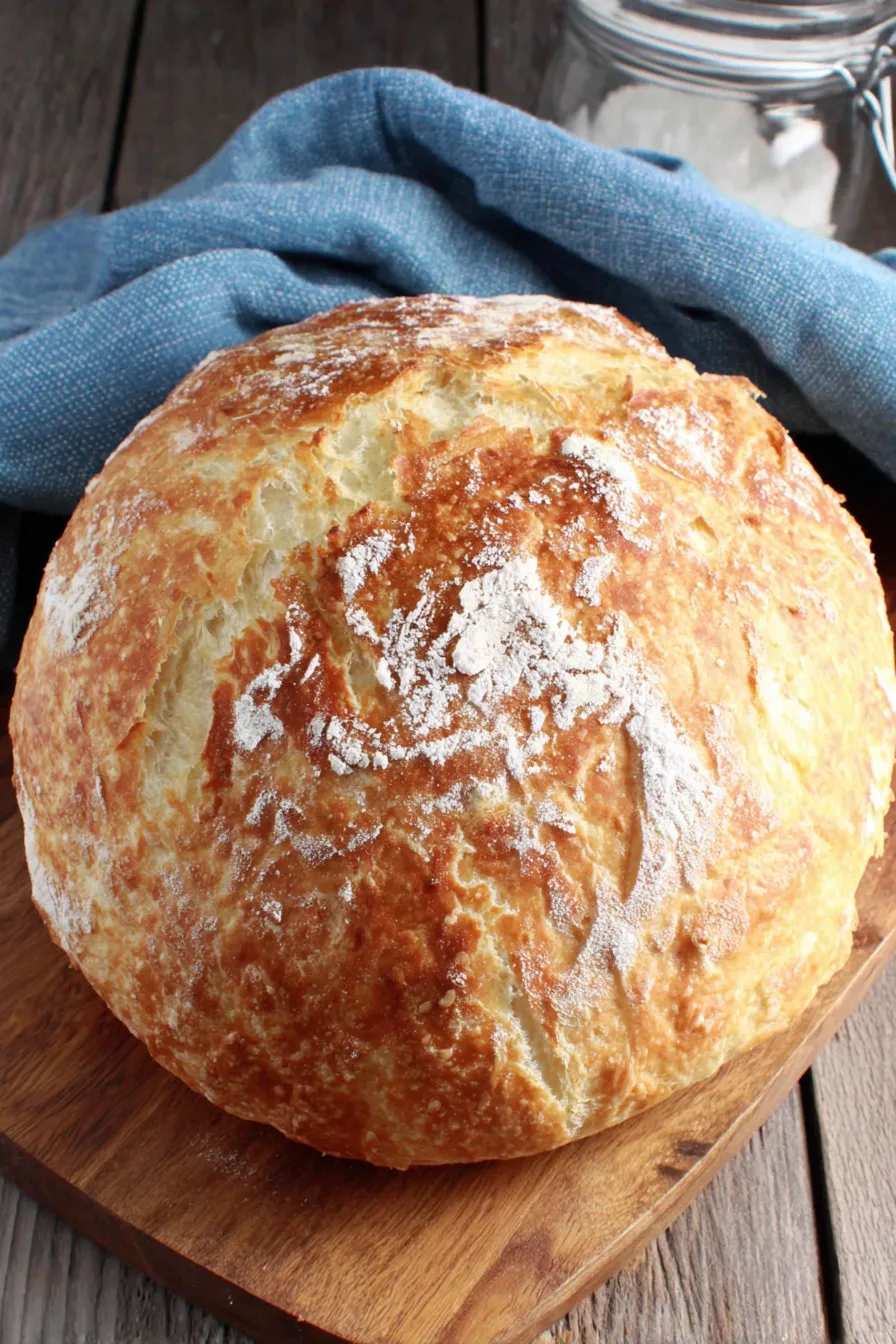
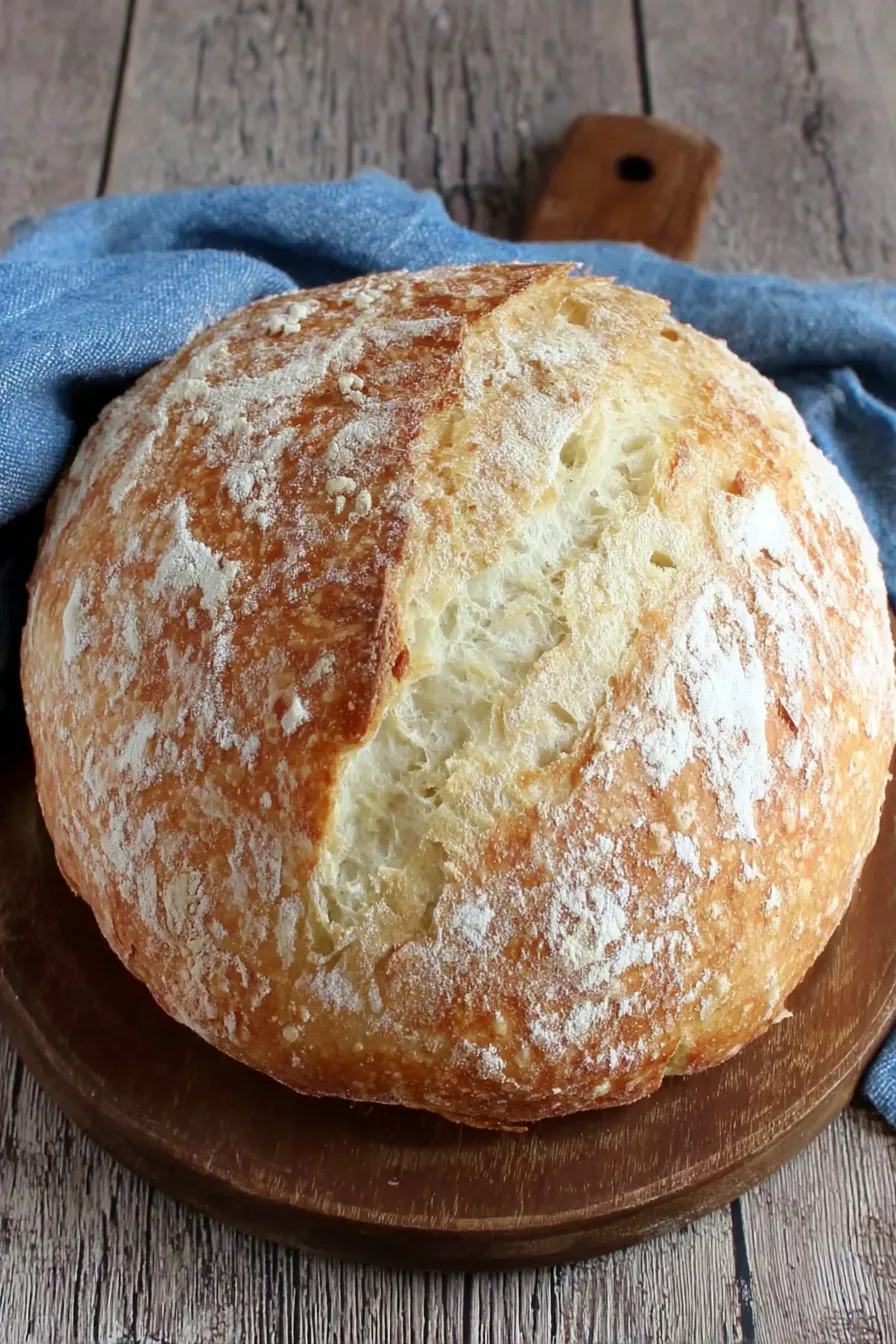
This rustic Italian crusty loaf has been my kitchen's quiet hero for years. I discovered this straightforward method on a rain-soaked evening when the market was closed and pantry staples were all I had: flour, yeast, water, a little olive oil and salt. The result was unexpectedly transformative — a loaf with a crackled, golden crust and an airy yet tender interior that made even plain olive oil taste celebratory. Since then, this loaf shows up at family dinners, impromptu gatherings and slow Sunday breakfasts.
What makes this loaf special is how little it asks of you and how generously it rewards: minimal ingredients, no fancy techniques, just a few minutes of active time and a bit of patience while the dough transforms. The texture balances a crisp, shattering crust with a slightly chewy crumb and irregular holes that trap butter and soups beautifully. Every time I slice into it I remember that first night and the warm kitchen full of baking scent — and that memory is baked right into the loaf.
In my home this loaf became a conversation starter — guests always ask how something so simple can taste so good. My sister likes it toasted with roasted garlic and tomato; my neighbor uses it as the perfect vehicle for her slow-braised ragu. It’s become our go-to when we want comfort without fuss.
My favorite thing about this loaf is how forgiving it is. I’ve baked it at sea level and at higher elevations, with slight adjustments in flour and hydration, and it always rewards me with a golden crust and warm, fragrant crumb. Family members love tearing off uneven pieces and dipping them into olive oil or ladling soup over them — it’s comfort food at its most elemental.
To keep the crust crisp and the crumb tender, cool the loaf completely on a rack before storing — trapping warmth invites sogginess. For short-term storage (1–2 days), place the cooled loaf in a paper bag or loosely wrap in a clean cotton towel; this protects the crust while allowing some airflow. For longer storage, slice the loaf, wrap individual portions in plastic wrap, then store in a resealable freezer bag for up to 3 months. When reheating, a quick 5–7 minute bake at 350°F restores the crust; for slices, toast directly from frozen for best results.
If you don’t have bread flour, all-purpose flour will work — expect a slightly softer crumb and less pronounced chew. For a whole-wheat variation, substitute up to 1 cup of the flour with whole-wheat flour and increase hydration by 1–2 tablespoons because whole grains absorb more water. Swap olive oil for neutral vegetable oil if preferred, though flavor will be milder. For a richer crust, brush the shaped loaf lightly with water before baking or steam the oven by placing a shallow pan of hot water on the bottom rack for the first 10 minutes.
Serve slices warm with extra-virgin olive oil and a pinch of flaky sea salt for dipping, or offer alongside a hearty minestrone or ribollita. Turn thicker slices into bruschetta topped with crushed tomatoes, garlic and basil, or slice thinly for sandwiches with cured meats and high-quality cheese. For a festive table, place a whole loaf in a basket lined with a linen napkin and tear pieces family-style — the rustic presentation complements roasted meats and vibrant salads.
Crusty country-style loaves are a pillar of Italian home cooking — simple breads meant to stretch ingredients and soak up sauces. Techniques vary regionally: some areas favor wetter doughs and long fermentations, others shape slender loaves or round pagnotte. This particular batard shape and straightforward hydration mirrors the traditional peasant approach: few ingredients, attention to technique, and an emphasis on texture and fragrance rather than elaborate enrichment.
In cooler months, let the dough proof in a warm oven (turned off) with a bowl of hot water to encourage a steady rise; in summer, a shorter proof at room temperature prevents over-fermentation. Add seasonal touches like chopped rosemary and roasted garlic in autumn, lemon zest and herb blends in spring, or a scattering of seeds on top for visual interest and nutty flavor. For holiday tables, turn the dough into small rolls brushed with garlic-infused oil.
For easy meal prep, double the dough and refrigerate one portion overnight for slow fermentation — this deepens flavor and gives you fresh-baked bread the next day with minimal effort. Portion and freeze baked slices in meal-sized batches so you can pull out just what you need. If planning sandwiches, slice and freeze the full loaf to keep slices uniform and prevent drying between uses.
There’s a special kind of satisfaction in baking your own loaf and hearing that first crack as the crust cools. Try this method once and you’ll find it becomes a dependable centerpoint of many meals: warming, welcoming and delicious.
Always proof yeast in warm (not hot) water around 110°F to avoid killing the yeast; a simple kitchen thermometer helps.
Resist the urge to over-flour while shaping — a light dusting prevents sticking but too much flour tightens the crumb.
Score the loaf with confident shallow slashes (about 1/4 inch) to control oven spring and create classic rustic ears.
Allow the loaf to cool completely before slicing to let the interior set; slicing too early creates a gummy texture.
This nourishing rustic italian crusty bread recipe is sure to be a staple in your kitchen. Enjoy every moist, high protein slice — it is perfect for breakfast or as a wholesome snack any time.
Yes. If the yeast does not foam within 10 minutes, it’s best to start over with fresh yeast because inactive yeast will not produce a good rise.
Cool the oven to 350°F and bake for about 5–7 minutes to refresh the crust, or toast slices directly from frozen.
This Rustic Italian Crusty Bread recipe makes perfectly juicy, tender, and flavorful steak every time! Serve with potatoes and a side salad for an unforgettable dinner in under 30 minutes.
Combine warm water (about 110°F), yeast and sugar in a large bowl. Let stand 5–10 minutes until foamy to confirm yeast activity.
Add 2 cups of the flour, olive oil and salt to the foamy mixture. Stir with a wooden spoon or use a stand mixer on low until a shaggy dough forms.
Knead by hand on a lightly floured surface for about 10 minutes or in a stand mixer with a dough hook on medium for 5 minutes, adding remaining flour as needed until elastic.
Shape into a ball, place in an oiled bowl, turn to coat, cover and let rise in a warm spot for about 1 hour until doubled.
Punch down dough, shape into a 12-inch batard on a lightly floured surface, transfer to a prepared baking sheet, cover and let rise 20–30 minutes until puffy.
Make several 1/4-inch slashes across the top, bake at 400°F for 20–25 minutes until golden brown and hollow-sounding when tapped. Cool completely on a rack before slicing.
Last Step: Please leave a rating and comment letting us know how you liked this recipe! This helps our business to thrive and continue providing free, high-quality recipes for you.
Leave a comment & rating below or tag
@yumelle on social media!

Juicy chicken meatballs baked with Parmesan and herbs, spooned with marinara, and covered in melty mozzarella on toasted slider rolls. Irresistible for parties.

Twirl eerie-colored spaghetti and top it with gooey, cheese-stuffed monster meatballs complete with olive eyes for a delightfully spooky family dinner.

Silky egg ribbons swirl through savory chicken broth, scented with sesame and scallions. Simple pantry staples, ready in just 10 minutes.
Leave a comment & rating below or tag @yumelle on social media!
Enjoyed this recipe? Share it with friends and family, and don't forget to leave a review!
This recipe looks amazing! Can't wait to try it.
Comments are stored locally in your browser. Server comments are displayed alongside your local comments.

Join to receive our email series which contains a round-up of some of our quick and easy family favorite recipes.
