
Red Velvet Crinkle Cookies

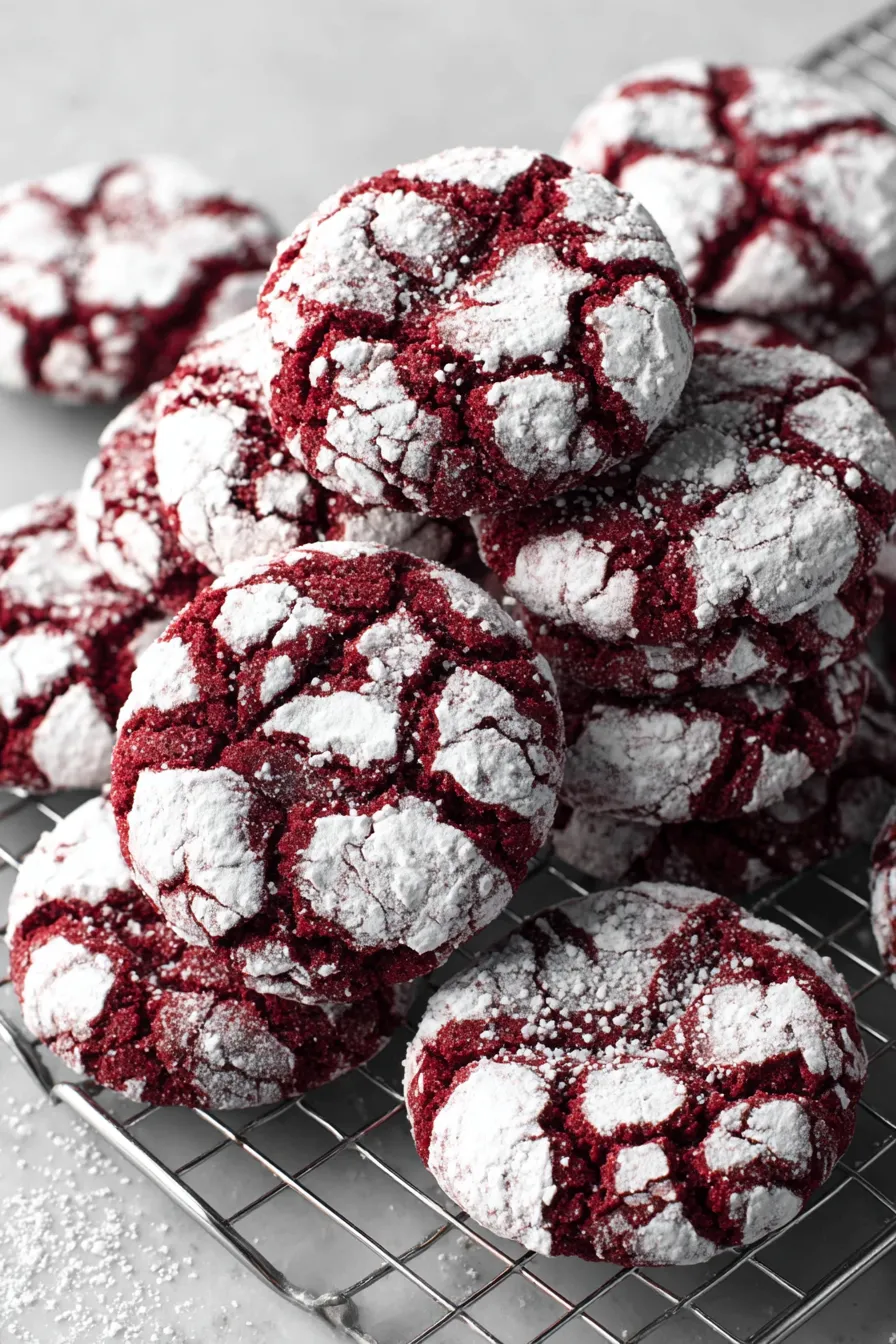
Soft, crackled red velvet cookies rolled in sparkling granulated sugar and a snowy powdered sugar coating — a festive twist on a classic favorite.
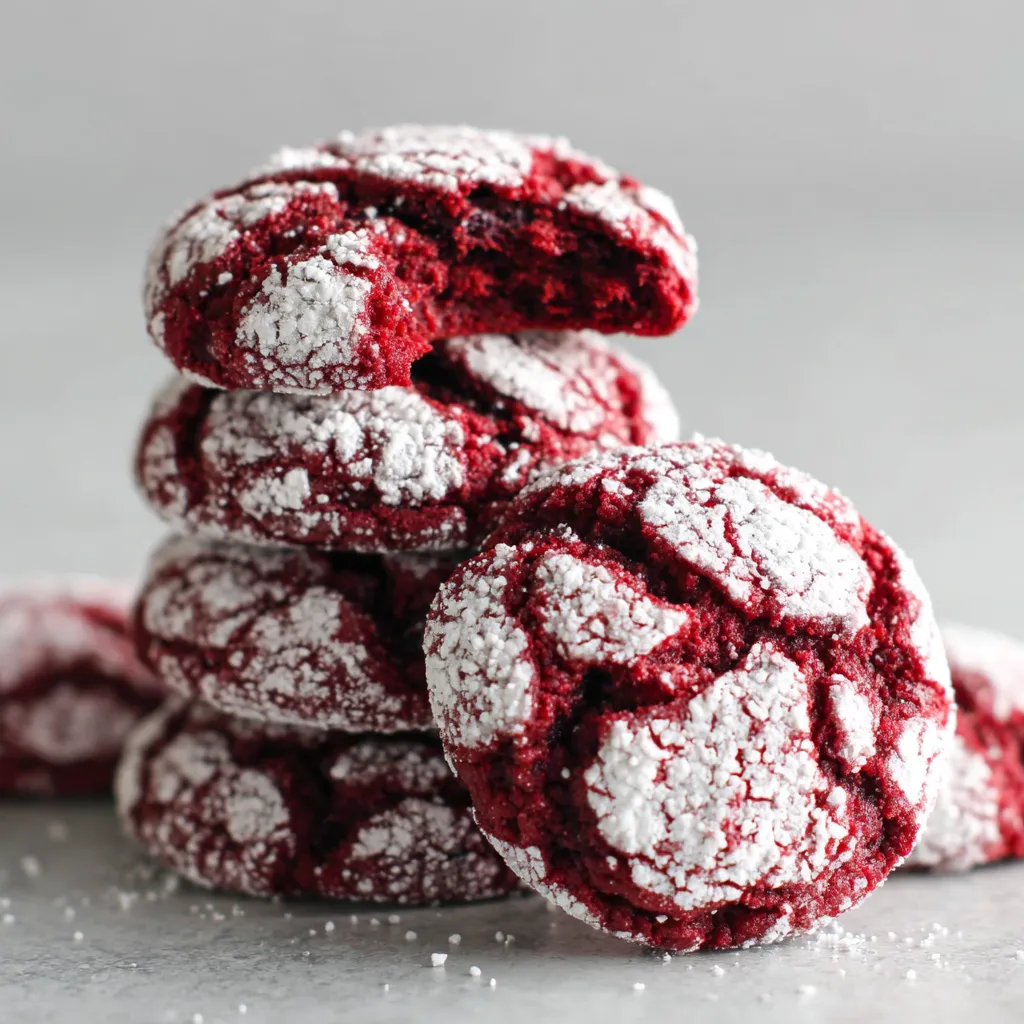
This batch of Red Velvet Crinkle Cookies began as my attempt to capture the velvet cake flavor in a handheld treat that would be perfect for holiday cookie swaps and weeknight sweet cravings. I discovered the combination during a chilly December when I wanted something that looked festive without being fussy. The cookies bake up with a tender, slightly gooey center and a crisp exterior that cracks into pretty white seams, creating the signature crinkle look that makes them impossible to resist.
What makes these particularly special is the interplay of cocoa and tang, tempered with butter for richness and a dusting of both granulated and powdered sugar for contrast. They’re quick to mix, forgiving to portion, and forgiving if you slightly overbake them — the center stays soft while the exterior crisps. They’ve shown up at cookie swaps, family potlucks, and quiet Sunday baking sessions, and in every case they disappear fastest from the platter.
Why You'll Love This Recipe
- Fast to prepare — about 20 minutes active time and a 10-minute bake makes this an easy weeknight or last-minute party project.
- Uses pantry staples: butter, sugar, flour, cocoa, and a touch of red food coloring for dramatic presentation.
- Make-ahead friendly: dough firms in the fridge and can be baked over a couple of days for fresh cookies when needed.
- Texture contrast is outstanding: a crackled, slightly crisp exterior with a soft, almost brownie-like center.
- Great for gifting — the doubled coating of granulated then powdered sugar creates a sparkling, snowy finish that looks professional.
- Kid-friendly steps: rolling and coating are perfect tasks for younger helpers to make baking social and fun.
I first made these for a neighborhood cookie exchange and watched them vanish within an hour. My partner declared them the best cookie they’d had all season, and I love how easy it is to scale the batch up or down. Over time I tweaked the sugar and bake time to achieve that soft center every time, and the method below reflects those little adjustments that make the cookies consistently successful.
Ingredients
- Unsalted butter (1/2 cup): Room-temperature butter creates an emulsion with the sugars for lift and tenderness; use a higher-fat European-style brand for a richer flavor.
- Light brown sugar (3/4 cup, packed): Adds moisture and a faint molasses note that deepens the red velvet profile; pack it into the cup for consistent sweetness.
- Granulated sugar (1/2 cup): Works with brown sugar during creaming to incorporate air and help the cookies rise and crack.
- Eggs (2 large, room temperature): Eggs help bind and add structure; bring them to room temp so the batter emulsifies smoothly.
- Vanilla extract (2 teaspoons): Balances the cocoa and enhances overall flavor; pure vanilla is worth the investment here.
- Red food coloring (1/2 teaspoon professional gel): Gel or professional paste gives more vivid color without thinning the dough; add gradually to reach the crimson shade you want.
- All-purpose flour (2 cups): The foundation of the dough — spoon into the cup and level for accurate measure.
- Cocoa powder (1/3 cup): Use unsweetened Dutch-process for a deeper color and mellow chocolate flavor, or natural cocoa if you prefer a tangier note.
- Baking powder (1 1/2 teaspoons): Provides lift to encourage the classic crackle during baking.
- Salt (1/2 teaspoon): Balances sweetness and amplifies flavor.
- For the coating — Granulated sugar (1/2 cup) and powdered sugar (1/2 cup): The two-step rolling — first in granulated then in powdered sugar — creates a sparkling outer layer that cracks into snowy folds during baking.
Instructions
Preheat and prepare:Preheat the oven to 350°F and line one or two baking sheets with parchment paper. Allow an inch of space between scooped dough balls; if you’re baking multiple trays, rotate them halfway through baking for even color and texture.Cream butter and sugars:In a large mixing bowl, cream 1/2 cup softened unsalted butter with 3/4 cup packed light brown sugar and 1/2 cup granulated sugar until light and fluffy, about 2–3 minutes with an electric mixer. Scrape down the bowl, then add eggs one at a time, beating well after each addition to maintain an emulsion. Stir in 2 teaspoons vanilla and 1/2 teaspoon professional red food coloring until the batter is uniformly colored.Combine dry ingredients:Sift together 2 cups all-purpose flour, 1/3 cup unsweetened cocoa powder, 1 1/2 teaspoons baking powder, and 1/2 teaspoon salt. Gradually add the dry mix to the wet mixture on low speed and beat just until a cohesive dough forms — avoid overmixing to keep the cookies tender.Portion and coat:Fill one shallow bowl with 1/2 cup granulated sugar and a second with 1/2 cup powdered sugar. Use a 1-ounce cookie scoop or rounded tablespoon to portion dough, roll each ball first in granulated sugar, then completely coat in powdered sugar. Place dough balls about 1 inch apart on the prepared sheet; the coated surface will crack and develop white veins as they bake.Bake and cool:Bake in the 350°F oven for about 10 minutes, watching for puffing and cracks while preserving a slightly soft center. Remove the tray and let cookies rest on the sheet for 3–4 minutes to set, then transfer to a wire rack to cool completely. Store in an airtight container once cooled.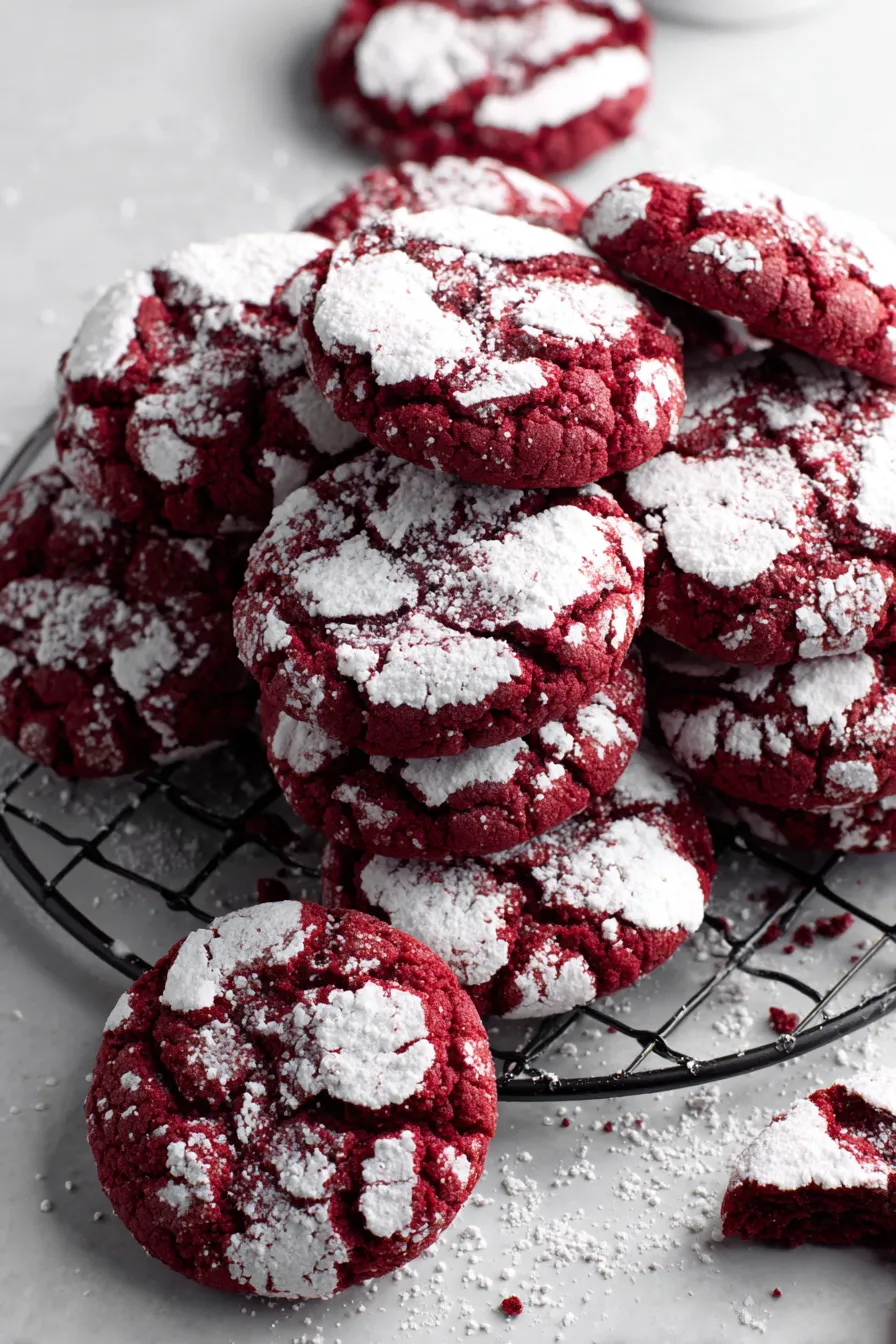
You Must Know
- These hold their texture well at room temperature for up to 3 days in an airtight container; refrigeration will dry them out, so avoid it unless necessary.
- The two-step coating (granulated then powdered sugar) is essential for dramatic crinkles and a delicate contrast between sparkle and snowy creases.
- They freeze well: freeze unbaked scoops on a tray, then transfer to a bag for up to 3 months; bake from frozen adding a minute or two to the bake time.
- Because of the butter and sugar balance, slightly underbaking by 30–60 seconds yields the best soft center while keeping a crisp exterior.
My favorite aspect is how reliably these produce beautiful cracks every time with minimal fuss — the visual payoff is enormous for very little extra work. I’ve learned that scooping uniformly and chilling briefly if dough is too soft are the two small steps that turn a decent batch into a showstopper. Family members have told me these are their favorite cookie at gatherings, and I enjoy telling them the trick is the double sugar roll, which looks fancy but is incredibly simple.
Storage Tips
To keep cookies fresh, cool completely before storing in an airtight container layered with parchment to prevent sticking. At room temperature they maintain ideal texture for about 2–3 days; after that, they begin to soften and lose crispness. For longer storage, freeze baked cookies in a single layer on a tray, then transfer to a freezer-safe container or bag for up to 3 months. To refresh slightly stale cookies, reheat in a 300°F oven for 4–6 minutes — this brings back a bit of crisp without drying the interior.
Ingredient Substitutions
If you need alternatives, swap unsalted butter for salted by reducing added salt by 1/4 teaspoon. For a dairy-free option use a firm plant-based butter stick and note the flavor will be slightly different. To make them gluten-free, replace the all-purpose flour with a 1:1 gluten-free baking blend that contains xanthan gum; expect a slightly denser crumb. If you prefer less sugar on the outside, omit the granulated sugar roll and only use powdered sugar, though the crackle effect will be less dramatic. For color without artificial dye, try a natural beet powder but reduce overall liquid slightly if it adds moisture.
Serving Suggestions
These cookies pair beautifully with a cold glass of milk or a cup of strong coffee; the cocoa and butter harmonize with both. For a festive platter, arrange with white chocolate-dipped pretzels, nutty biscotti, or tangy lemon bars to provide contrast. Garnish individual servings with a light dusting of extra powdered sugar or a tiny edible gold leaf for special occasions. They also work well as a topping for scoops of vanilla ice cream — gently crumble warm cookies over chilled ice cream for a delightful texture contrast.
Cultural Background
Red velvet has roots in Southern American baking traditions where the contrasting color and cocoa flavor became popular in layer cakes and cupcakes. The distinctive scarlet hue was often achieved historically with reaction between natural cocoa and acidic ingredients; modern recipes use dye to ensure vibrancy. Translating that flavor profile into a small, crinkled cookie brings together the cake’s tender crumb and the crinkle cookie’s rustic charm — a modern nod to a classic Southern dessert tradition.
Seasonal Adaptations
These are perfect for winter holidays when red is celebratory, but they adapt well for other seasons. In spring, swap powdered sugar for a light citrus glaze and scatter freeze-dried raspberry pieces. For autumn, add 1/4 teaspoon cinnamon and switch to a brown butter for a nuttier depth. For Valentine’s Day, sandwich two cookies together with a cream cheese frosting or Swiss meringue buttercream for an elegant treat.
Meal Prep Tips
Portion dough into 1-ounce balls and freeze them on a tray until firm; then transfer scooped dough to a labeled freezer bag. From frozen, roll in sugars and bake directly from the freezer — add 1–2 minutes to the bake time. This makes quick fresh-baked cookies for guests without last-minute mixing. For organized gifting, bake and cool completely, then stack in cellophane bags with parchment between layers to keep the coating intact.
These crinkle cookies are easy to personalize and rewarding to share; the combination of dramatic color, tender interior, and snowy crackle always earns compliments. Try the recipe once and you’ll find the small techniques here become your go-to for reliable, beautiful cookies.
Pro Tips
Chill the dough briefly if it becomes too soft to handle — about 10–15 minutes in the fridge.
Use a 1-ounce scoop for uniform cookies that bake evenly and crack consistently.
Roll first in granulated sugar, then powdered sugar to achieve the best crackle and snowy appearance.
Let cookies rest on the baking sheet for a few minutes before transferring to a rack to finish setting.
This nourishing red velvet crinkle cookies recipe is sure to be a staple in your kitchen. Enjoy every moist, high protein slice — it is perfect for breakfast or as a wholesome snack any time.
FAQs about Recipes
Can I freeze the dough?
Yes — portion the dough with a scoop and freeze the balls on a tray until firm, then transfer to a bag. Bake from frozen, adding 1–2 minutes to the bake time.
How long do they keep?
Store in an airtight container at room temperature for up to 3 days. For longer storage, freeze baked cookies for up to 3 months.
Tags
Red Velvet Crinkle Cookies
This Red Velvet Crinkle Cookies recipe makes perfectly juicy, tender, and flavorful steak every time! Serve with potatoes and a side salad for an unforgettable dinner in under 30 minutes.
Ingredients
Dough
Coating
Instructions
Preheat and prepare
Preheat oven to 350°F and line baking sheets with parchment paper. Allow an inch of space between cookies. Rotate trays halfway through baking if using multiple racks for even color.
Cream butter and sugars
Cream 1/2 cup softened butter with 3/4 cup packed light brown sugar and 1/2 cup granulated sugar until fluffy (2–3 minutes). Scrape bowl, add eggs one at a time, then vanilla and red food coloring until evenly combined.
Combine dry ingredients
Sift together 2 cups flour, 1/3 cup cocoa powder, 1 1/2 teaspoons baking powder, and 1/2 teaspoon salt. Add to wet mixture on low speed and mix until just combined to avoid tough cookies.
Scoop and coat
Use a 1-ounce scoop or tablespoon to portion dough. Roll each ball in granulated sugar, then in powdered sugar until fully coated. Place on prepared sheet about 1 inch apart.
Bake and cool
Bake at 350°F for about 10 minutes until puffed and cracked but still slightly soft in the center. Let cool on the sheet for 3–4 minutes before transferring to a wire rack to cool completely.
Last Step: Please leave a rating and comment letting us know how you liked this recipe! This helps our business to thrive and continue providing free, high-quality recipes for you.
Nutrition
Did You Make This?
Leave a comment & rating below or tag
@yumelle on social media!
Categories:
You might also like...

Chicken Parmesan Meatball Sliders
Juicy chicken meatballs baked with Parmesan and herbs, spooned with marinara, and covered in melty mozzarella on toasted slider rolls. Irresistible for parties.

Spooky Spaghetti Monster Meatballs
Twirl eerie-colored spaghetti and top it with gooey, cheese-stuffed monster meatballs complete with olive eyes for a delightfully spooky family dinner.

10-Minute Egg Drop Soup
Silky egg ribbons swirl through savory chicken broth, scented with sesame and scallions. Simple pantry staples, ready in just 10 minutes.
Did You Make This?
Leave a comment & rating below or tag @yumelle on social media!
Rate This Recipe
Share This Recipe
Enjoyed this recipe? Share it with friends and family, and don't forget to leave a review!
Comments (1)
This recipe looks amazing! Can't wait to try it.
Comments are stored locally in your browser. Server comments are displayed alongside your local comments.

Hi, I'm Hannah!
What's Popular

30-Minute Meals!
Join to receive our email series which contains a round-up of some of our quick and easy family favorite recipes.