
>>

A playful strawberry-filled 9-inch pie finished with a glossy vanilla glaze and rainbow sanding sugar, inspired by the nostalgia of pop tarts and the comfort of homemade fruit pie.
This Pop Tart Pie is the kind of dessert that turns a regular afternoon into a celebration. I first landed on this combination during a long weekend when I wanted something fun and familiar for a family brunch. The idea was to take the bright, jammy strawberry filling we love in summer tarts and encase it in a fully sealed, glazed top crust that echoes the childhood comfort of a frosted pop tart. The result is a pie that slices like a classic fruit pie but wears its candy-coated heart on top.
What makes this version special is the contrast between the glossy, slightly jammy filling and the crisp, golden refrigerated crust. I like using Pillsbury refrigerated pie crusts for the convenience and the reliably flaky edges they produce. Cooking the strawberries gently with sugar and a cornstarch slurry yields a filling that sets up firm enough to slice without puddling, while the white glaze and rainbow sanding sugar give it that unmistakable pop tart charm. Every time I bring this to a get-together, people smile at the familiar look and then quiet down to savor the fresh strawberry flavor.
Personally, my kids called this the 'grown-up pop tart' the first time I served it. It has become a requested contribution at potlucks, where the frosting and sprinkles always start a conversation. I love that the filling is unmistakably fresh strawberry instead of a heavy, canned jam, and that balance of freshness and playfulness keeps people coming back for seconds.
My favorite part of making this is the anticipation while it cools; family members will hover near the counter hoping for the first slice. The first time I made this for a summer picnic, everyone loved that it looked playful but tasted like a true, bright strawberry pie. It has quickly replaced jarred jam fillings in my rotation because fresh fruit simply sings through when cooked correctly.
To keep the glaze glossy and the crust crisp, cool the baked pie completely before glazing. Once glazed, let the glaze set uncovered for 30 to 60 minutes, then cover loosely with foil. Store at room temperature for up to one day, or refrigerate in an airtight container for up to three days. For longer storage, freeze the pie unglazed and wrapped tightly in plastic wrap and foil for up to three months; thaw overnight in the refrigerator and bring to room temperature before glazing. Reheat slices for 8 to 10 seconds in a microwave or 5 minutes at 325°F in the oven for a warm slice with restored flakiness.
Swap strawberries for raspberries or a berry blend to introduce different acidity and color; reduce cornstarch to 3 tablespoons if using raspberries because their seeds can create more texture. For a gluten-free version, use a store-bought gluten-free pie crust, and confirm cornstarch is certified gluten-free. If you prefer less sugar, substitute half the granulated sugar with a natural sweetener like coconut sugar and taste as you cook. For a dairy-free glaze, use full-fat coconut milk in place of whole milk; the glaze will have a subtle coconut note but remain glossy.
Serve slices slightly chilled or at room temperature with a scoop of vanilla ice cream or a dollop of softly whipped cream for contrast. Garnish with fresh strawberry slices or mint leaves for a polished presentation. This dessert pairs beautifully with light coffee drinks, a bright herbal tea, or a sparkling rosé for warm-weather gatherings. For a brunch menu, slice into smaller squares and present on a dessert board with other breakfast pastries and fresh fruit for a playful morning spread.
The Pop Tart Pie blends two beloved American traditions: the convenience pastry and the classic fruit pie. Pop tarts, introduced in the late 1960s, became a nostalgic pantry staple, while fruit pies date back centuries as a way to showcase seasonal fruit. This hybrid pays homage to both by combining sealed, glazed top crusts with the open, fruit-forward nature of traditional pies. Regional variations across the United States often use local fruit and decorative glazes, which is why this version with fresh strawberries resonates widely in summer and spring celebrations.
In summer, use the ripest strawberries you can find and reduce sugar slightly to let the fruit shine. In fall, switch to apples or pears with added cinnamon and a touch of nutmeg and swap the sanding sugar for coarse sugar crystals. For winter holidays, use cranberry-orange filling with orange zest in the glaze and top with chopped pistachios instead of rainbow sprinkles. Adjust cornstarch slightly depending on fruit water content to maintain the same slicing texture.
Prepare the filling in advance and keep it refrigerated for up to 48 hours; rewarm gently before filling the crust. You can blind bake the bottom crust for 8 minutes to create extra protection against soaking if you plan to serve the pie the same day. Assemble the pie up to the point of glazing and refrigerate overnight, then glaze just before serving to preserve the brightest finish. For single-serve options, assemble in a muffin tin using small rounds of crust and bake 18 to 22 minutes.
This pie brings together nostalgia and fresh fruit in a way that is approachable yet memorable. Whether you make it for a casual family brunch or a festive gathering, the bright filling, crisp crust, and playful glaze will make people smile and ask for your secret. Enjoy making it your own and share the joy around the table.
Cook the strawberries until they reach a rapid simmer before adding the slurry to help the cornstarch activate quickly and avoid a raw starch taste.
Allow the pie to cool completely for at least 5 to 6 hours before glazing to ensure the filling sets and the glaze adheres without running.
Use a rimmed baking sheet under the pie to catch any bubbling filling and make transferring to and from the oven safer.
Sift powdered sugar before whisking into milk to prevent gritty glaze and to achieve a smooth finish.
This nourishing pop tart pie recipe is sure to be a staple in your kitchen. Enjoy every moist, high protein slice — it is perfect for breakfast or as a wholesome snack any time.
This Pop Tart Pie recipe makes perfectly juicy, tender, and flavorful steak every time! Serve with potatoes and a side salad for an unforgettable dinner in under 30 minutes.
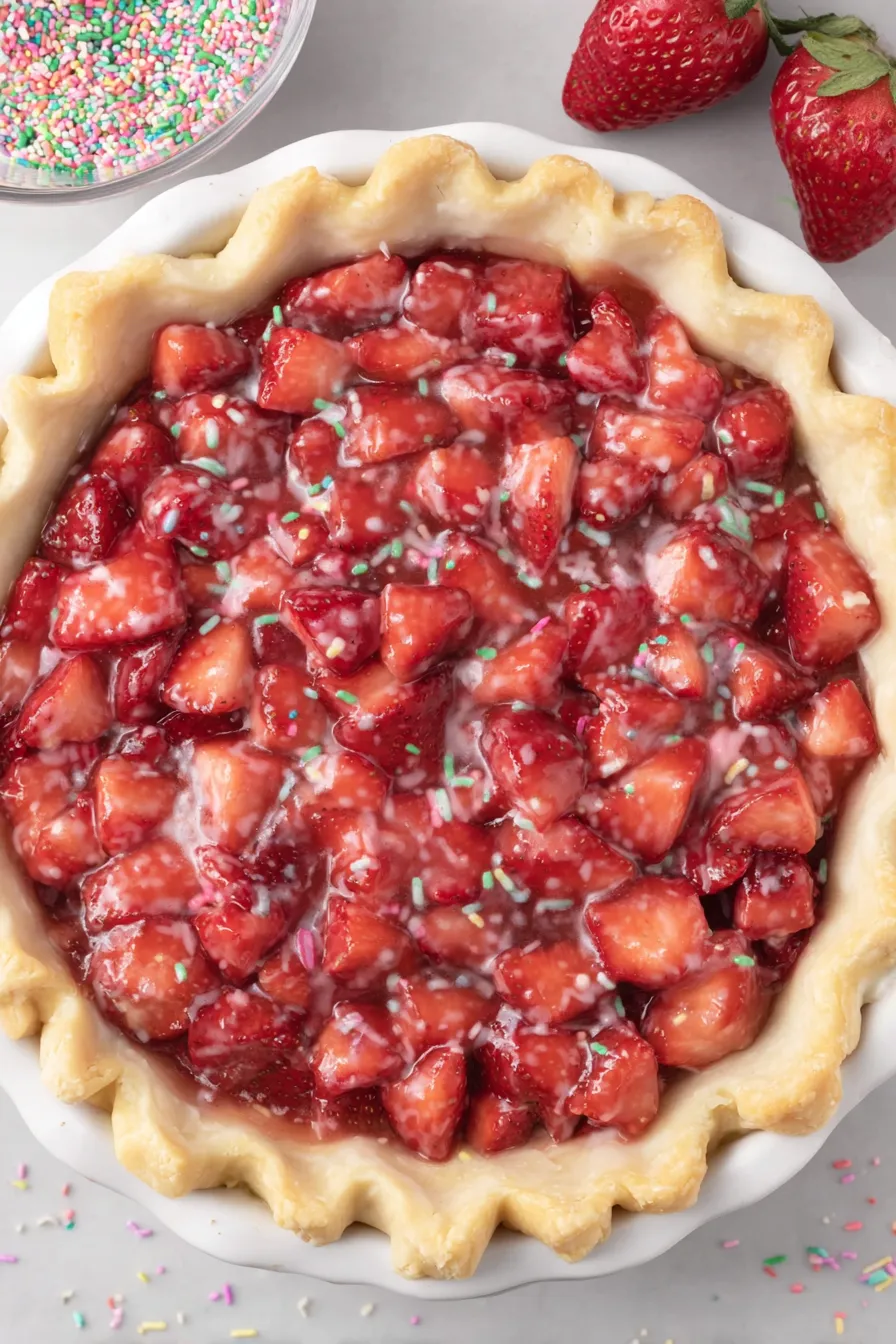
In a 4-quart saucepan over medium heat, combine diced strawberries and granulated sugar. Cook for 10 to 12 minutes, stirring frequently, until juices are released and the mixture reaches a rapid boil. Monitor to prevent burning or boiling over.
Whisk cornstarch into fresh lemon juice in a small bowl until smooth and no lumps remain. This will thicken the filling when incorporated into the hot fruit.
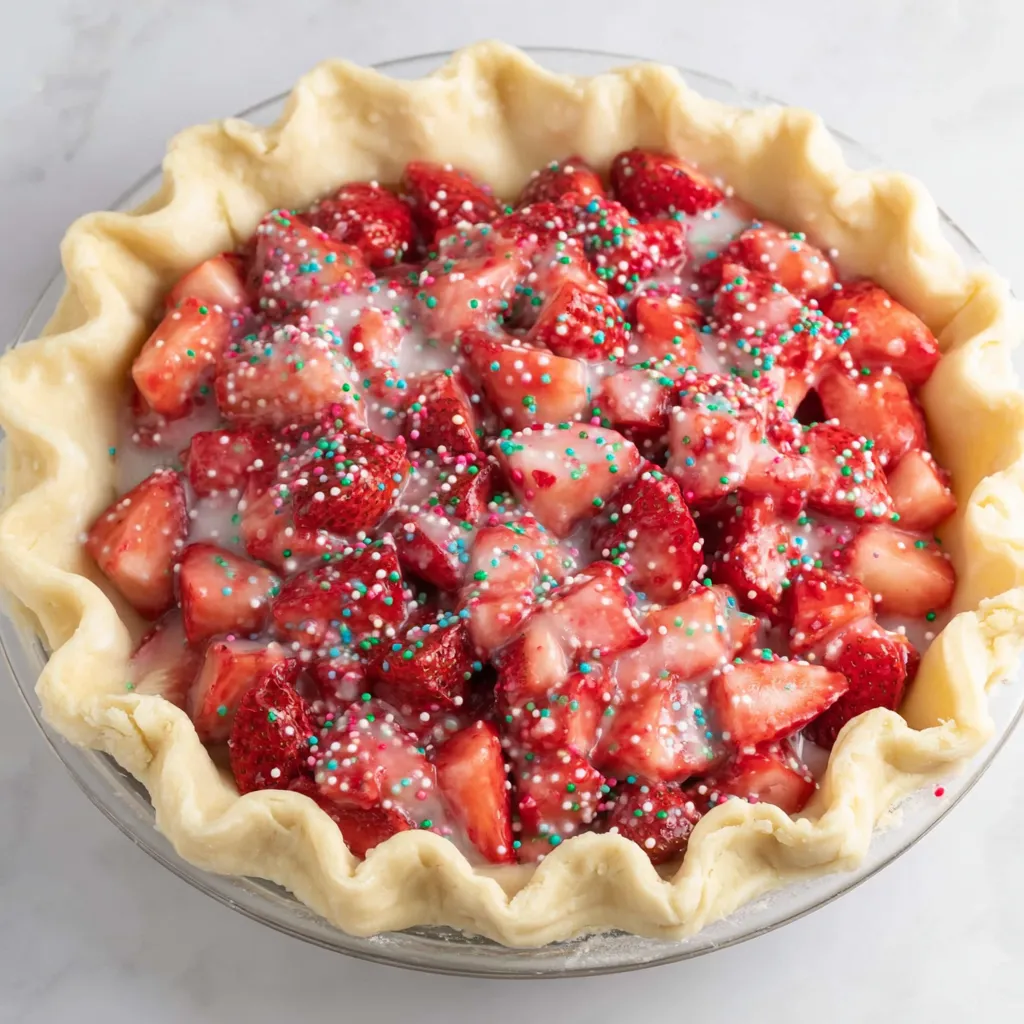
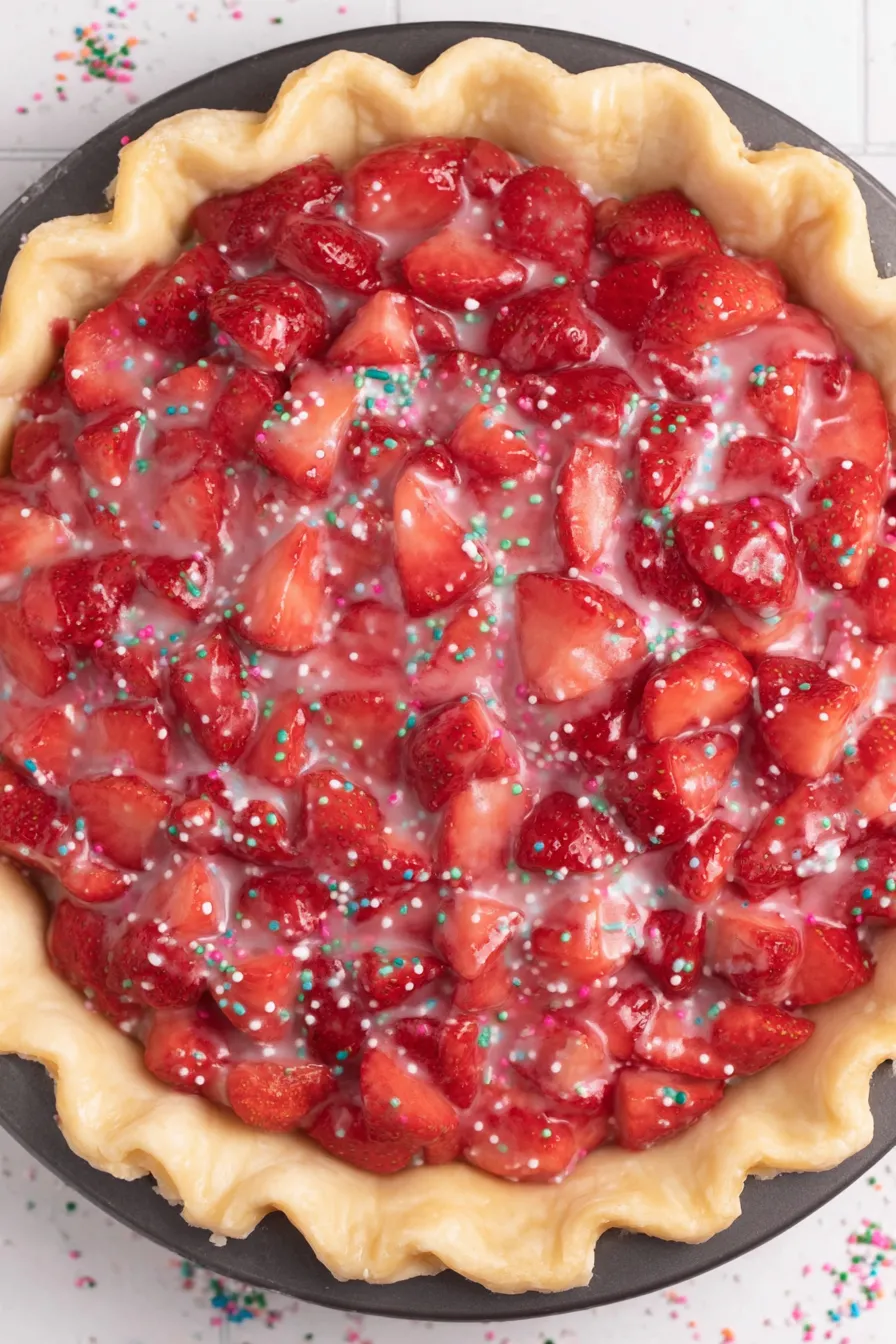
Slowly whisk the slurry into the boiling strawberries while stirring constantly. Cook 1 to 2 minutes until the filling becomes thick and glossy. Remove from heat, stir in vanilla, and transfer to a shallow bowl to cool for about 30 minutes until warm.
Adjust oven racks to the lower two-thirds and preheat to 375°F. Place a 9-inch pie dish on a rimmed baking sheet. Unroll one thawed crust into the dish and press into the sides.
Whisk the egg and brush the bottom and sides of the crust lightly. Pour the warm strawberry filling into the crust and top with the second crust. Trim edges and crimp with a fork to seal. Cut four 1-inch slits for steam vents.
Bake for 40 to 45 minutes until golden brown. Remove from oven and baking sheet and cool completely for a minimum of 5 to 6 hours at room temperature before glazing.
Whisk sifted powdered sugar with 2 tablespoons whole milk and vanilla. Add more milk 1 teaspoon at a time if needed for a thick spreadable consistency. Spoon and spread glaze across the cooled pie, sprinkle sanding sugar, and allow to set for at least 30 minutes before slicing.
Last Step: Please leave a rating and comment letting us know how you liked this recipe! This helps our business to thrive and continue providing free, high-quality recipes for you.
Leave a comment & rating below or tag
@yumelle on social media!

Juicy chicken meatballs baked with Parmesan and herbs, spooned with marinara, and covered in melty mozzarella on toasted slider rolls. Irresistible for parties.

Twirl eerie-colored spaghetti and top it with gooey, cheese-stuffed monster meatballs complete with olive eyes for a delightfully spooky family dinner.

Silky egg ribbons swirl through savory chicken broth, scented with sesame and scallions. Simple pantry staples, ready in just 10 minutes.
Leave a comment & rating below or tag @yumelle on social media!
Enjoyed this recipe? Share it with friends and family, and don't forget to leave a review!
This recipe looks amazing! Can't wait to try it.
Comments are stored locally in your browser. Server comments are displayed alongside your local comments.

Join to receive our email series which contains a round-up of some of our quick and easy family favorite recipes.
