
>>

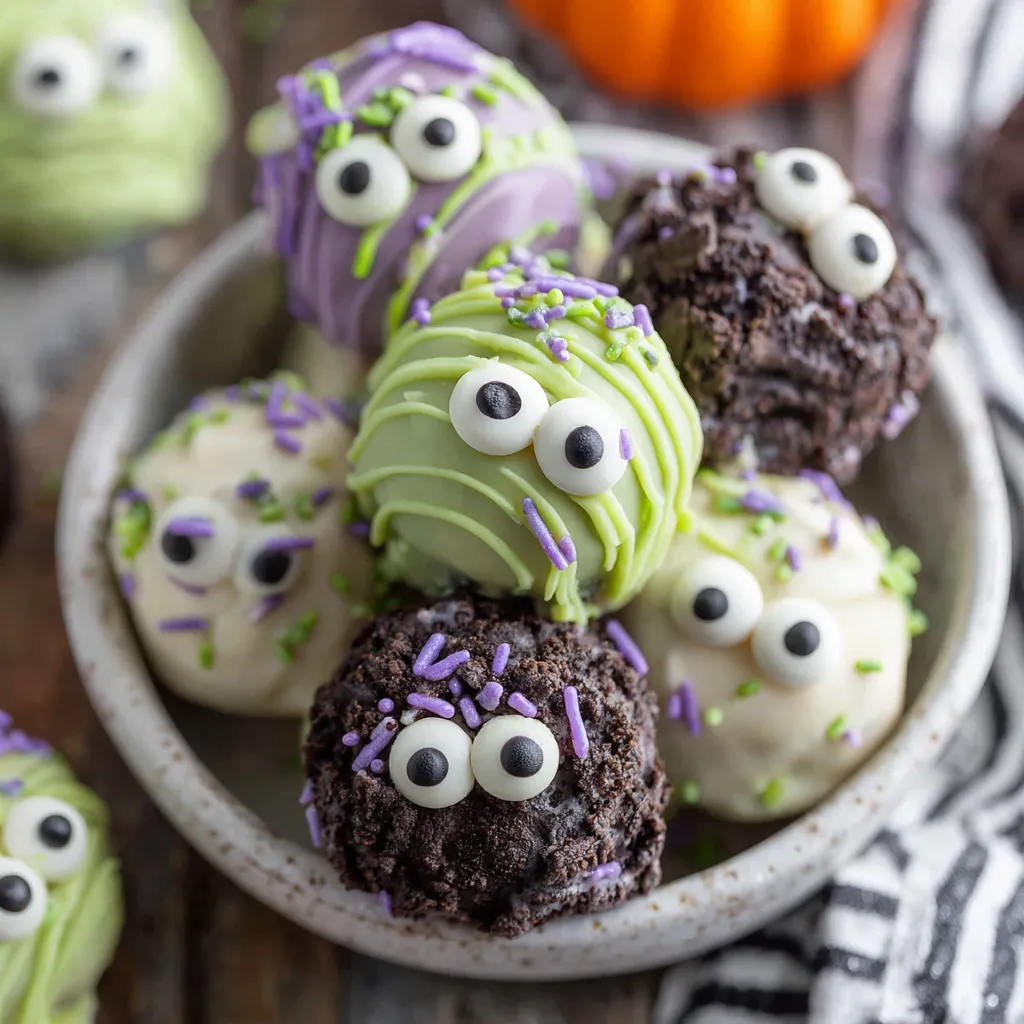
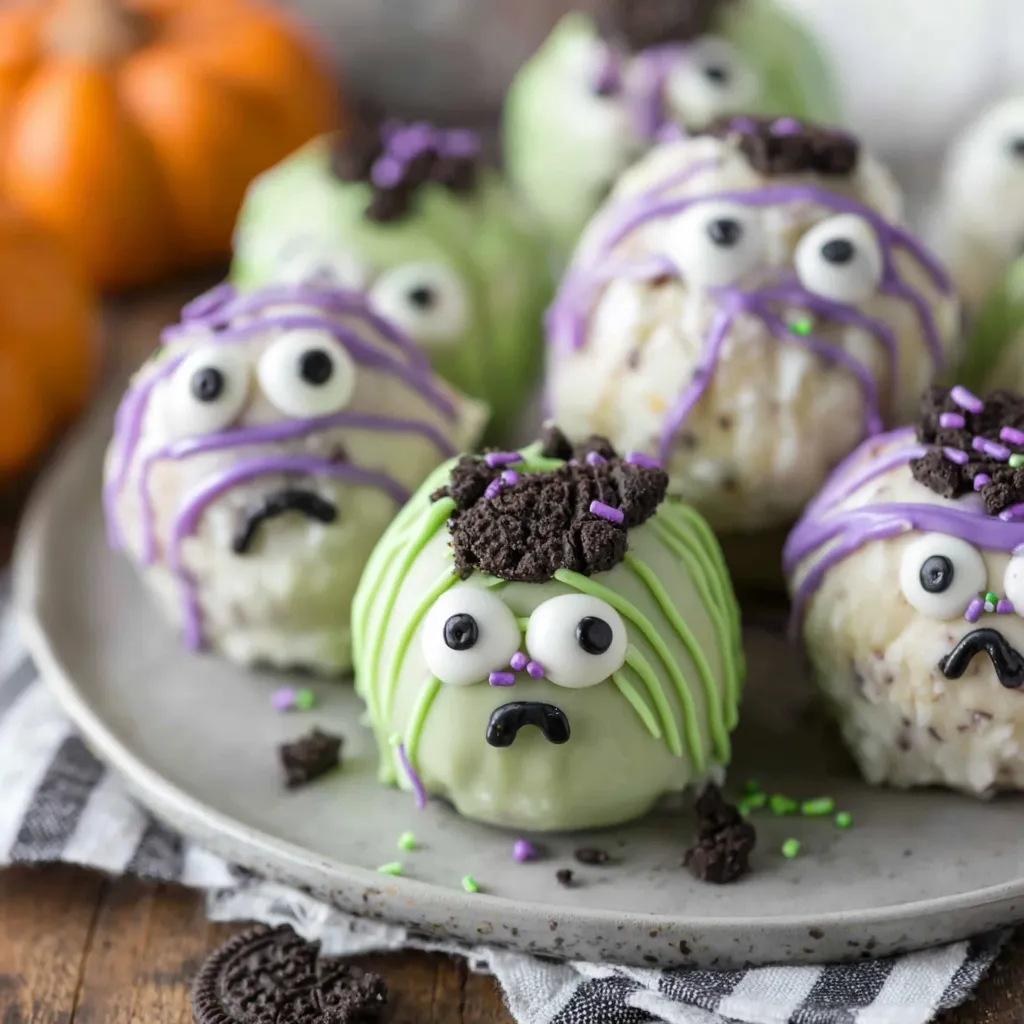
Cute and spooky no-bake Oreo truffles coated in colored white chocolate, decorated with candy eyes and sprinkles—an easy Halloween treat the whole family will love.
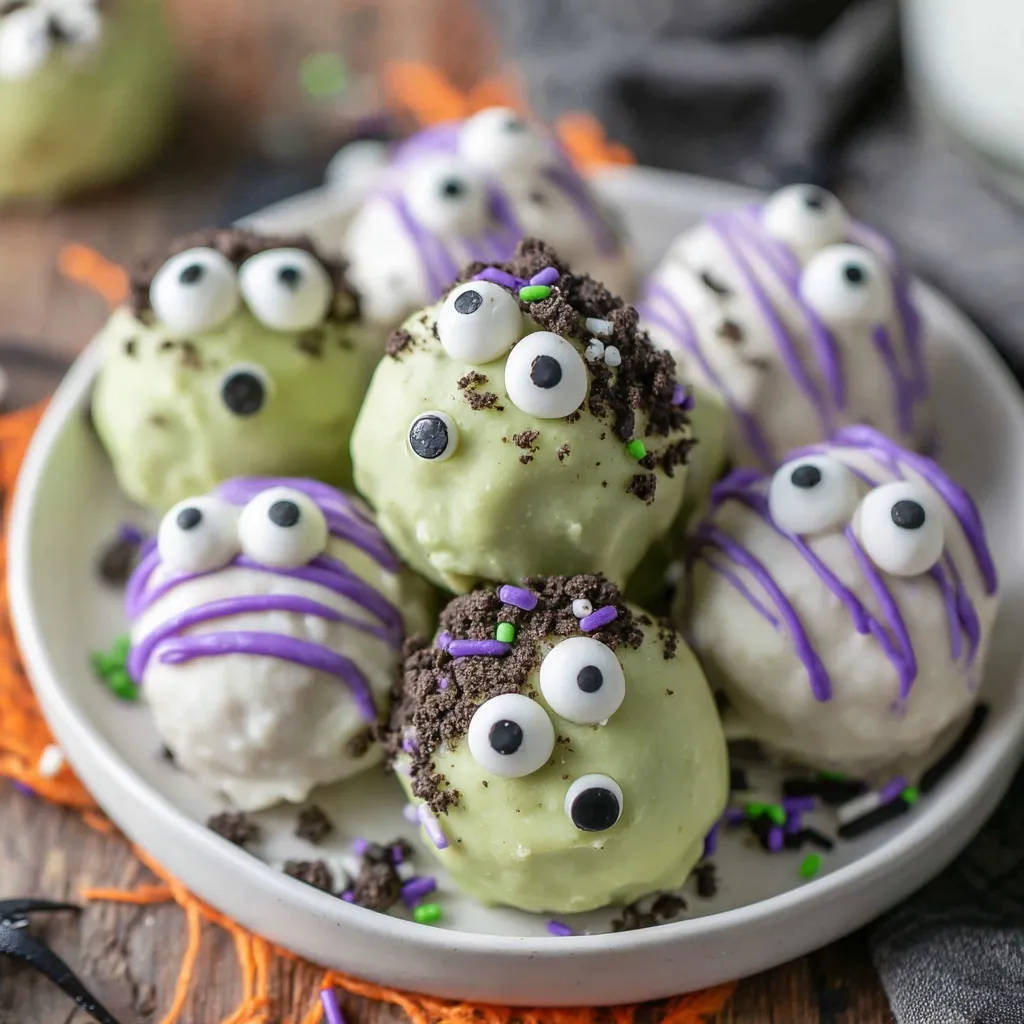
This batch of No Bake Monster Truffles has become my go-to for every Halloween gathering. I first made these the year my niece insisted on a monster-themed party and refused anything that remotely resembled a plain cookie. The transformation of simple sandwich cookies into colorful, eye-studded little monsters felt almost magical. The texture is addictive: a creamy, fudgy center wrapped in a crisp white chocolate shell that gives a delightful contrast with every bite. They are playful, forgiving, and perfect for making with kids—each truffle becomes a tiny creative project.
I discovered this combination while trying to use up a stash of vanilla sandwich cookies and a bag of white melting wafers. The result was so much more than I expected. The sweet center, thanks to the cream cheese binder, stays tender and slightly tangy while the white coating adds a sweet snap. Decorating with food coloring gel and candy eyes turns them into party-ready bites without complicated tempering or baking. These truffles reliably charm both picky eaters and seasoned bakers because they are easy, fast, and very customizable.
When I first brought them to a potluck, they disappeared within minutes. Guests loved the moist center and the crunchy coating; several people guessed there was a hidden layer inside. My favorite memory is making a double batch with my niece and watching her carefully place three eyes on one truffle because, in her words, "monsters should be dramatic."
My favorite aspect is how forgiving the process is. The centers remain creamy and the coating hides imperfect shapes, so even first-time makers come away with pretty results. I once pre-assembled 48 balls for a school fundraiser and froze half; on event day I dipped both batches and they looked identical. The ease of scaling up is a big advantage when preparing for large groups.
Store completed truffles in a single layer in an airtight container lined with parchment to prevent sticking. Refrigerate for up to 7 days for best texture, or layer with wax paper and freeze for up to 3 months. To serve from frozen, transfer to the refrigerator for several hours or overnight to avoid condensation on the coating. If the coating becomes soft after refrigeration, allow them to sit at room temperature for 10 minutes before serving to restore a pleasant snap.
If you need to adapt ingredients, swap standard sandwich cookies for gluten-free sandwich cookies to make this gluten-free. Replace cream cheese with a dairy-free cream cheese to create a lactose-free option, though texture will be slightly different. For the coating, use dark or milk chocolate melting wafers instead of white chocolate for a deeper flavor; omit gel if you prefer natural chocolate hues. You can also add 1/2 teaspoon vanilla extract to the center for aromatic depth.
Arrange the truffles on a festive platter with small paper cups to prevent sticking and to keep flavors separate. They pair well with hot apple cider, dark roast coffee, or a creamy milkshake. For a party, create a candy bar where guests can pick different colored coatings and sprinkles. Garnish with crushed cookie crumbs or edible glitter for a grown-up twist.
These truffles are a variation on the classic cookie-and-cream ball that has become popular in home baking for decades. Similar treats appear in many cultures as an easy way to transform biscuits into rich confections without baking. The modern trend of decorating such bites for holidays—especially using candy eyes for Halloween—blends traditional confection techniques with playful seasonal aesthetics. The simplicity and adaptability have made them a staple at bake sales and holiday gatherings worldwide.
Change colors and toppings to match the season: use orange and black for Halloween, red and green for the holidays, or pastel colors for spring celebrations. Swap sprinkles to match events—gold and silver for New Year’s, or themed confetti for birthdays. Adding a pinch of pumpkin spice to the center or a dash of peppermint extract to the coating instantly seasonalizes the flavor profile.
Prepare the centers and freeze them on the baking sheet for an hour. Transfer frozen centers to a sealed bag and store in the freezer; when you are ready to serve, dip and decorate directly from frozen. This workflow speeds up assembly on the day of an event. Use labeled containers and divide into serving portions so guests can grab pre-portioned treats with minimal handling.
These No Bake Monster Truffles are the kind of recipe that invites creativity and sharing. Whether made for kids or the kid in all of us, they bring a little theatrical charm to dessert time—easy to make, easy to scale, and always a crowd pleaser. Have fun with colors and eyes, and make them your own.
Soften cream cheese to room temperature for a smooth center; cold cream cheese leads to lumps and uneven texture.
Chill the formed balls well before dipping to reduce cracking and ensure an even chocolate shell.
Work in small batches when dipping to keep the coating warm and fluid for a glossy finish.
Use gel food coloring to tint white chocolate; liquid colors can cause the chocolate to seize.
To reheat hardened chocolate slightly, microwave in 10 second bursts and stir thoroughly between bursts.
This nourishing no bake monster truffles (halloween oreo balls) recipe is sure to be a staple in your kitchen. Enjoy every moist, high protein slice — it is perfect for breakfast or as a wholesome snack any time.
Yes. Place finished truffles in an airtight container and refrigerate for up to 7 days. For longer storage, freeze up to 3 months and thaw in the refrigerator before serving.
Use gel-based food coloring for best results; liquid color can seize or thin the chocolate. Add small amounts until you reach the desired shade.
This No Bake Monster Truffles (Halloween Oreo Balls) recipe makes perfectly juicy, tender, and flavorful steak every time! Serve with potatoes and a side salad for an unforgettable dinner in under 30 minutes.
Line a baking sheet with parchment. Process 24 Oreo cookies in a food processor until they become fine crumbs. If you lack a processor, place cookies in a heavy bag and crush with a rolling pin until fine.
Add 4 ounces softened cream cheese to the crumbs and pulse until fully combined into a pliable dough. Scrape the bowl and pulse again to ensure even texture.
Scoop the mixture into 2-tablespoon portions or use a small ice cream scoop. Roll into balls, place on the prepared sheet, and freeze for 20 minutes until firm.
Melt 12 ounces white melting chocolate in 30 second intervals, stirring between each, until smooth. Tint with 3 to 4 drops of green gel color and stir to combine.
Dip chilled balls into the green chocolate using a fork, tapping off excess. Return to the parchment-lined sheet. If chocolate thickens, reheat in short bursts and stir.
Melt the remaining 4 ounces white chocolate, tint purple, and drizzle over the coated truffles. Add candy eyes while coating is tacky and sprinkle with Halloween decorations. Let set before serving.
Last Step: Please leave a rating and comment letting us know how you liked this recipe! This helps our business to thrive and continue providing free, high-quality recipes for you.
Leave a comment & rating below or tag
@yumelle on social media!

Juicy chicken meatballs baked with Parmesan and herbs, spooned with marinara, and covered in melty mozzarella on toasted slider rolls. Irresistible for parties.

Twirl eerie-colored spaghetti and top it with gooey, cheese-stuffed monster meatballs complete with olive eyes for a delightfully spooky family dinner.

Silky egg ribbons swirl through savory chicken broth, scented with sesame and scallions. Simple pantry staples, ready in just 10 minutes.
Leave a comment & rating below or tag @yumelle on social media!
Enjoyed this recipe? Share it with friends and family, and don't forget to leave a review!
This recipe looks amazing! Can't wait to try it.
Comments are stored locally in your browser. Server comments are displayed alongside your local comments.

Join to receive our email series which contains a round-up of some of our quick and easy family favorite recipes.
