
>>

Creamy peanut butter cheesecake with an Oreo crust, topped with chocolate-peanut butter ganache and cocoa whipped cream—perfect for parties or an indulgent treat.
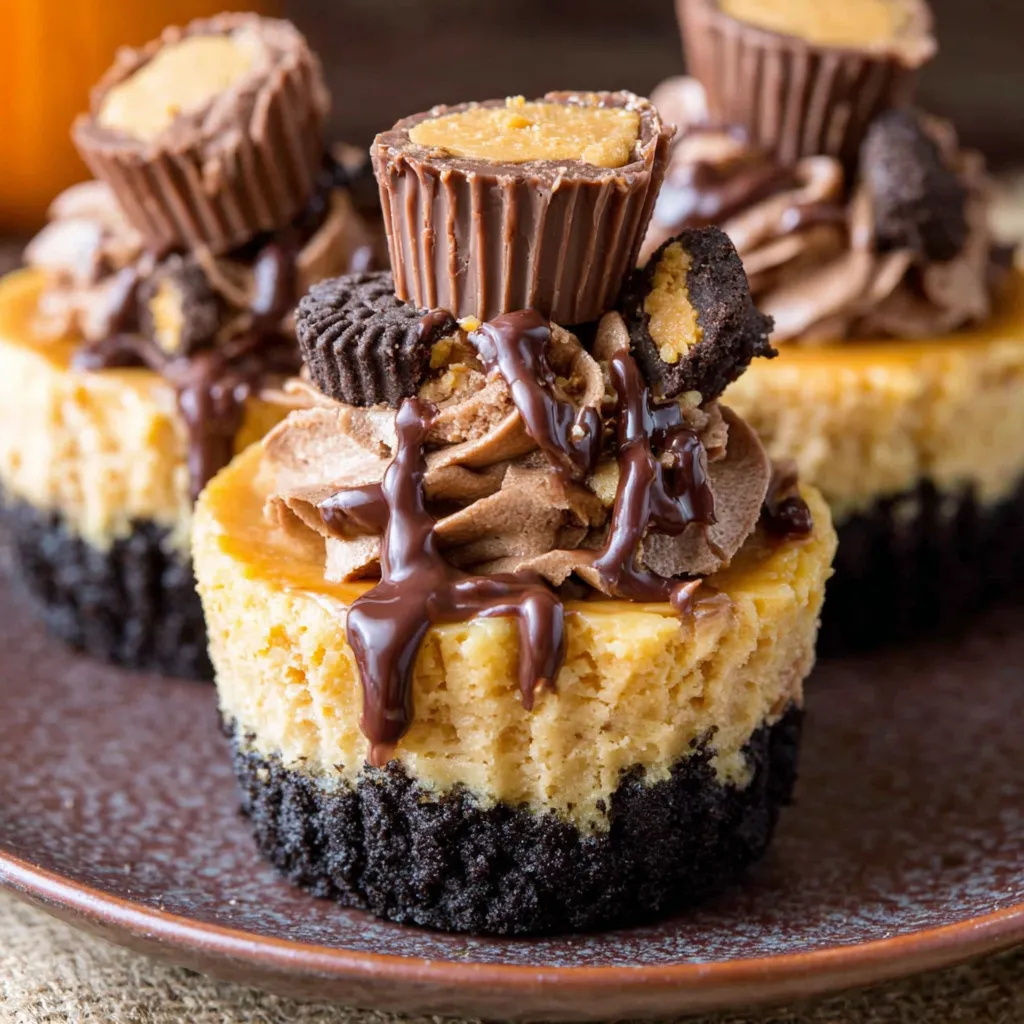
This recipe is my go-to when I want something over-the-top but portable: mini Reese's peanut butter cheesecakes that are rich, creamy, and perfectly portioned. I first developed this version on a rainy weekend when I had a jar of creamy peanut butter, a stack of Oreos, and a handful of mini Reese's cups leftover from Halloween. The result was so addictive that neighbors stopped by unannounced and left with empty plates and requests for the recipe. The balance of a chocolate cookie base, silky peanut butter cheesecake, glossy ganache, and a light chocolate whipped cream makes each bite layered and satisfying.
What makes these special is the texture contrast and the crowd-pleasing nostalgia. The Oreo crumb crust gives a crisp anchor, the filling is dense yet not heavy because of a touch of cornstarch and sour cream, and the little bursts of chopped mini Reese's inside offer peanut-chocolate pockets. I love making a batch the night before gatherings: chilling overnight develops flavor and makes assembly simple the next day. These mini cheesecakes travel well and are a favorite for birthday trays, potlucks, and holiday cookie tables.
My family reaction is always the same: a hush, a second helping, and instant requests to double the batch next time. I discovered that folding chopped mini Reese's into the batter creates pockets of melty candy that everyone raves about. Little details like chilling the batter in the pan and using room-temperature dairy create that perfect velvety texture that makes these stand out.
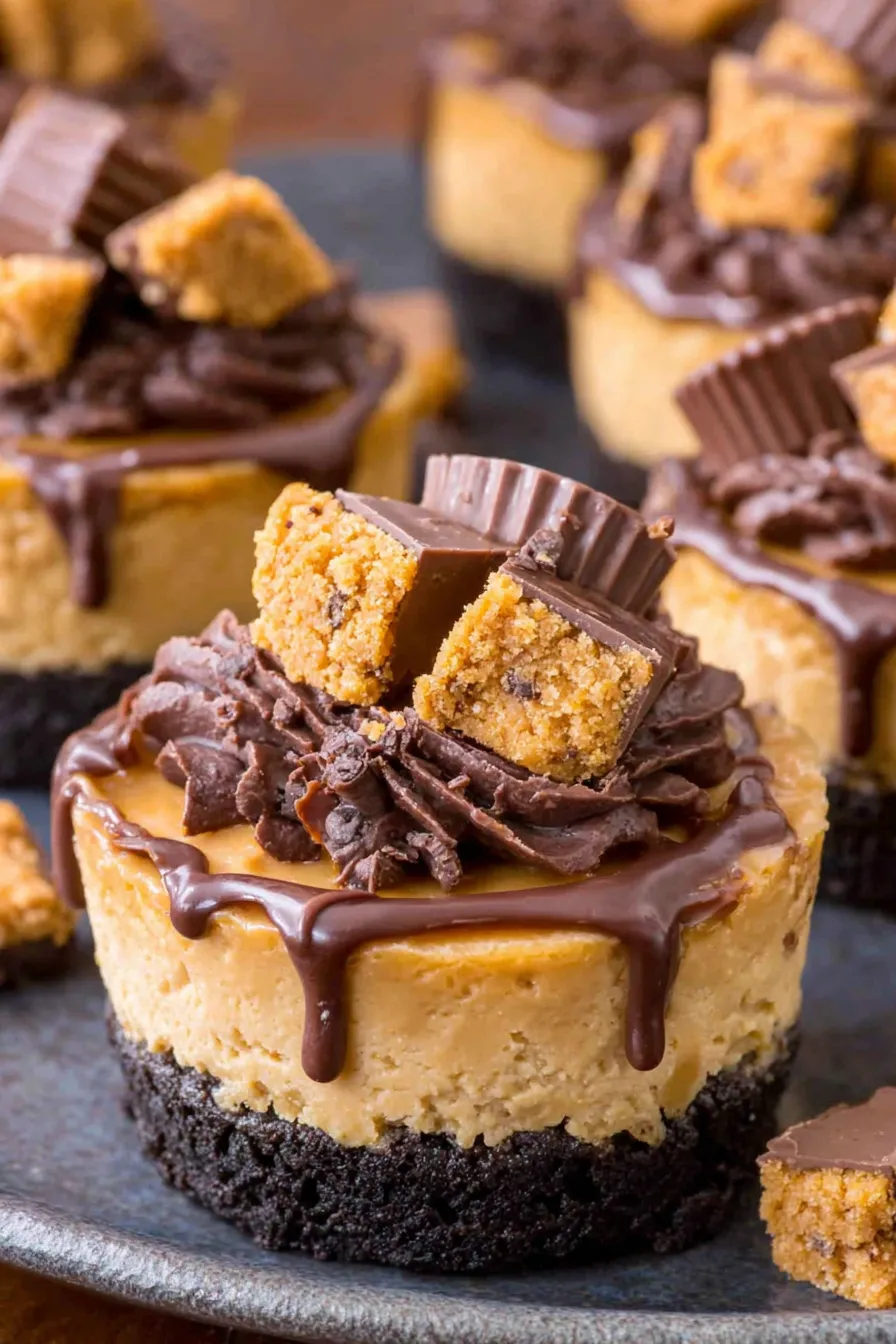
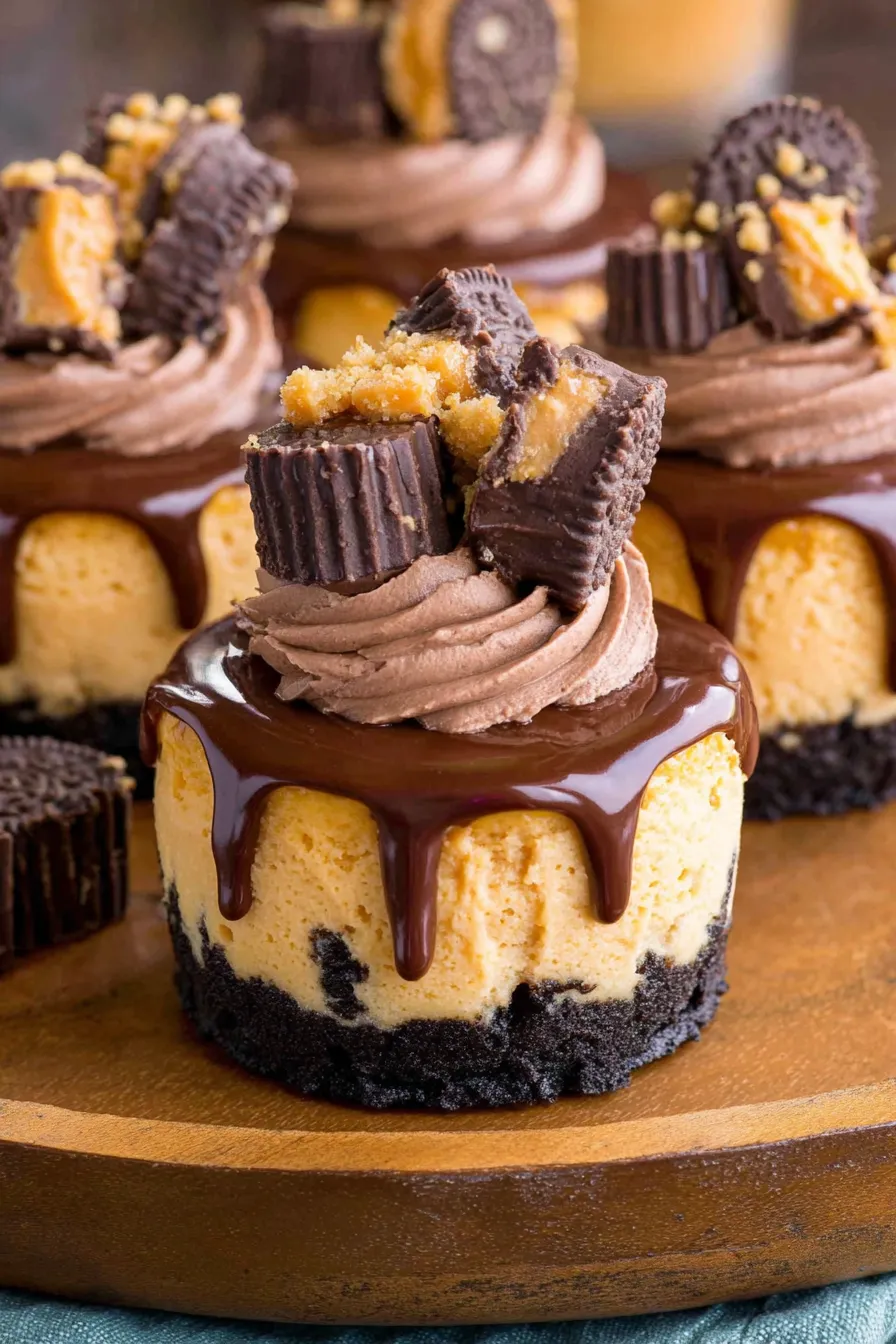
One of my favorite parts is the way the mini Reese's inside the filling become slightly melty while the ganache sets glossy on top—a contrast of textures that never fails to impress guests. I remember bringing a tray to a neighborhood picnic and watching people try one bite and immediately pick another. The portable size makes portion control optional and dessert plating simple.
Store chilled cheesecakes in a single layer in an airtight container in the refrigerator for up to 4 days. If stacked, place parchment between layers to prevent sticking. For longer storage, freeze without the whipped cream topping: place the pan in the freezer until solid, then transfer minis to a freezer-safe container or bag for up to 3 months. Thaw overnight in the refrigerator and finish with ganache and whipped cream before serving to preserve texture and presentation.
Use gluten-free chocolate sandwich cookies for a gluten-free base; press crumbs into liners and bake the same way. Replace sour cream with full-fat Greek yogurt for a slightly tangier profile. For nut-free alternatives, swap peanut butter with sunflower seed butter and use sunflower butter cups instead of Reese's. Use dairy-free cream cheese and coconut cream in place of heavy cream to make a dairy-free version, remembering that texture and flavor will shift slightly.
Serve these minis on a dessert platter with fresh berries for a pop of brightness, salted pretzels for crunch contrast, or alongside a scoop of vanilla ice cream to cut through richness. For a celebration, place them on a tiered stand with contrasting garnishes like flaky sea salt, cacao nibs, or a drizzle of caramel. They also work well as favors—wrap each in a small box with a clear window for gifting.
This dessert is a playful American take on classic baked custard and layered chocolate-peanut butter combinations popularized in candy bars. Miniature cheesecakes are rooted in the tradition of individual pastries in patisserie, while the use of Oreo crumbs and Reese's cups showcases modern pantry-driven baking where confectionery items are repurposed into home desserts. The fusion of creamy American-style cheesecake with iconic American candy makes this an instantly familiar and comforting treat.
In winter, swap mini Reese's for peppermint bark pieces and top with crushed candy cane for a holiday twist. For summer gatherings, fold in chopped salted peanuts and finish with a light salted caramel drizzle instead of ganache. Spring brunches pair well with a smear of berry compote under the ganache and a sprinkle of toasted almond slivers for freshness and color.
Make the crust and filling the day before and refrigerate the filled cheesecakes in the pan overnight. Prepare ganache and chilled whipped cream in the morning of your event and finish the cheesecakes an hour before serving. Use disposable piping bags for quick cleanup and transport the finished tray with ice packs to keep them stable during travel.
These mini cheesecakes are one of those recipes I return to whenever I need an effortless showstopper. They combine nostalgia and technique in a way that feels both indulgent and comforting. Make a double batch and share them—nothing makes a kitchen friendlier than plates of chocolate and peanut butter handed around a table.
Use room-temperature cream cheese and eggs to ensure a smooth, lump-free filling.
Avoid overbeating after adding eggs to prevent incorporating too much air which can cause cracking.
Tap the mixing bowl firmly on the counter to release air bubbles before filling the liners.
Chill for at least 4 hours or overnight for the best texture and easier topping application.
This nourishing mini reese's peanut butter cheesecakes recipe is sure to be a staple in your kitchen. Enjoy every moist, high protein slice — it is perfect for breakfast or as a wholesome snack any time.
This Mini Reese's Peanut Butter Cheesecakes recipe makes perfectly juicy, tender, and flavorful steak every time! Serve with potatoes and a side salad for an unforgettable dinner in under 30 minutes.
Preheat oven to 350°F and line a 12-cup muffin pan with liners. This keeps edges tidy and makes removal simple.
Mix Oreo crumbs with melted butter until moistened. Press about 1 heaping tablespoon into each liner and bake 5 minutes at 350°F. Cool on a rack then lower oven to 325°F.
Beat room-temperature cream cheese with sugar, cornstarch, and salt on low until creamy, scraping sides to avoid lumps.
Add sour cream, creamy peanut butter, and vanilla. Beat until smooth for a velvety texture that will set properly.
Add eggs one at a time, mixing only until combined. Fold in chopped mini Reese's and tap bowl to remove air bubbles before filling liners.
Fill liners evenly and bake at 325°F for 18-20 minutes until centers jiggle slightly. Cool completely on a rack then refrigerate covered for at least 4 hours.
Melt chocolate chips, peanut butter, and heavy cream in 30-second microwave intervals, stirring until smooth. Spoon ganache over chilled cheesecakes and refrigerate to set.
Whip chilled heavy cream with powdered sugar, cocoa powder, and vanilla until stiff peaks form. Pipe onto each cheesecake and top with a halved mini Reese's before serving.
Last Step: Please leave a rating and comment letting us know how you liked this recipe! This helps our business to thrive and continue providing free, high-quality recipes for you.
Leave a comment & rating below or tag
@yumelle on social media!

Juicy chicken meatballs baked with Parmesan and herbs, spooned with marinara, and covered in melty mozzarella on toasted slider rolls. Irresistible for parties.

Twirl eerie-colored spaghetti and top it with gooey, cheese-stuffed monster meatballs complete with olive eyes for a delightfully spooky family dinner.

Silky egg ribbons swirl through savory chicken broth, scented with sesame and scallions. Simple pantry staples, ready in just 10 minutes.
Leave a comment & rating below or tag @yumelle on social media!
Enjoyed this recipe? Share it with friends and family, and don't forget to leave a review!
This recipe looks amazing! Can't wait to try it.
Comments are stored locally in your browser. Server comments are displayed alongside your local comments.

Join to receive our email series which contains a round-up of some of our quick and easy family favorite recipes.
