
>>

A no-bake, crowd-pleasing icebox dessert layered with birthday cake pudding, cake-mix whipped cream, and Oreo cookies — perfect for celebrations and make-ahead parties.
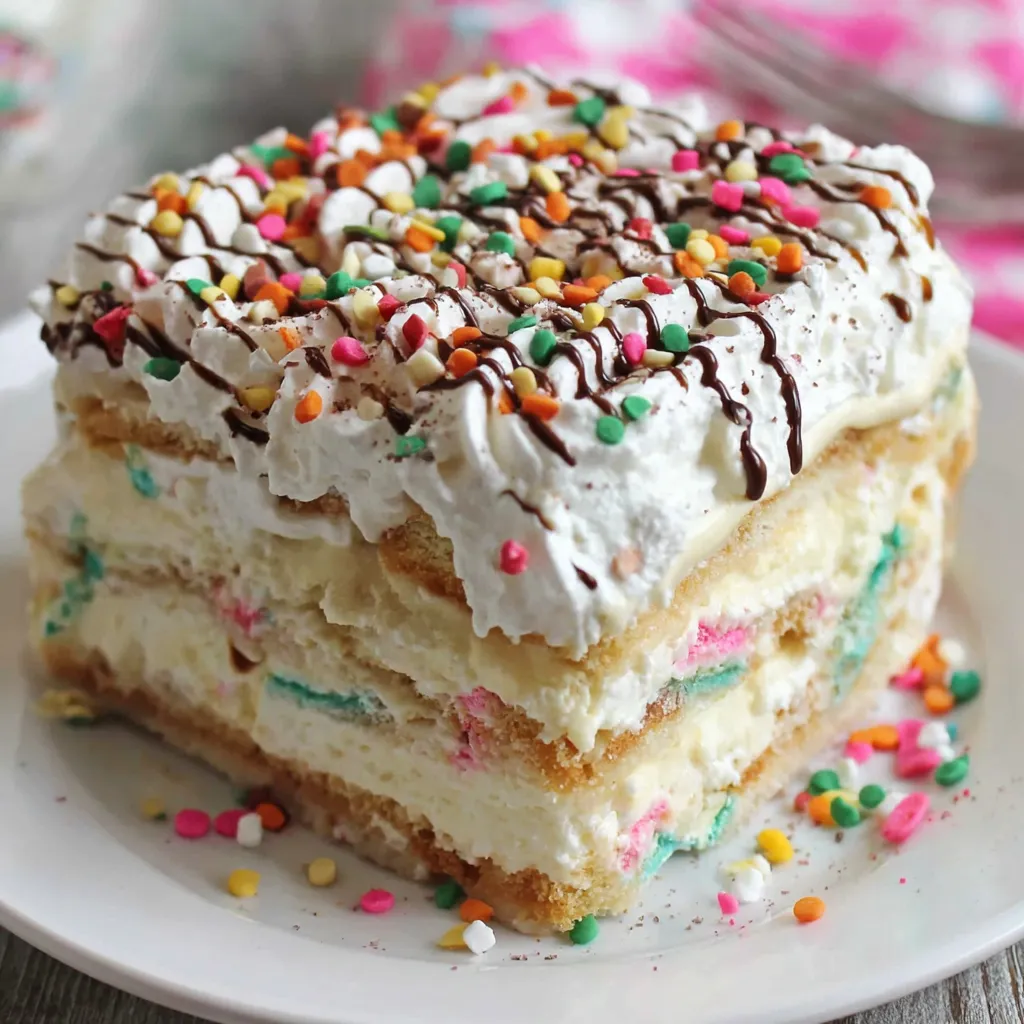
This Funfetti birthday cake icebox cake is my go-to celebration treat whenever a crowd needs bright flavor without the fuss of baking. I first put this together on a frantic morning before my niece's sixth birthday; we had limited oven space, a tiny apartment kitchen, and a hungry set of relatives showing up in under two hours. It felt like culinary magic when the layered cookies softened into cake-like slices and the whipped cake batter filling tasted exactly like birthday cake frosting. The texture is a playful contrast of silky pudding, pillowy whipped cream infused with cake mix, and softened cookie layers with little bursts of sprinkles and crunch.
What makes this dish special is the balance of convenience and nostalgia. It uses pantry-friendly components — instant pudding, dry cake mix, Oreos — and transforms them into something celebratory: colorful, sweet, and unapologetically fun. The finished slices are moist and sliceable, like a hybrid between icebox cake and trifle, and they hold up well for parties because you can assemble it hours ahead and serve chilled. For busy hosts or anyone who loves a retro dessert with a modern twist, this icebox cake checks all the boxes.
I discovered this version when experimenting with ways to get that birthday-cake flavor without baking a sponge. My family’s reaction was immediate: plates cleared, requests for seconds, and my niece insisting we make it every year. Over time I learned small tweaks that elevate the texture — like a quick milk dip for the cookies and whipping the cream to the right peak — and these simple techniques turned a nostalgic idea into a foolproof favorite.
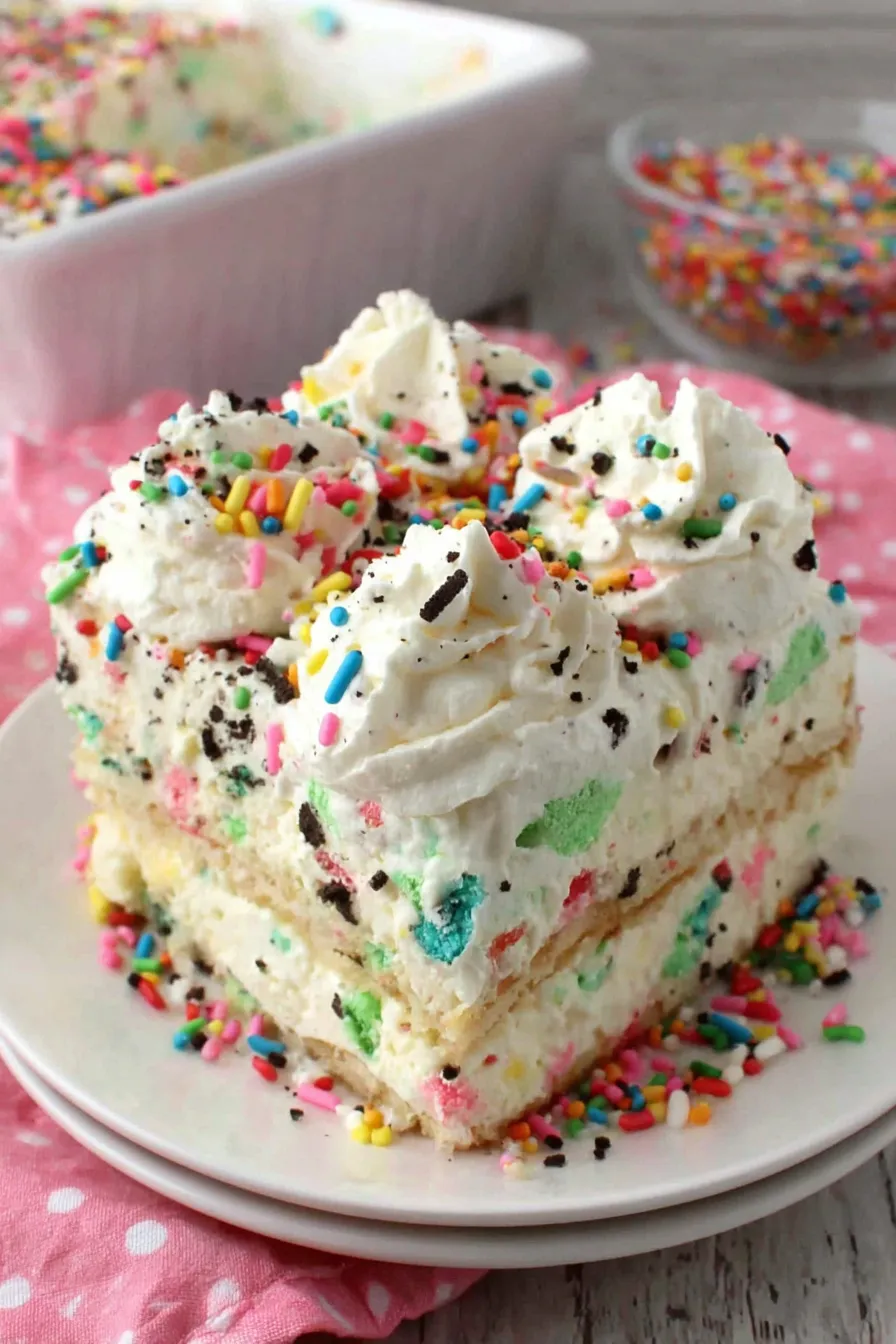
One of my favorite parts is how forgiving this method is: whether the whipped cream peaks are perfect or a bit soft, the chilling process evens everything out. My family has tested many variations — swapping different sandwich cookies or flavoring the pudding — and the response is consistently enthusiastic. The visual joy on children’s faces when they see the rainbow sprinkles is worth every second it takes to assemble.
Store the dessert tightly covered in the refrigerator to prevent the surface from drying out and to protect it from absorbing other odors. Use an airtight lid or press a layer of plastic wrap directly on the whipped cream surface before sealing the pan. Kept refrigerated, slices remain high quality for up to 3 days; after that, the cookie layers become overly soft and the texture degrades. You can freeze portions for up to 1 month in airtight containers, but allow frozen slices to thaw in the fridge overnight to preserve the best texture.
If you need dairy-free alternatives, swap the heavy cream for a coconut-based whipping product and choose dairy-free sandwich cookies. For a gluten-free version, use certified gluten-free sandwich cookies and a gluten-free cake mix. To lighten the dessert, replace half of the heavy cream with whipped aquafaba (chickpea brine) whipped to stiff peaks, though the flavor will be slightly less rich. Be aware that substitutions change texture and stability, so always test chilling times.
Serve chilled slices with a small scoop of vanilla ice cream or a drizzle of white chocolate sauce for an extra indulgence. Garnish with fresh berries or edible confetti for adult-friendly plates. This dessert is perfect for birthdays, potlucks, or any occasion that calls for a whimsical, colorful centerpiece. Slice with a hot, clean knife for tidy servings and wipe the knife between cuts for the best presentation.
The icebox cake is an American classic that dates back to the early 20th century when refrigeration became more common in homes. Traditionally made with wafers or cookies and whipped cream, it evolved into many regional variations. This Funfetti take merges that retro technique with modern convenience of instant pudding and boxed cake mix, offering a nostalgic flavor reminiscent of birthday parties across generations.
For spring and summer celebrations, swap in lemon pudding and white chocolate chips for a lighter profile, or add a layer of fresh strawberries between the pudding and cookies. Around the holidays, use gingerbread or chocolate sandwich cookies and cinnamon-flavored cake mix to give a seasonal spin. Small adjustments to sprinkles (seasonal colors) instantly adapt the dessert for any event.
Assemble the dessert the night before to save time on the day of serving. Store in a dedicated refrigerator shelf to avoid accidental crushing. If transporting, keep it chilled in a cooler with ice packs. For individual portions, assemble in small mason jars or clear cups for convenient grab-and-go servings that look festive and are easy to distribute.
At the end of the day, this Funfetti birthday cake icebox cake is a joyful, approachable dessert that turns simple ingredients into a celebratory moment. Whether for a birthday, potluck, or just because, it’s one of those dishes that invites creativity while remaining reliably delicious — and that’s why I keep making it year after year.
Use cold heavy cream and a chilled bowl for the best whipping volume and stability.
Dip cookies only briefly in milk to soften without falling apart; a quick swipe is enough.
Cover the pan with plastic wrap pressed gently on the surface to keep the whipped cream from drying out during chilling.
For cleaner slices, run a knife under hot water, dry it, and slice through a single motion, wiping between cuts.
This nourishing funfetti birthday cake icebox cake recipe is sure to be a staple in your kitchen. Enjoy every moist, high protein slice — it is perfect for breakfast or as a wholesome snack any time.
This Funfetti Birthday Cake Icebox Cake recipe makes perfectly juicy, tender, and flavorful steak every time! Serve with potatoes and a side salad for an unforgettable dinner in under 30 minutes.
Pour both packages of instant vanilla pudding into a large bowl, add 2/3 cup dry funfetti cake mix and 4 tablespoons sprinkles, and whisk to combine so color and cake flavor are evenly distributed.
Whisk in 4 cups of milk for about two minutes until the mixture thickens slightly and becomes spreadable, leaving soft ribbons when lifted with a whisk.
In a chilled bowl, whip 1 2/3 cups cold heavy cream until soft peaks form. Add 3/4 cup dry cake mix and 1 teaspoon vanilla, then whip to medium-stiff peaks to stabilize the cream and add cake flavor.
Pour the remaining 1/2 cup milk into a shallow bowl. Quickly dip each Oreo and place a single layer in the bottom of a 9x13-inch pan, dipping briefly to soften without causing breakage.
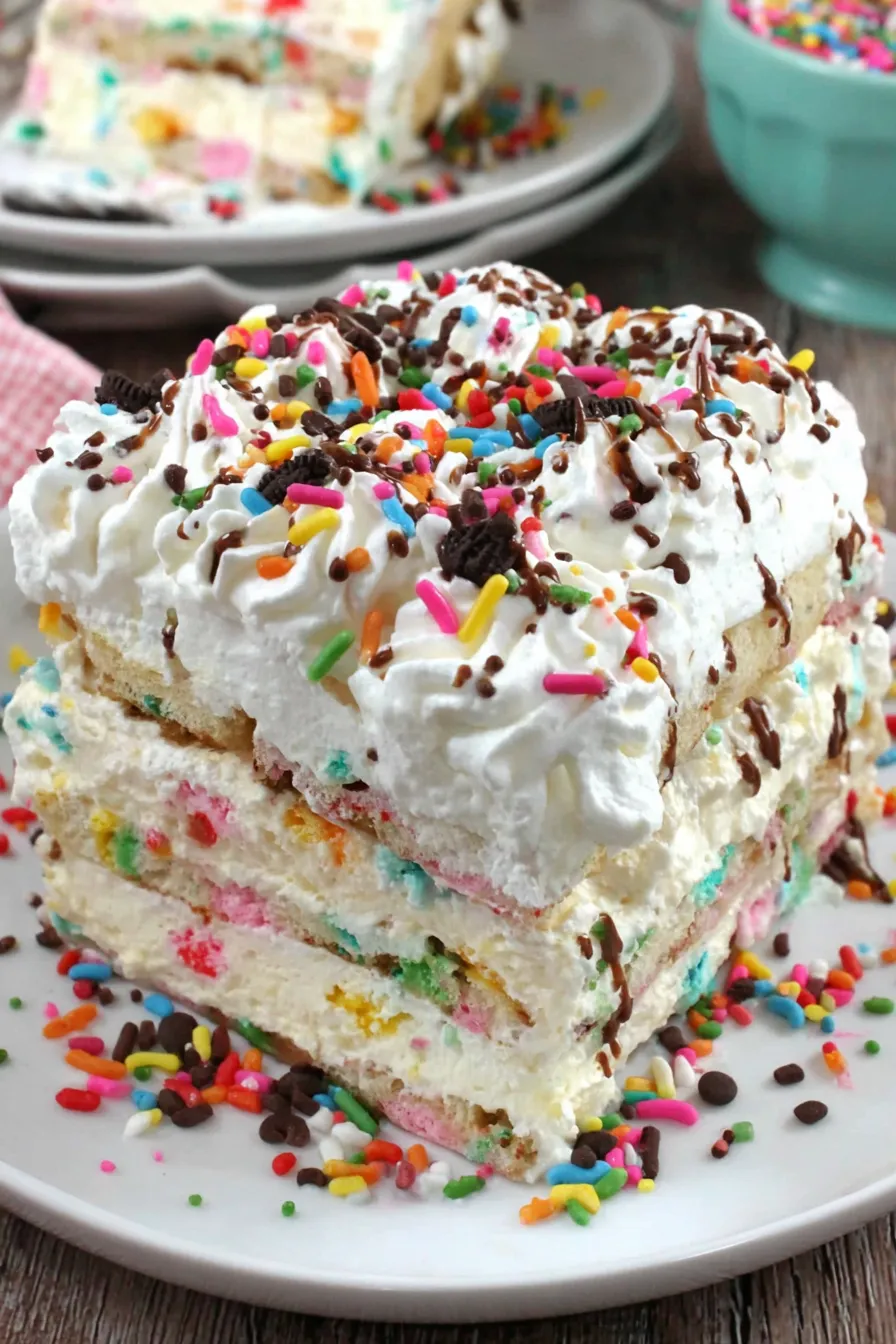
Spread half the pudding over the cookie layer, then spread half the whipped cake-batter cream on top. Smooth gently with an offset spatula for even layers.
Dip remaining Oreos quickly and arrange in a single layer on top of the whipped cream. Top with remaining pudding, then finish with the remaining whipped cream and sprinkle extra confetti on the surface.
Cover the pan tightly and refrigerate at least 4 hours or overnight. Chilling allows cookies to soften into cake-like layers and ensures clean slicing.
Last Step: Please leave a rating and comment letting us know how you liked this recipe! This helps our business to thrive and continue providing free, high-quality recipes for you.
Leave a comment & rating below or tag
@yumelle on social media!

Juicy chicken meatballs baked with Parmesan and herbs, spooned with marinara, and covered in melty mozzarella on toasted slider rolls. Irresistible for parties.

Twirl eerie-colored spaghetti and top it with gooey, cheese-stuffed monster meatballs complete with olive eyes for a delightfully spooky family dinner.

Silky egg ribbons swirl through savory chicken broth, scented with sesame and scallions. Simple pantry staples, ready in just 10 minutes.
Leave a comment & rating below or tag @yumelle on social media!
Enjoyed this recipe? Share it with friends and family, and don't forget to leave a review!
This recipe looks amazing! Can't wait to try it.
Comments are stored locally in your browser. Server comments are displayed alongside your local comments.

Join to receive our email series which contains a round-up of some of our quick and easy family favorite recipes.
