
>>

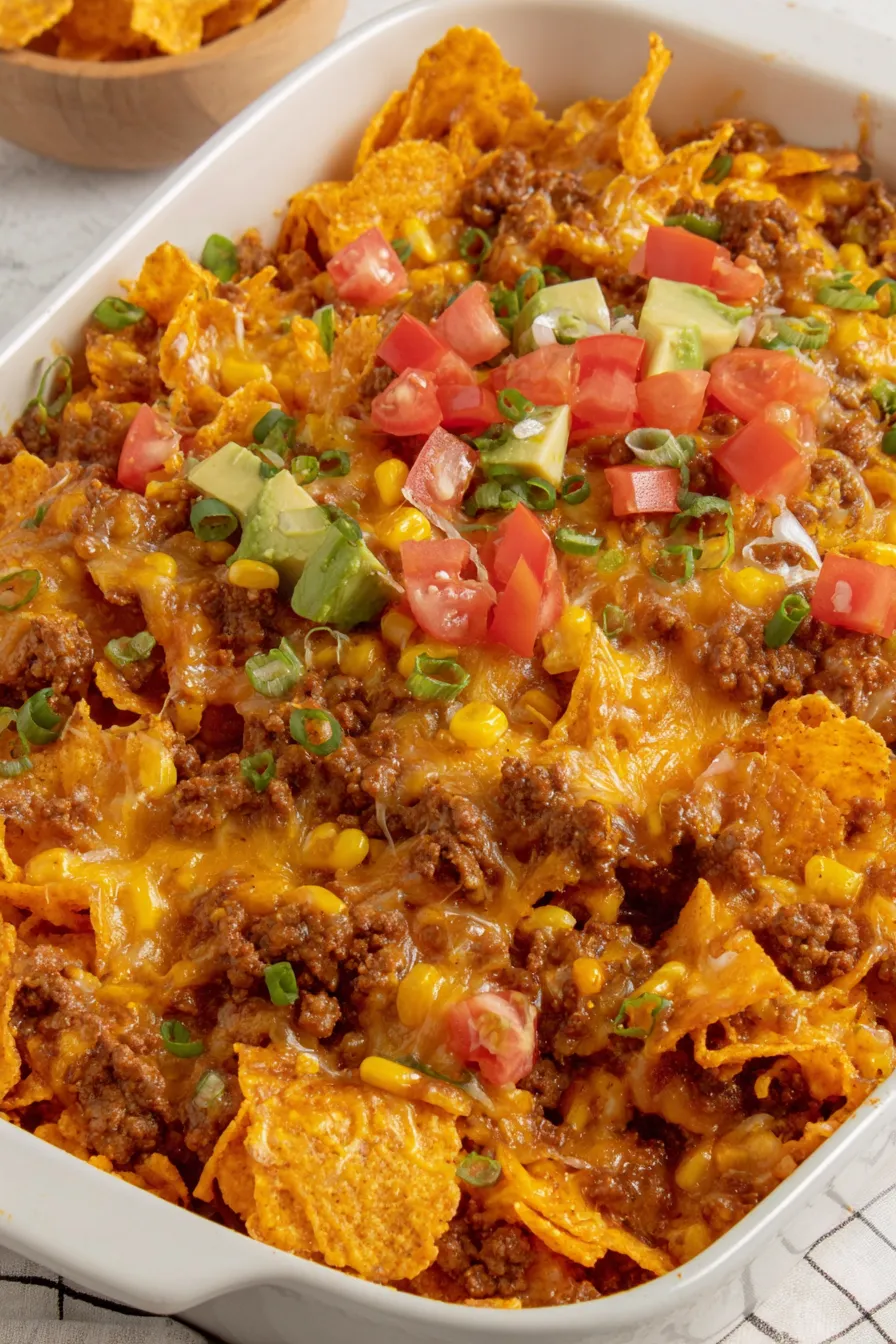
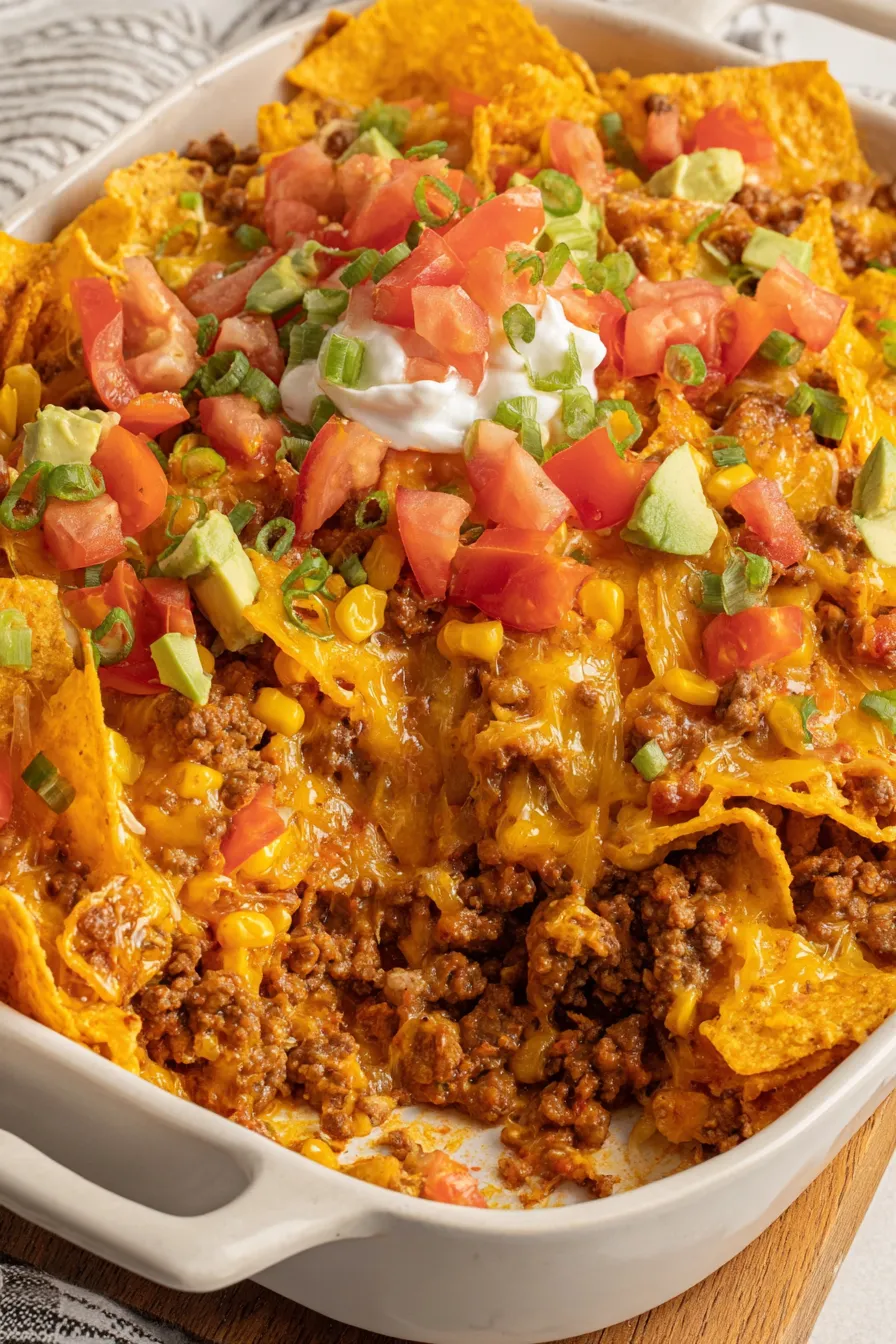
A crowd-pleasing, crunchy, creamy casserole that layers seasoned beef, queso-like sour cream, frozen corn and Doritos for an easy weeknight hit.

This Doritos Taco Casserole has been my go-to for casual gatherings and busy weeknights ever since I first cobbled it together years ago. I discovered the combination one evening while cleaning out the pantry: a sleeve of chips, a pound of ground beef, and a can of tomatoes with green chiles put together into something unexpectedly satisfying. The casserole hits three textures at once—crispy Doritos, creamy melted cheese and sour cream, and tender seasoned beef—which is what makes it an instant family favorite. It’s one of those dishes everyone crowds around and eats straight from the baking dish, which has led to many boisterous, delightful dinners at my table.
What I love most is how forgiving and adaptable it is. You can assemble it from mostly pantry and freezer staples in under 30 minutes of active time and it performs beautifully whether served for a casual game night or a last-minute potluck. The smoky heat from the tomatoes with green chiles and the big crunch from the Doritos give it a playful, nostalgic edge that always makes people smile. Over the years I’ve learned a few small tweaks—like reserving a cup of larger chip pieces for the top and folding in the sour cream off the heat—that really elevate the texture and flavor.
I remember serving this at a laid-back backyard party where every guest asked for the recipe. Even folks who claimed they weren’t “chip people” loved the way the chips change texture after baking—less greasy, more toasty and full of corn flavor. My kids insist on extra shredded lettuce and avocado on top; adults often add a squeeze of lime. It’s a low-fuss, high-pleasure dish that still surprises me with how often it gets requested.
One of my favorite things about this dish is how it brings people together without fuss. At holiday movie nights it’s the first dish gone, loved for its playful crunch and comforting, familiar spices. I also enjoy experimenting with crunchy toppings—sometimes I mix a few crushed plain tortilla chips with Doritos for a milder background and let a few cilantro leaves scatter on top for brightness.
Cool the casserole to room temperature before refrigerating to avoid condensation that can soften the chips. Transfer leftovers to an airtight container or cover the baking dish tightly with foil and store in the fridge for up to three days. For longer storage, portion into freezer-safe containers and freeze for up to two months—thaw overnight in the refrigerator before reheating. When reheating, warm in a 325°F oven covered with foil for 10–15 minutes to prevent the topping from burning; remove the foil the last few minutes to re-crisp the chip layer if desired.
If you don’t have Doritos on hand, substitute sturdy tortilla chips—use 2 cups finely crushed and 1 cup coarsely broken for the topping. To reduce saturated fat, swap half the ground beef for ground turkey or use a lean 90/10 blend; drain very well. Replace sour cream with plain Greek yogurt 1:1 for a tangier, protein-rich outcome. For a vegetarian version, swap the beef for seasoned cooked lentils or crumbled firm tofu and use a vegetarian taco seasoning. If you need gluten-free, use certified gluten-free corn chips and verify all packaged ingredients.
Serve straight from the casserole dish for a casual gathering, accompanied by bowls of shredded lettuce, diced tomatoes, sliced avocado and extra sour cream so guests can customize their plates. Offer lime wedges and chopped cilantro for brightness. For a heartier meal, serve with cilantro-lime rice or a simple black bean salad; for lighter fare, a crisp mixed-green salad with citrus vinaigrette pairs beautifully. Garnish with pickled jalapeños or hot sauce for those who prefer more heat.
This dish is rooted in Tex-Mex comfort cooking, which blends Mexican flavors with American convenience ingredients. While not traditional, the idea of layering seasoned meat, corn, and cheese in a baking vessel mirrors casseroles like enchilada bakes and tamale pies. Doritos, an American snack food inspired by tortilla chips, add a playful modern twist—this casserole is an example of culinary improvisation where pantry items meet bold, familiar flavors to create something new and convivial.
In summer, swap frozen corn for fresh grilled corn kernels and add a handful of chopped roasted peppers for sweetness. In winter, include a roasted poblano or a spoonful of chipotle in adobo for deeper smokiness. For holiday gatherings, top with more festive garnishes—pomegranate seeds don’t sound typical but provide a surprising pop of color and acidity when paired with creamy toppings. Adjust the tomato component to fire-roasted diced tomatoes for a charred note in cooler months.
Assemble the entire casserole up to a day in advance and keep covered in the refrigerator; add the reserved crunchy chips just before baking to maintain crispness. For single-serve meal prep, portion into individual foil or glass containers and refrigerate; reheat covered to preserve moisture and then uncover to reinstall the crunchy finish briefly under the broiler if you like. Label containers with the date and reheat within three days for best quality.
Making this casserole has always felt like a little kitchen victory—simple steps, minimal hands-on time, and a reliably joyful result. Whether you’re feeding a hungry household or bringing a dish to share, it’s one of those dependable, crowd-pleasing options that invites creativity and always leaves room for seconds.
Reserve a cup of larger chip pieces for the topping to preserve crunch after baking.
Fold in the sour cream off the heat to keep the filling creamy and prevent separation.
Drain any excess grease from the browned beef to avoid a soggy casserole.
Let the finished dish rest 5 minutes before serving so the filling sets for cleaner slices.
This nourishing doritos taco casserole recipe is sure to be a staple in your kitchen. Enjoy every moist, high protein slice — it is perfect for breakfast or as a wholesome snack any time.
This Doritos Taco Casserole recipe makes perfectly juicy, tender, and flavorful steak every time! Serve with potatoes and a side salad for an unforgettable dinner in under 30 minutes.
Preheat oven to 350°F and spray a 9x13-inch casserole dish with nonstick spray so the casserole releases easily after baking.
Measure and crush 2 cups of Doritos to a fine breadcrumb-like texture and set aside 1 cup in larger pieces for the topping.
In a large skillet over medium-high heat, cook the ground beef and diced onion until the beef is browned and the onion is translucent, about 6–8 minutes; drain excess grease and add garlic, cooking briefly until fragrant.
Stir in frozen corn, taco seasoning, undrained diced tomatoes with green chilies and the 2 cups of finely crushed Doritos; mix thoroughly so the chips absorb some juices.
Remove skillet from heat and fold in the sour cream and 2 cups of shredded cheese until evenly combined to create a creamy filling.
Pour the filling into the prepared dish, bake 5 minutes to warm through, then add the remaining 1 cup cheese and 1 cup loosely crushed Doritos and bake another 5 minutes until cheese melts and topping is warmed.
Allow the dish to rest 5 minutes before serving, then garnish with green onions, diced tomatoes, shredded lettuce, avocado slices and extra sour cream as desired.
Last Step: Please leave a rating and comment letting us know how you liked this recipe! This helps our business to thrive and continue providing free, high-quality recipes for you.
Leave a comment & rating below or tag
@yumelle on social media!

Juicy chicken meatballs baked with Parmesan and herbs, spooned with marinara, and covered in melty mozzarella on toasted slider rolls. Irresistible for parties.

Twirl eerie-colored spaghetti and top it with gooey, cheese-stuffed monster meatballs complete with olive eyes for a delightfully spooky family dinner.

Silky egg ribbons swirl through savory chicken broth, scented with sesame and scallions. Simple pantry staples, ready in just 10 minutes.
Leave a comment & rating below or tag @yumelle on social media!
Enjoyed this recipe? Share it with friends and family, and don't forget to leave a review!
This recipe looks amazing! Can't wait to try it.
Comments are stored locally in your browser. Server comments are displayed alongside your local comments.

Join to receive our email series which contains a round-up of some of our quick and easy family favorite recipes.
