
>>

A simple, crunchy oven-baked panko chicken with a golden parmesan crust—weeknight-friendly, crowd-pleasing, and ready in about 35 minutes.
This panko chicken has been a weeknight lifesaver in my kitchen for years. I first developed this version on a busy Sunday afternoon when I wanted something crisp, flavorful, and quick without frying. The combination of airy Japanese-style breadcrumbs and a hint of grated parmesan gives the exterior a satisfying crunch and a savory depth that keeps everyone reaching for seconds. I love how the olive oil in the crumbs browns them beautifully in the oven so you get that deep golden crust without the fuss or mess of pan-frying.
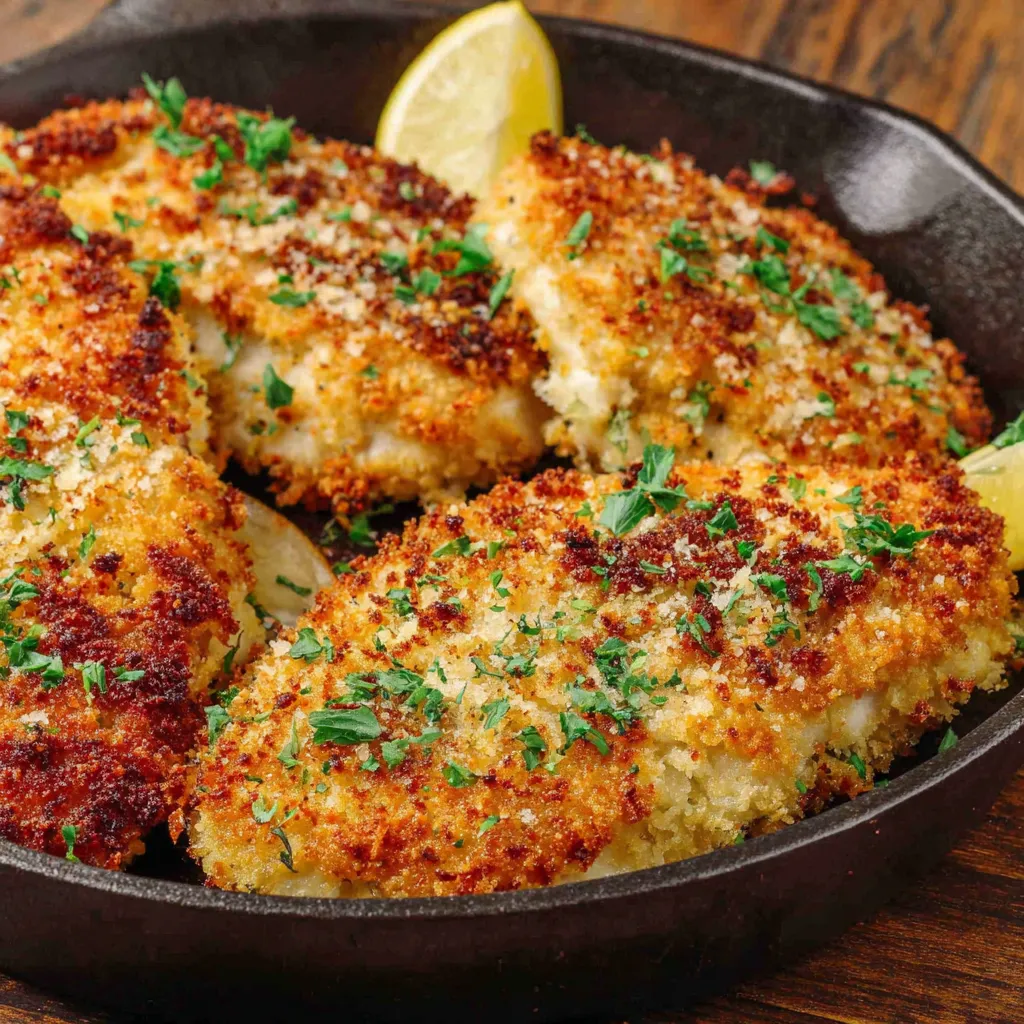
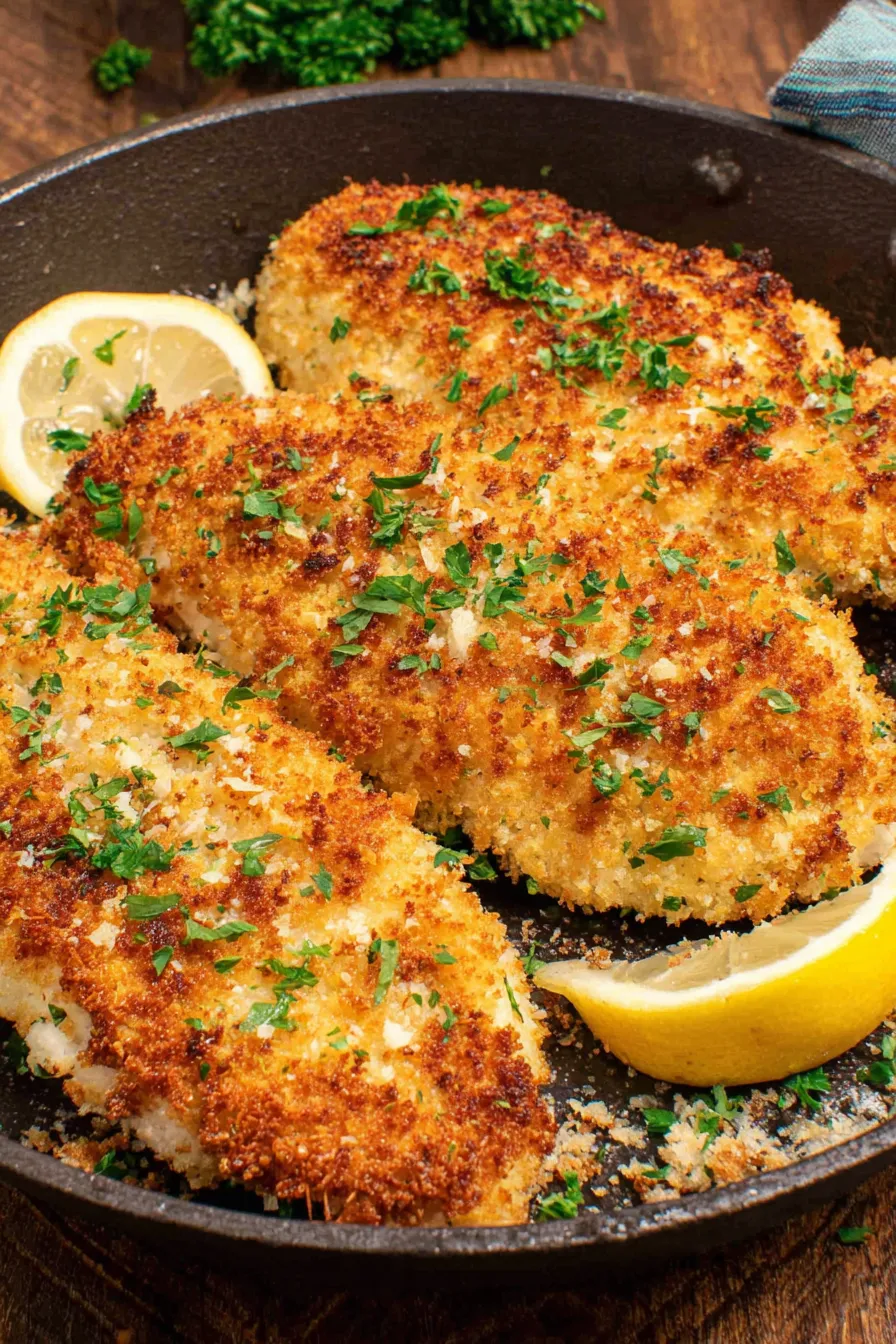
What makes this preparation special is the balance between speed and texture. The cutlets are pounded to an even thickness so they cook through in the time the crust needs to turn golden. The seasoning in the flour gives the interior a gentle lift while the panko-parmesan coating delivers crisp flakes that hold up even after a short rest. We often serve this with bright lemon wedges and a sprinkle of fresh parsley—the acidity wakes up the dish and pairs perfectly with the toasty crust.
In my household this dish quickly earned a regular spot on the rotation. My partner comments on the crunch every time, and our kids love squeezing lemon over the top. On nights when I double the batch, the leftovers make an excellent lunch—sliced and served cold over greens or reheated gently under the broiler for a few minutes to revive the crispness.

My favorite part of this preparation is how forgiving it is: even on a rushed evening the breading comes out crisp and the meat stays tender. One memorable dinner was when I doubled the recipe for a small gathering; guests raved about the crunchy exterior and the simple lemon finish. I learned early on that coating the crumbs with a little olive oil makes a dramatic difference in oven browning—an easy professional trick.
Store leftover chicken in an airtight container in the refrigerator for up to 3 days. To keep the crust from becoming soggy, place a paper towel between pieces to absorb excess moisture and avoid stacking if possible. For longer storage, flash-freeze pieces on a tray for 30 minutes, then transfer to a freezer bag for up to 3 months. Reheat from thawed in a 375°F oven for 8–12 minutes or until warm, or revive crispness under the broiler for 1–2 minutes while watching closely. Avoid microwaving as it softens the coating.
If you need a gluten-free option, swap standard panko for certified gluten-free panko or finely crushed gluten-free cornflakes; note texture will be slightly different but still crispy. For dairy-free, omit the parmesan and replace with 1 1/2 teaspoons nutritional yeast for savory depth. To make a lower-fat version, reduce the oil to 2 teaspoons and spritz the crumbs with cooking spray before baking—browning will be milder but still tasty. For a spicier crust, add 1/2 teaspoon smoked paprika or cayenne to the flour mixture.
Serve the cutlets whole with lemon wedges and chopped parsley for bright contrast, or slice them thin and layer on crusty bread with arugula and aioli for an elevated sandwich. They pair beautifully with a simple mixed greens salad, roasted vegetables, or creamy mashed potatoes for a comforting plate. For an Asian-inspired twist, slice and serve over steamed rice with a drizzle of soy-sesame dressing and quick-pickled cucumbers.
The technique draws inspiration from breaded cutlets found across many cuisines—European schnitzel, Japanese tonkatsu, and American chicken cutlets. Panko itself originates from Japan and differs from Western breadcrumbs because it creates larger, airier flakes that produce an exceptionally light, crispy crust. Using panko with parmesan marries the Japanese texture with Mediterranean umami, creating a hybrid that’s both modern and familiar in home kitchens.
In spring and summer, finish the chicken with a zesty herb salad—chopped parsley, mint, lemon zest, and olive oil—for a fresh contrast. Autumn and winter call for richer sides: braised greens, roasted root vegetables, or a warm grain salad. For holidays, serve thinner cutlets as part of a composed platter with roasted squash, herbed couscous, and a tangy mustard sauce for a comforting crowd-pleasing option.
For meal prep, bread all cutlets in one session and store them separated by parchment in an airtight container in the refrigerator for up to 6 hours. Bake just before serving for peak texture. Alternatively, fully bake and portion into meal containers with roasted vegetables; reheat in a 375°F oven or toaster oven for 8–10 minutes to bring back crispness. Label and date frozen portions and enjoy within three months for best quality.
There’s something undeniably satisfying about the crunch of panko and the clean pop of lemon at the end of each bite. Whether you’re feeding a family or prepping lunches for the week, this method delivers reliable texture and flavor with minimal fuss—give it a try and make it your own.
Use room-temperature eggs to help the egg wash adhere and create a uniform crust.
Lightly coat panko with olive oil to encourage deep golden browning in the oven.
If the crust softens after refrigeration, reheat under the broiler for 1–2 minutes to restore crispness.
Pound cutlets to an even 3/4-inch thickness for consistent cooking and a juicy interior.
This nourishing crispy oven-baked panko chicken recipe is sure to be a staple in your kitchen. Enjoy every moist, high protein slice — it is perfect for breakfast or as a wholesome snack any time.
This Crispy Oven-Baked Panko Chicken recipe makes perfectly juicy, tender, and flavorful steak every time! Serve with potatoes and a side salad for an unforgettable dinner in under 30 minutes.
Preheat oven to 425°F and line a rimmed baking sheet with aluminum foil. If using a wire rack, place it on the tray and lightly oil it to prevent sticking.
Combine 1/2 cup flour, garlic powder, onion powder, salt, and pepper in a shallow dish and whisk to distribute the spices evenly.
Whisk 2 room-temperature large eggs in a second shallow dish until smooth to create the egg wash that will bind the breading.
In a third dish, stir together 1 1/4 cups panko, 1/2 cup grated parmesan, and 3 tablespoons olive oil until crumbs are evenly coated.
Coat each cutlet in the seasoned flour, shake off excess, dip in the egg wash, then press both sides into the panko mixture. Place coated cutlets on the prepared tray about 1/2 inch apart.
Bake 18–22 minutes until golden and an instant-read thermometer reads 165°F in the thickest part. Allow to rest 3–5 minutes before slicing and serving with parsley and lemon.
Last Step: Please leave a rating and comment letting us know how you liked this recipe! This helps our business to thrive and continue providing free, high-quality recipes for you.
Leave a comment & rating below or tag
@yumelle on social media!

Juicy chicken meatballs baked with Parmesan and herbs, spooned with marinara, and covered in melty mozzarella on toasted slider rolls. Irresistible for parties.

Twirl eerie-colored spaghetti and top it with gooey, cheese-stuffed monster meatballs complete with olive eyes for a delightfully spooky family dinner.

Silky egg ribbons swirl through savory chicken broth, scented with sesame and scallions. Simple pantry staples, ready in just 10 minutes.
Leave a comment & rating below or tag @yumelle on social media!
Enjoyed this recipe? Share it with friends and family, and don't forget to leave a review!
This recipe looks amazing! Can't wait to try it.
Comments are stored locally in your browser. Server comments are displayed alongside your local comments.

Join to receive our email series which contains a round-up of some of our quick and easy family favorite recipes.
