
Copycat Dairy Queen Ice Cream Cake

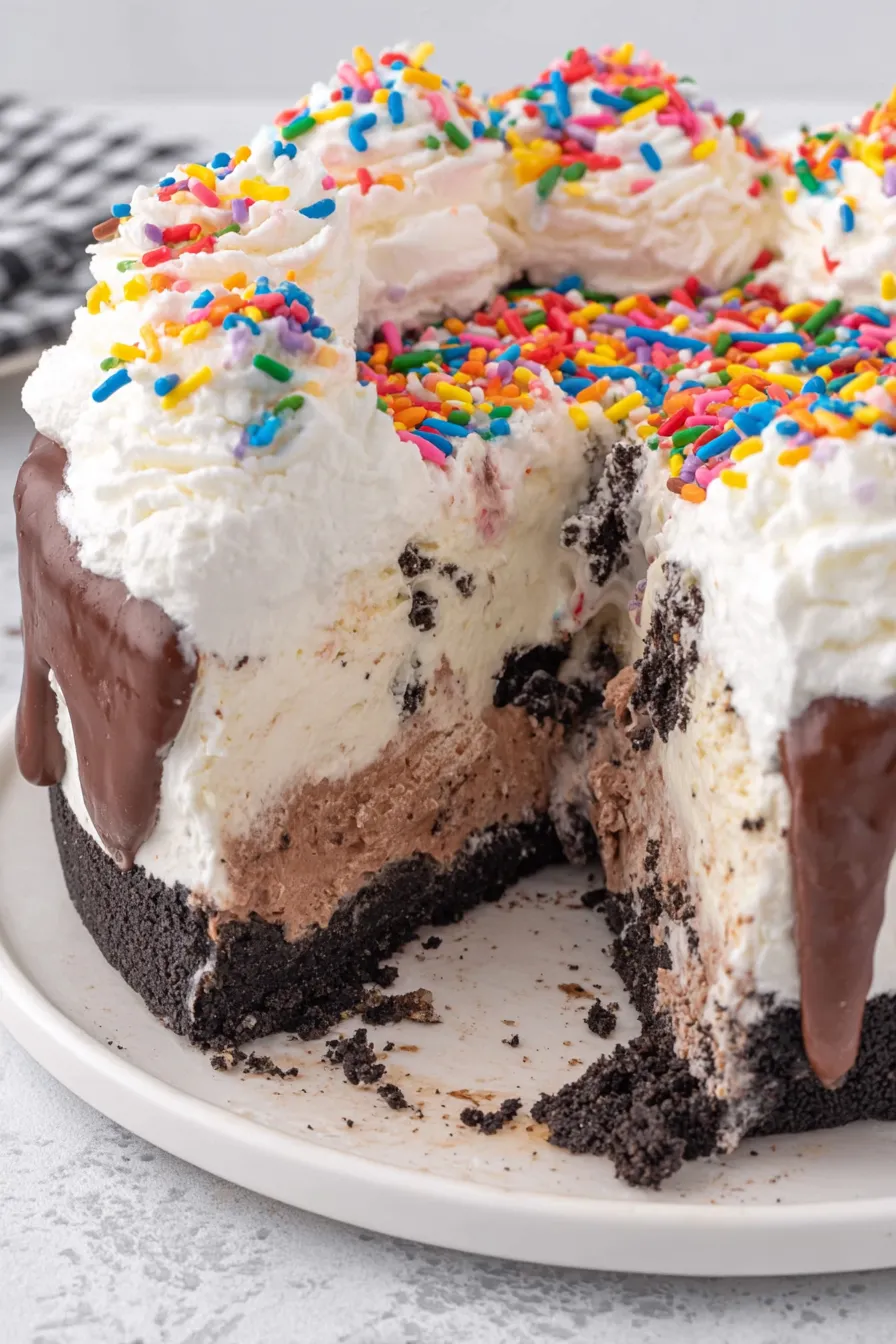
Recreate the classic Dairy Queen ice cream cake at home with a crunchy cookie base, layers of chocolate and vanilla ice cream, hot fudge, and cloud-like whipped cream frosting.
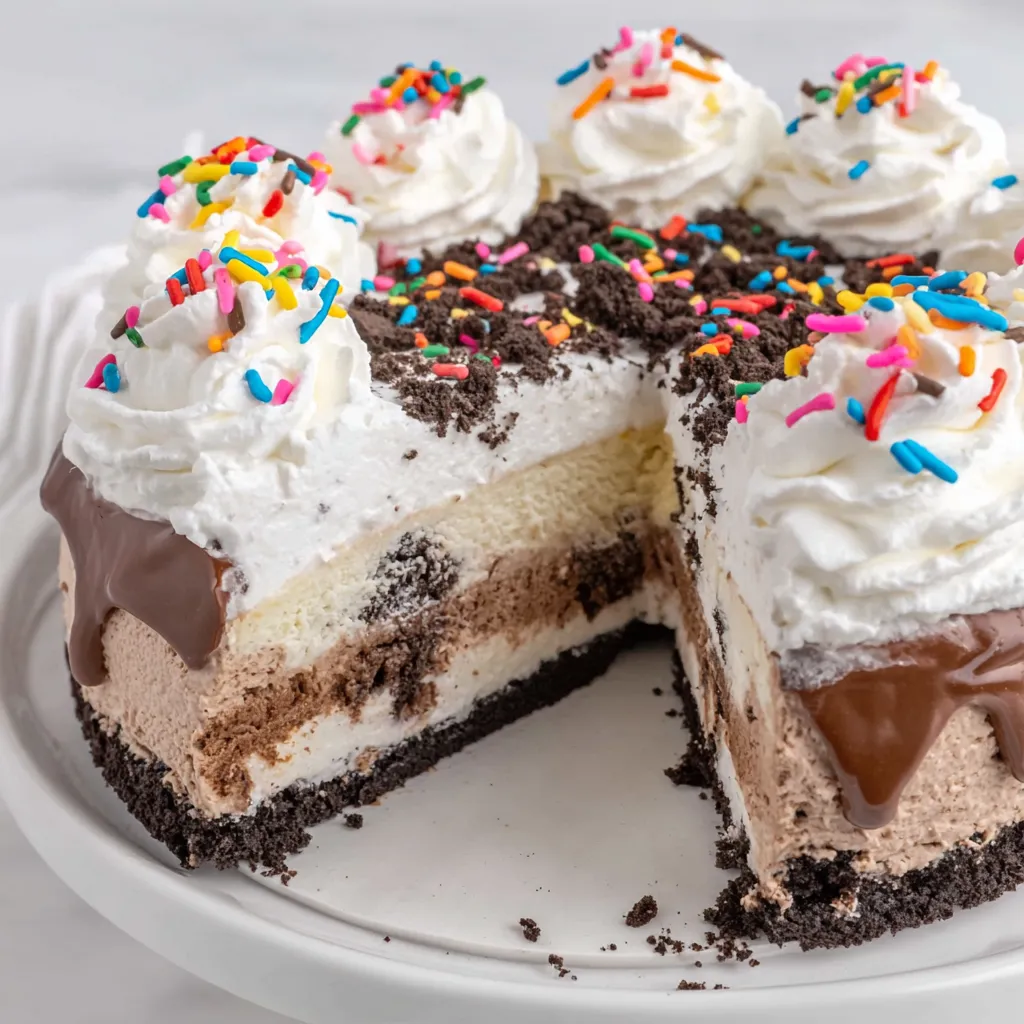
This copycat Dairy Queen ice cream cake has been my celebration staple for years. I first made a version of this cake on a rainy spring afternoon when a last-minute birthday request needed a frozen showstopper. The result was better than expected: a satisfyingly crunchy cookie layer, a dense chocolate ice cream middle, a lush ribbon of hot fudge, and a light vanilla layer capped with pillowy whipped cream. Every spoonful is a contrast of textures and familiar tastes that bring people together in a way that only dessert can.
I love how predictable and comforting this cake feels while still delivering little surprises. The baked cookie crumbs add a toasty edge that keeps the cake from being one-note frozen sweetness. The hot fudge layer is the glue that keeps the cookie crumbs and ice cream from sliding apart, and the whipped cream frosting creates an elegant finish that’s easy to pipe when everything is cold. Serving this cake at neighborhood parties or family dinners has become a ritual: the room quiets when I slice it, and the first forkful usually earns an audible "oh!" from someone at the table.
Why You'll Love This Recipe
- This make-ahead centerpiece is perfect for celebrations because you can assemble it hours or the day before: simply freeze until ready to serve.
- It uses pantry staples and grocery-store ice cream—no need for churning—so it’s a fast way to get a professional-looking dessert without special ingredients.
- The baked cookie base adds structure and toasted flavor while staying easy to slice once fully frozen.
- Ready in stages: active time is under an hour but total chilling time turns hands-off waiting into an advantage.
- Customizable layers let you swap flavors for dietary needs or seasonal tastes, and the whipped cream finish is lower in sweetness than buttercream.
- Crowd-pleasing for varied ages: kids adore the sprinkles and chocolate; adults appreciate the texture contrasts.
In my home this cake has become the go-to for birthdays and finish-line celebrations. My sister once requested this exact cake after a half marathon and described each bite as "instant recovery." Seeing that mix of nostalgia and excitement makes the extra planning worth it, and I love watching guests debate whether the homemade copy is better than the original.
Ingredients
- Cookie Layer: 20 chocolate sandwich cookies with cream (use a brand you enjoy like Oreo). Crushing them finely creates a cohesive base when combined with melted butter and a quick bake deepens the flavor and stabilizes the crumbs.
- Butter: 4 tablespoons salted sweet cream butter, melted. Salted butter balances the sweetness of the crumbs and adds richness; if using unsalted, add a pinch of salt to taste.
- Chocolate ice cream: 1 quart. Choose a dense brand or a premium shop-bought chocolate for good cocoa flavor; softer, airier ice creams need slightly longer to firm in the freezer.
- Vanilla ice cream: 1 quart (I used vanilla bean). Visible specks of vanilla add a homemade touch but plain vanilla works fine; allow the tub to soften briefly for easier spreading.
- Hot fudge topping: 11.75 ounces. Slightly warm the jar to a spreadable consistency; this creates a glossy, sliceable layer between ice cream and crumbs.
- Heavy cream: 2 cups cold. Chilled cream whips best; for extra stability, chill the mixing bowl and beaters.
- Powdered sugar: 1 1/4 cups. Adds structure and sweetness to the whipped cream while keeping it pipeable.
- Clear vanilla flavoring: 1 1/2 teaspoons. Keeps the frosting white for a clean finish; you may substitute pure vanilla extract if desired but your frosting will have a slightly warmer hue.
- Sprinkles (optional): Colorful sprinkles for garnish; add right before serving so they do not bleed into the frosting while frozen.
Instructions
Prepare the pan and workspace: Line a 9-inch springform pan with plastic wrap so there is extra overhang to lift the cake later. This makes unmolding painless. Also line a 10×15-inch baking sheet with parchment for the cookie crumbs to bake evenly. Make and bake the cookie base: Place 20 chocolate sandwich cookies in a food processor or a sturdy zip bag and crush until fine. Transfer to a bowl and stir in 4 tablespoons melted salted butter until the crumbs hold together when pinched. Spread the crumbs evenly on the prepared baking sheet and bake at 350°F (175°C) for 7 to 8 minutes; the brief baking time toasts the crumbs and removes excess moisture so the crumbs won’t make the ice cream soggy. Cool completely. Soften ice creams: Remove the chocolate ice cream from the freezer 15 to 20 minutes before you plan to spread it; you want it soft enough to spread but not melted. This timing depends on ambient room temperature—longer if your kitchen is cool, shorter if warm. Form the chocolate ice cream layer: Scoop softened chocolate ice cream into the prepared springform pan and press into an even layer about 1 to 1 1/2 inches thick. Smooth the surface with an offset spatula and return to the freezer for 30 minutes to 1 hour so it firms to a spreadable, stable stage. Warm and spread the hot fudge: Place the lid-off jar of hot fudge in the microwave for 20 to 25 seconds to soften; stir and check viscosity. Spread the warm fudge over the firm chocolate layer with a silicone or offset spatula, then immediately sprinkle an even layer of the cooled baked cookie crumbs over the fudge. Return to the freezer for 1 hour so the layers set. Add the vanilla layer: Allow vanilla ice cream to soften 15 to 20 minutes, then remove the pan from the freezer and spread a smooth layer of vanilla over the cookie crumb layer. Level the top and return the entire pan to the freezer for 4 to 6 hours or overnight to ensure the cake is fully solid for slicing. Chill bowl for frosting: About 30 minutes before frosting, place your metal mixing bowl and beaters in the freezer if using a stand or handheld mixer. Cold equipment helps heavy cream whip to stiff peaks quickly and prevents overworking. Make the whipped cream frosting: In the chilled bowl, beat 2 cups cold heavy cream with 1 1/4 cups powdered sugar and 1 1/2 teaspoons clear vanilla flavoring. Start on medium until the sugar dissolves, then increase speed and beat until stiff peaks form, about 3 to 4 minutes. Reserve 1 cup of frosting for piping in a decorator bag fitted with a large star tip. Unmold and frost: Work quickly: remove the cake from the freezer, release the springform sides, and lift the cake on the plastic wrap using a cake lifter or large spatula onto a serving plate. Remove plastic wrap. Using a chilled offset spatula, spread the remaining whipped frosting on the top and sides. Immediately pipe a shell or rosette border using the reserved frosting and add sprinkles. Return to the freezer until serving.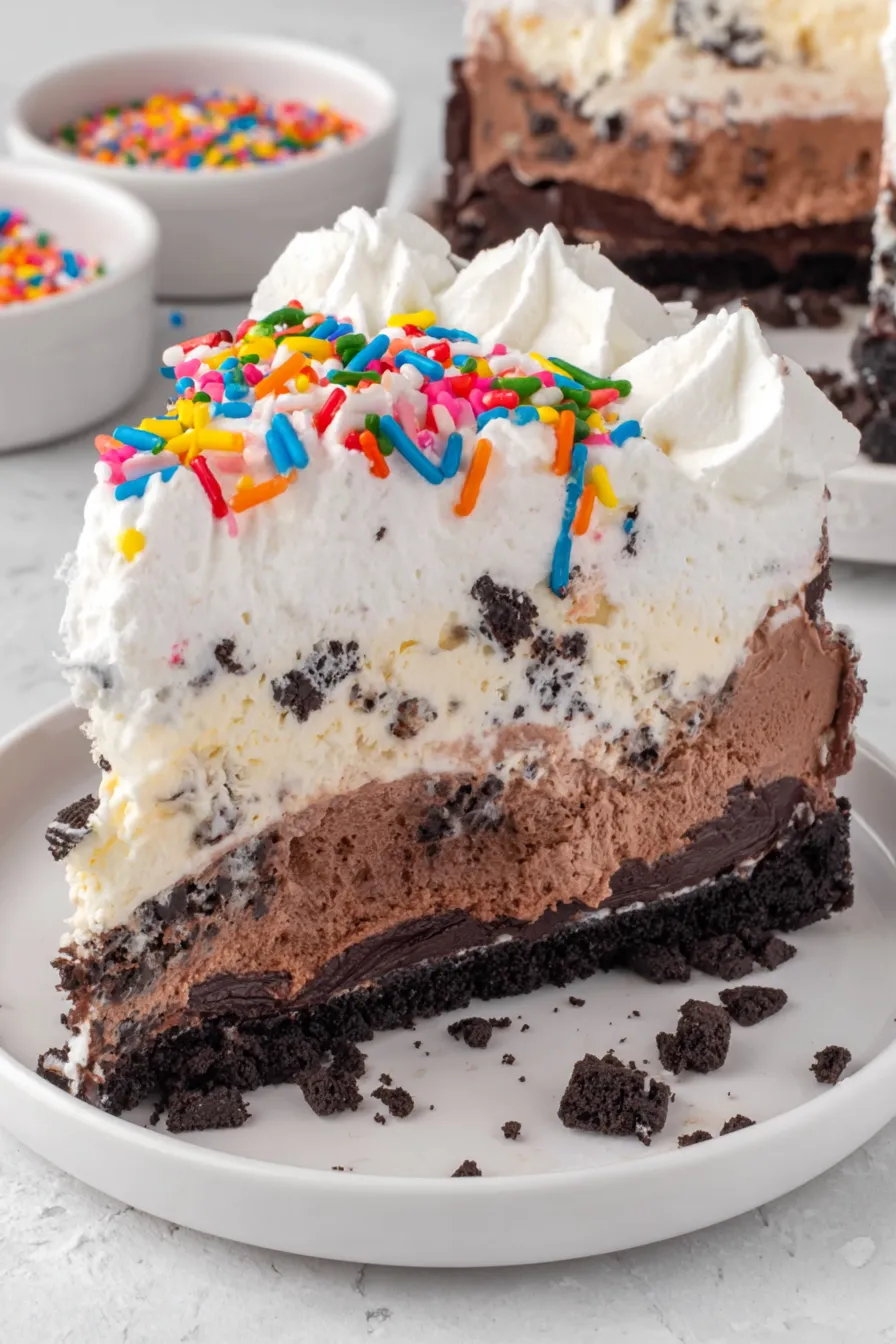
You Must Know
- This cake freezes well for up to 3 months when wrapped tightly in plastic wrap and aluminum foil to prevent freezer burn.
- Thaw at room temperature for 10 to 15 minutes before slicing so the cake yields clean slices without cracking the whipped cream.
- Because it contains dairy and gluten, store and label accordingly; keep away from strong-smelling foods that can transfer odors in the freezer.
- The baked cookie base gives structure and flavor but can be swapped for gluten-free chocolate cookies if needed.
- Plan for total time: active assembly is under an hour, but allow four to six hours of freezing for the best texture.
My favorite thing is how reliably this dessert evokes memories. Once, at a summer block party, a neighbor who had lived abroad returned home and declared this cake "exactly like childhood." Those small confirmations—that a dessert can transport someone—are why I keep this formula in my entertaining repertoire.
Storage Tips
Store the finished cake in the freezer, wrapped first with a layer of plastic wrap directly against the frosting to protect decoration, then a layer of aluminum foil. This double protection prevents ice crystals and helps maintain texture. For short-term storage, keep it in a cake keeper or large airtight container to avoid absorbing freezer odors. If you need to transport the cake, place it on a firm insulated carrier with ice packs and keep travel time under 90 minutes. When ready to serve, transfer the cake to the refrigerator for 10 to 15 minutes or let it sit at room temperature for 10 minutes for cleaner slicing.
Ingredient Substitutions
To make the cake gluten-free, substitute gluten-free chocolate sandwich cookies for the cookie base and verify the hot fudge is gluten-free. For a lower-sugar option, use no-sugar-added ice creams and reduce the powdered sugar in the whipped frosting slightly; the texture will be similar but flavor milder. For a dairy-free version, try coconut-based ice creams and a stabilized coconut whipped topping, though the mouthfeel will differ from traditional heavy cream frosting. If you prefer a firmer frosting, fold 1 tablespoon of instant gelatin dissolved in 2 tablespoons water into the whipped cream while beating.
Serving Suggestions
Serve the cake on a chilled platter straight from the freezer after a short rest for clean slices. Pair with fresh berries for a bright counterpoint to the sweetness or a small espresso for adults. For a festive birthday, top with a scattering of sprinkles and a few chocolate curls. If serving to a crowd, pre-slice the cake into wedges using a sharp, warmed knife (dip the knife in hot water and wipe dry between cuts) to create neat portions quickly.
Cultural Background
The original inspiration comes from the long tradition of layered frozen desserts that combine textures: a crunchy biscuit or cookie base, layered ice creams, and a light cream topping. This style is popular in North American quick-service establishments and evokes mid-20th-century convenience desserts where ready-made components were layered to produce an impressive frozen dessert without lengthy preparation. Many regions adapt these layers with local flavors, such as coffee, dulce de leche, or fruit compotes.
Seasonal Adaptations
In summer, switch to fruity ice creams like strawberry or mango and add a thin layer of fresh berry compote between layers to brighten the flavor. For winter celebrations, use peppermint or eggnog ice cream and top with crushed candy canes. Around holidays, swap sprinkles for toasted nuts or finely grated chocolate and consider a drizzle of warmed caramel instead of hot fudge for a richer, spiced profile.
Meal Prep Tips
Assemble the cake a day ahead and keep frozen; this frees up time on the day of your event. If you need two cakes, make the cookie crumb mixture in advance and store in an airtight container at room temperature for 2 days. Make the whipped cream frosting shortly before decorating for the best texture, or stabilize it with a tiny amount of gelatin if you must whip it hours in advance. Store leftover slices in a shallow container with layers separated by parchment to prevent sticking.
Whether you are marking a milestone or simply craving a nostalgic dessert, this copycat version captures the charm of the original while being forgiving and adaptable. I encourage you to make it your own with flavor swaps and decorations that reflect your celebration.
Pro Tips
Chill your mixing bowl and beaters for 30 minutes before whipping cream to getstiff peaks quickly.
Warm your knife under hot water and wipe dry between slices for cleaner cuts.
Bake the cookie crumbs briefly to remove excess moisture and add toasted flavor.
Reserve a cup of frosting for piping so you can quickly decorate before the cake warms.
This nourishing copycat dairy queen ice cream cake recipe is sure to be a staple in your kitchen. Enjoy every moist, high protein slice — it is perfect for breakfast or as a wholesome snack any time.
Tags
Copycat Dairy Queen Ice Cream Cake
This Copycat Dairy Queen Ice Cream Cake recipe makes perfectly juicy, tender, and flavorful steak every time! Serve with potatoes and a side salad for an unforgettable dinner in under 30 minutes.
Ingredients
Cookie Layer
Ice Cream Layer
Hot Fudge Layer
Whipped Cream Frosting Layer
Instructions
Prepare pan and preheat
Line a 9-inch springform pan with plastic wrap and set aside. Preheat the oven to 350°F and line a 10×15-inch baking sheet with parchment paper.
Make cookie crumbs
Crush 20 chocolate sandwich cookies finely in a food processor or zip bag, mix with 4 tablespoons melted salted butter until combined, spread on the baking sheet, and bake 7 to 8 minutes. Cool completely.
Soften and spread chocolate ice cream
Remove 1 quart chocolate ice cream from the freezer to soften for 15 to 20 minutes. Spread an even layer in the springform pan and freeze 30 minutes to 1 hour.
Warm and spread hot fudge
Warm the 11.75 oz jar of hot fudge in the microwave for 20 to 25 seconds, stir, then spread over the chocolate ice cream. Sprinkle the cooled cookie crumbs over the fudge and freeze 1 hour.
Add vanilla layer and freeze
Soften 1 quart vanilla ice cream for 15 to 20 minutes, spread over the cookie crumb layer, level, and freeze 4 to 6 hours or overnight.
Make whipped frosting and assemble
Chill mixing bowl and beaters. Beat 2 cups cold heavy cream with 1¼ cups powdered sugar and 1½ teaspoons clear vanilla until stiff peaks form. Reserve 1 cup for piping, frost the cake, pipe border, add sprinkles, and return to freezer.
Last Step: Please leave a rating and comment letting us know how you liked this recipe! This helps our business to thrive and continue providing free, high-quality recipes for you.
Nutrition
Did You Make This?
Leave a comment & rating below or tag
@yumelle on social media!
Categories:
You might also like...

Chicken Parmesan Meatball Sliders
Juicy chicken meatballs baked with Parmesan and herbs, spooned with marinara, and covered in melty mozzarella on toasted slider rolls. Irresistible for parties.

Spooky Spaghetti Monster Meatballs
Twirl eerie-colored spaghetti and top it with gooey, cheese-stuffed monster meatballs complete with olive eyes for a delightfully spooky family dinner.

10-Minute Egg Drop Soup
Silky egg ribbons swirl through savory chicken broth, scented with sesame and scallions. Simple pantry staples, ready in just 10 minutes.
Did You Make This?
Leave a comment & rating below or tag @yumelle on social media!
Rate This Recipe
Share This Recipe
Enjoyed this recipe? Share it with friends and family, and don't forget to leave a review!
Comments (1)
This recipe looks amazing! Can't wait to try it.
Comments are stored locally in your browser. Server comments are displayed alongside your local comments.

Hi, I'm Hannah!
What's Popular

30-Minute Meals!
Join to receive our email series which contains a round-up of some of our quick and easy family favorite recipes.