
>>

Crisp, buttery-sweet homemade hard candy flavored with anise, lemon, or orange. A nostalgic, quick confection you can make with simple pantry staples.
This recipe for homemade hard candy is one of those kitchen projects that feels both nostalgic and triumphant. I first learned this technique while helping my grandmother prepare small candies for holiday gift boxes. The result was always the same: a bright, glassy candy that snaps cleanly and carries pure, punchy flavor. The method is deceptively simple, relying on precise temperatures and a little confectioners sugar to shape and finish the pieces.
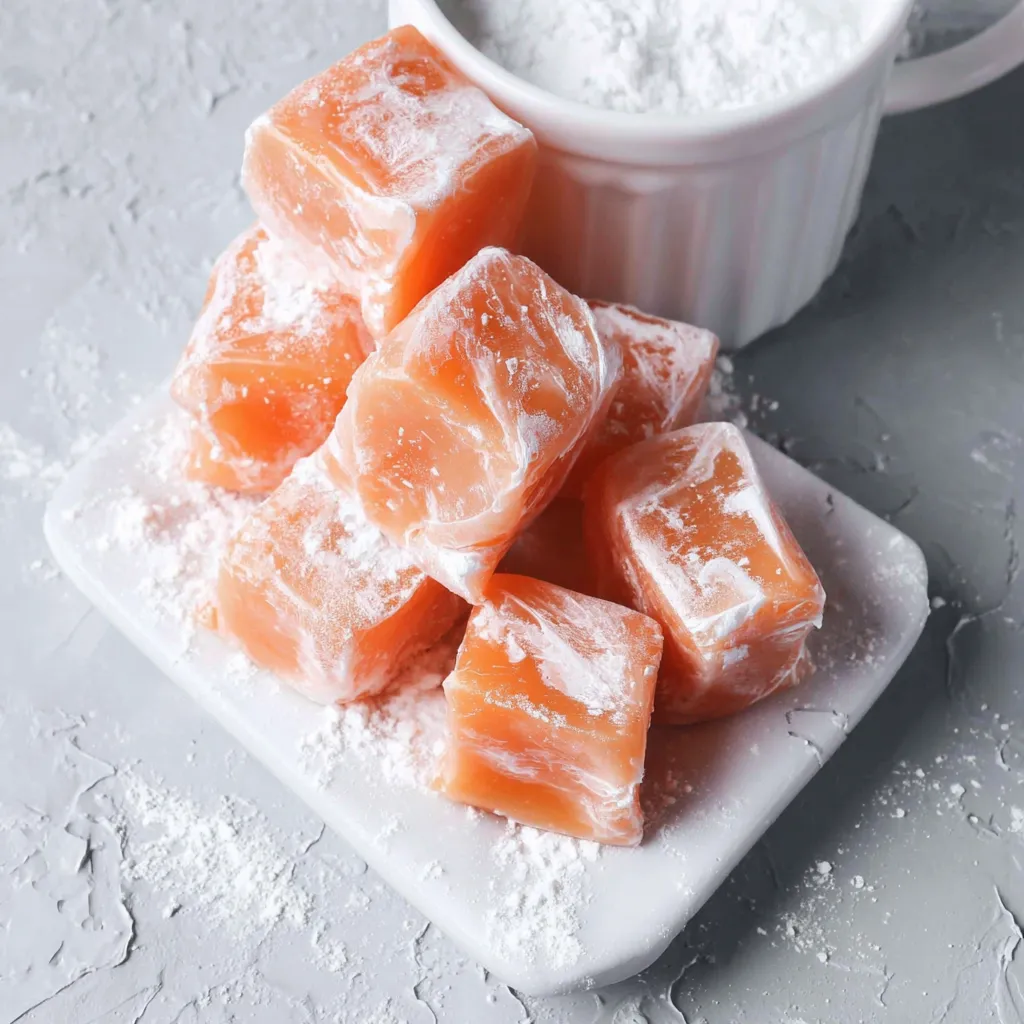
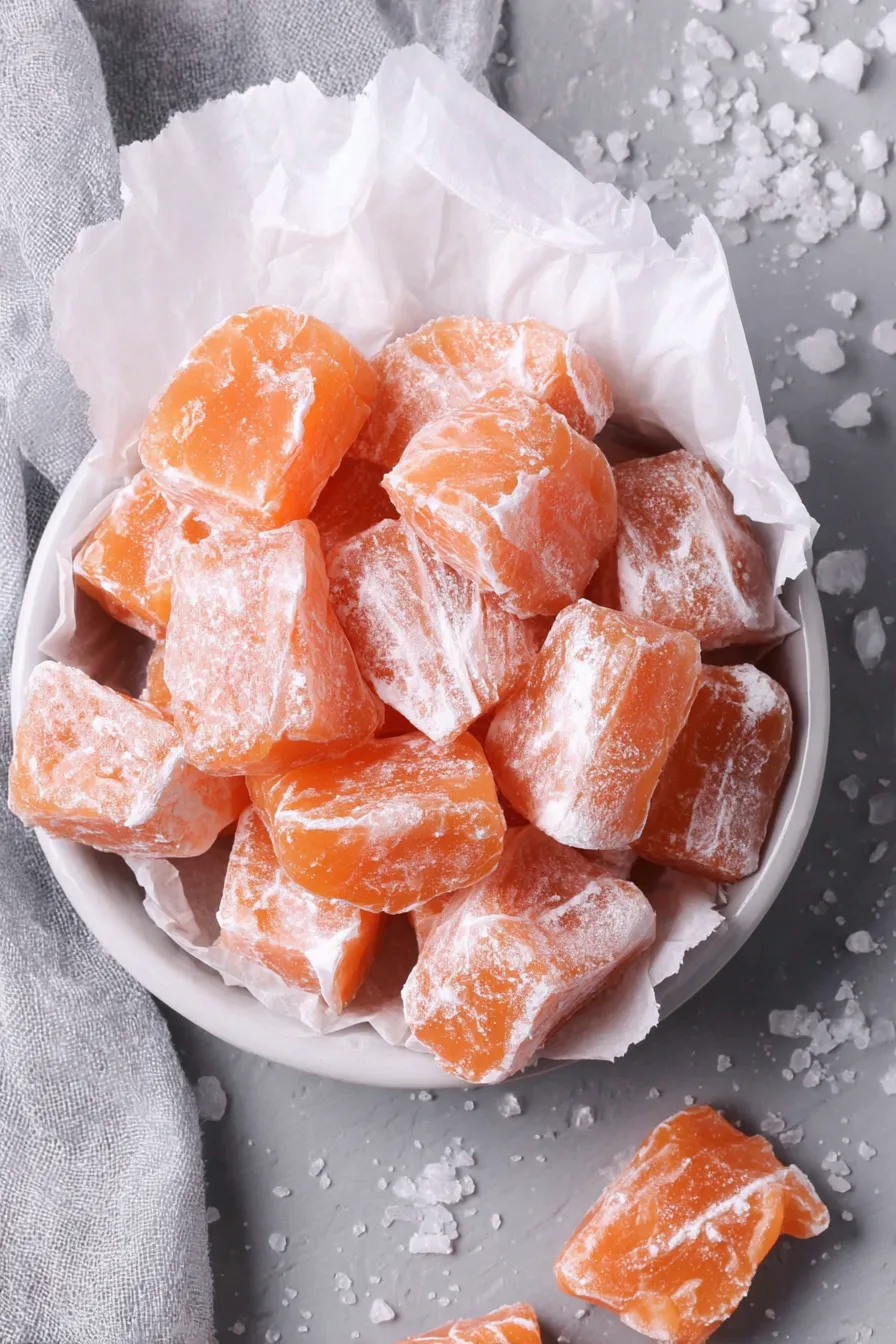
What makes this version special is its clarity and flexibility. The base is a straightforward sugar syrup cooked to the hard-crack stage, then lightly scented with anise, lemon, or orange extract. Those few choices allow you to create flavors that recall childhood candies, bakery counters, and festive moments. The texture is brittle but smooth, the shine almost jewel-like, and the quick finish with confectioners sugar prevents sticking while giving a classic matte dusted surface for easy handling.
As someone who loves creating edible gifts, I remember the first time I packaged these in little boxes and tied them with twine. Neighbors and friends said they tasted like small moments of joy. The simplicity of the ingredients always surprises newcomers: pure sugar and a thoughtful extract produce something much more than the sum of the parts.

My favorite part is the sound: a clean, glassy snap when you bite in. I once brought a tin of these to a neighborhood potluck and people kept asking how I achieved such a clear candy. The simple trick is precise temperature and fresh extracts. Over the years I have experimented with different flavors and found that bright citrus extracts pair beautifully with a lightly dusted surface to balance sweetness.
Store the candies in a cool, dry place at room temperature in an airtight container. Layer pieces between sheets of parchment or wax paper to prevent sticking. Avoid storing near humid appliances or the refrigerator where condensation can form; humidity will make the surface sticky and degrade the texture. Properly stored, candies keep for up to 4 weeks. For longer storage, freeze individual pieces in a single layer on a tray until firm, then transfer to a freezer-safe container for up to 3 months. Thaw at room temperature before serving.
If you do not have light corn syrup, you can substitute an equal amount of glucose syrup where available, but results may vary slightly in clarity. Avoid using dark corn syrup as it will add color and a molasses note. For extracts, use pure essential oils labeled for food use sparingly: such oils are more concentrated than extract, so reduce quantity by half. If you want unflavored clear candies, omit extract and add a couple drops of vanilla for a neutral sweetness. Do not attempt to replace granulated sugar with alternative sweeteners; they will not crystallize the same way.
Serve these as bite-sized treats in small tins, cellophane bags tied with ribbon, or arranged on a small dessert platter. They pair delightfully with coffee or tea as a sweet finish. For seasonal appeal, color the candy to match holidays: red or pink for valentines, orange and black for autumn, or pale yellow and green for spring. Garnish by sprinkling a contrasting color of confectioners sugar on the wrapped candies for a vintage look.
Hard candy has a long history across many cultures as a preserved sweet that travels well. Confectioners in the 19th century refined techniques for boiling sugar to specific stages, creating what we now recognize as glass-like candies. Flavors such as anise and lemon are traditional in many European hard candies, while countries around the world developed regional variations using local extracts and colorings. This recipe mirrors a classic American pantry-style approach that became popular with home candy makers and small confection shops.
Adapt the flavor and color to the season: use peppermint extract and pale green dye for winter mints, lemon and a light yellow tint for spring, or orange extract with autumnal orange hues for harvest-time treats. For holiday gift boxes, add edible glitter or dust with a tiny amount of colored sanding sugar on top before the confectioners sugar fully sets. For summer parties, consider citrus or tropical extracts for a brighter palate.
Make multiple batches in one session and store portions in airtight jars for quick access. Prepare the pans with confectioners sugar in advance and label them if you are doing different flavors or colors to avoid confusion. When multitasking, keep a heatproof measuring cup nearby for pouring, and have scissors or a warm knife ready for cutting. For gifting, assemble packaging supplies beforehand to keep the workflow smooth.
There is something deeply satisfying about transforming a few pantry staples into bright, crisp pieces of candy. Whether you make a single batch for yourself or a dozen tins for loved ones, these simple sweets always bring a smile. Try a small test batch to get your timing right, then scale up when you are confident. Enjoy the process, and share generously.
Use a heavy-bottomed saucepan and clip a candy thermometer to the side to ensure accurate temperature readings.
Steam the covered syrup for three minutes after it begins to boil to dissolve stray crystals on the pan sides.
Work quickly when pouring the hot syrup and wear heat-resistant gloves to avoid burns.
Sift confectioners sugar before use to create a smooth, nonstick bed and minimize lumps.
Label batches when making multiple flavors to avoid mixing colors or extracts.
This nourishing classic homemade hard candy recipe is sure to be a staple in your kitchen. Enjoy every moist, high protein slice — it is perfect for breakfast or as a wholesome snack any time.
No. The candy is shelf-stable at room temperature; refrigeration can cause moisture and stickiness.
Yes, cook to 300 degrees Fahrenheit using a reliable candy thermometer for a brittle, glassy finish.
Use a heavy-bottomed saucepan and a reliable candy thermometer. Avoid stirring after the syrup starts boiling to prevent crystallization.
This Classic Homemade Hard Candy recipe makes perfectly juicy, tender, and flavorful steak every time! Serve with potatoes and a side salad for an unforgettable dinner in under 30 minutes.
Line a 15 x 10 x 1 inch rimmed baking sheet with 5 to 6 cups sifted confectioners sugar to a 1/2 inch depth and make a continuous curved groove with a wooden spoon.
In a large heavy saucepan combine 2 cups granulated sugar, 3/4 cup light corn syrup, and 1/2 cup water. Stir to wet sugar and bring to a simmer over medium heat.
When the mixture boils, cover and steam for 3 minutes to dissolve stray crystals on the pan sides, then uncover.
Increase heat to medium-high and cook without stirring until a candy thermometer reads 300 degrees Fahrenheit, then remove from heat.
Stir in 1 to 2 teaspoons extract and a few drops of liquid food coloring off the heat until evenly combined.
Transfer syrup to a heatproof glass measuring cup and pour carefully into the sugar-lined groove in the prepared pan.
Generously cover the poured candy with confectioners sugar and let cool 30 to 45 minutes until firm.
Cut into bite-sized pieces with scissors or a sharp knife, shake off excess sugar, and store in an airtight container at room temperature.
Last Step: Please leave a rating and comment letting us know how you liked this recipe! This helps our business to thrive and continue providing free, high-quality recipes for you.
Leave a comment & rating below or tag
@yumelle on social media!

Juicy chicken meatballs baked with Parmesan and herbs, spooned with marinara, and covered in melty mozzarella on toasted slider rolls. Irresistible for parties.

Twirl eerie-colored spaghetti and top it with gooey, cheese-stuffed monster meatballs complete with olive eyes for a delightfully spooky family dinner.

Silky egg ribbons swirl through savory chicken broth, scented with sesame and scallions. Simple pantry staples, ready in just 10 minutes.
Leave a comment & rating below or tag @yumelle on social media!
Enjoyed this recipe? Share it with friends and family, and don't forget to leave a review!
This recipe looks amazing! Can't wait to try it.
Comments are stored locally in your browser. Server comments are displayed alongside your local comments.

Join to receive our email series which contains a round-up of some of our quick and easy family favorite recipes.
