
>>

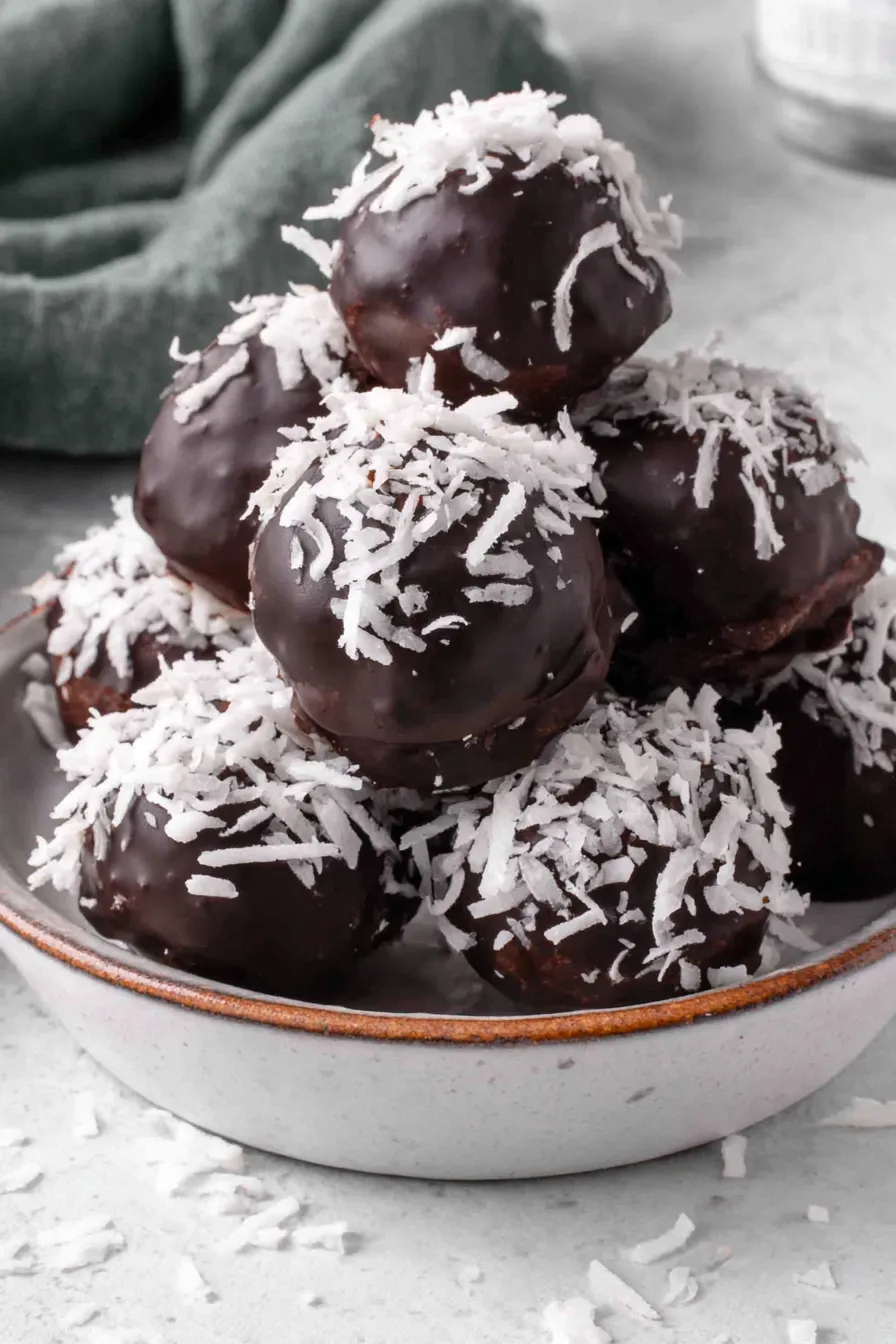
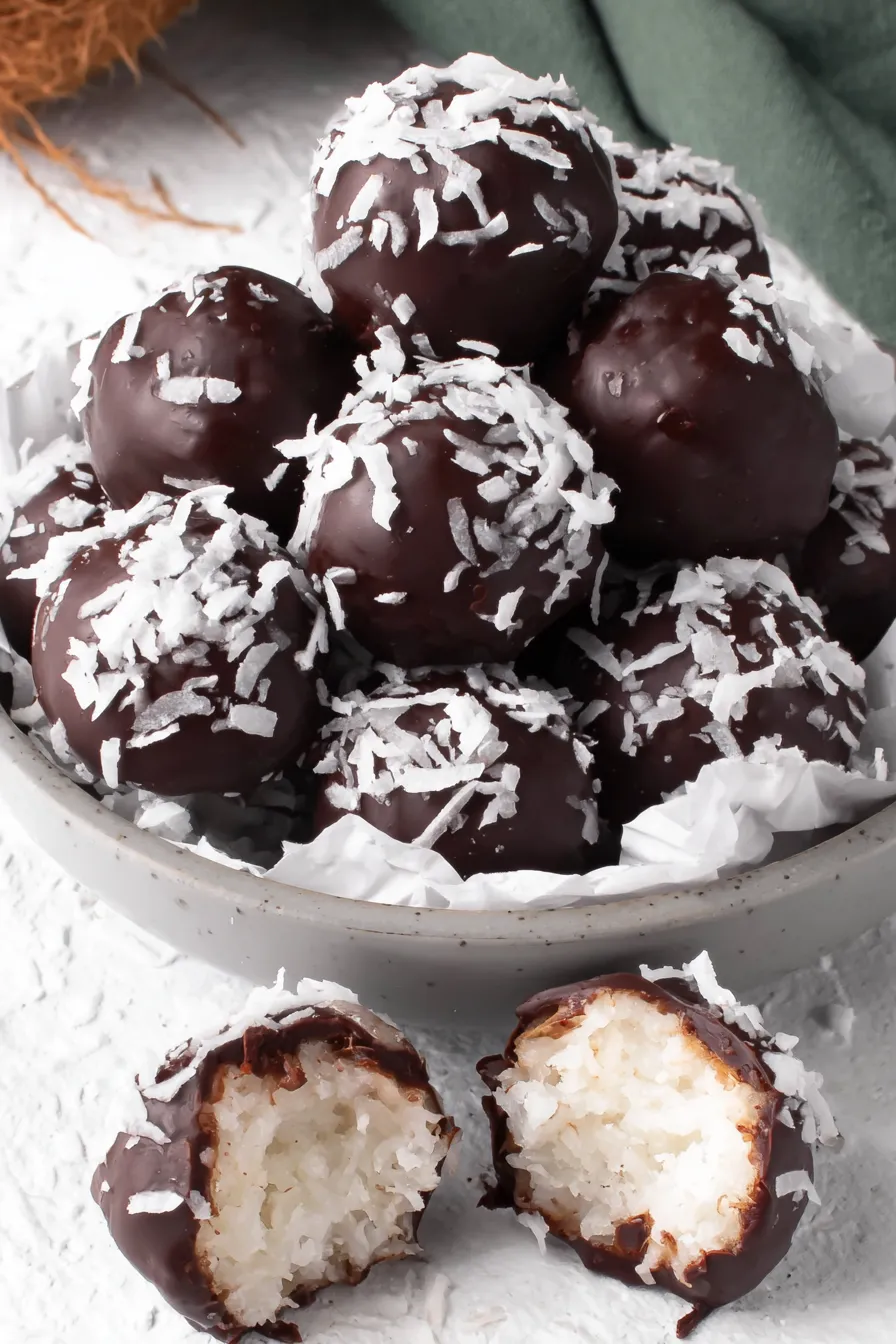
Chewy, chocolate-coated coconut bites that are easy to make and perfect for gifting — crisp chocolate shell with a sweet, tender coconut center.
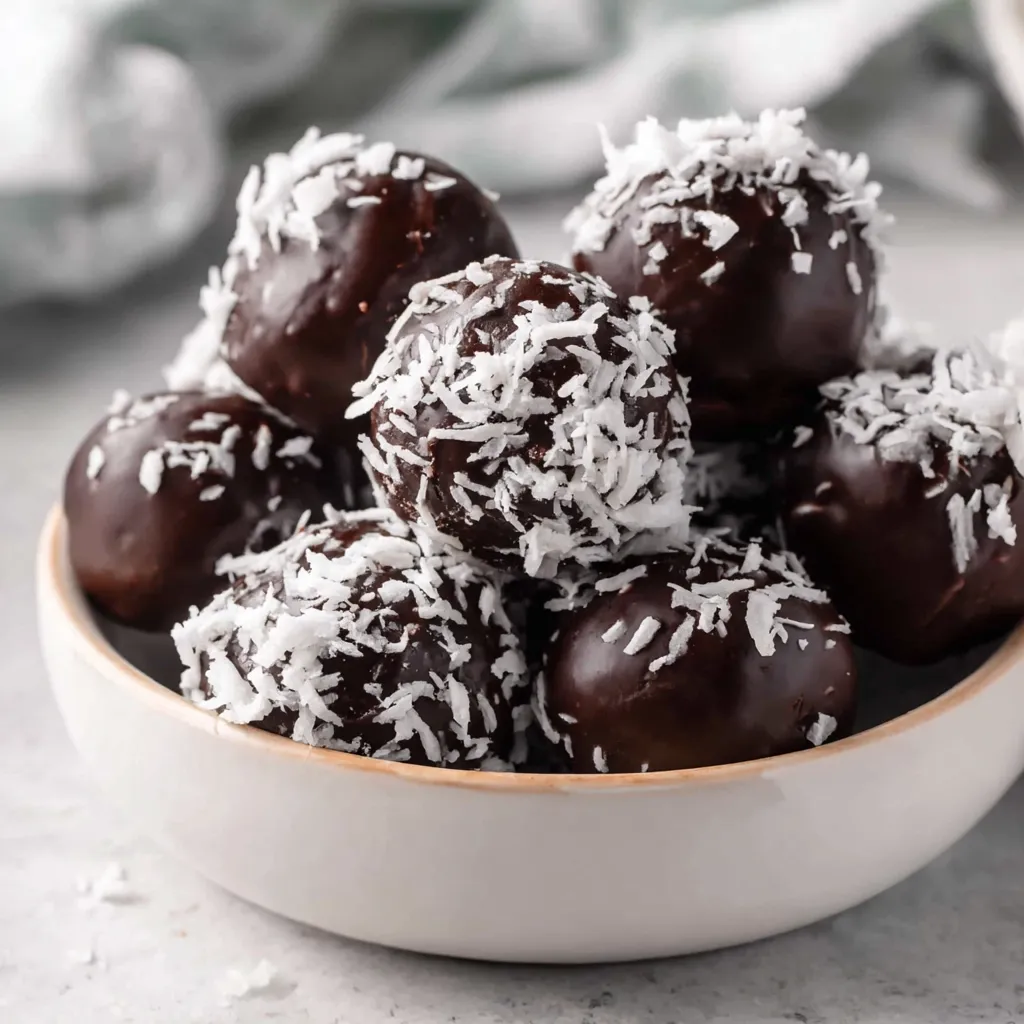
This simple, nostalgic treat has been a staple on my countertop since I first made it for a holiday cookie swap. The combination of finely shredded coconut, confectioners' sugar and sweetened condensed milk forms a tender, fudge-like center that’s irresistible when enrobed in glossy dark chocolate. I discovered this version during a busy December when I needed a quick, no-bake sweet to share with neighbors; it required minimal equipment and the results were so satisfying that they instantly became a requested contribution to every gathering since. The texture is what wins people over: a pleasantly chewy interior with a thin, snappy chocolate shell that gives the first satisfying bite.
These bites are deceptively easy to scale and adapt. I usually make a double batch when I know company is coming, and I keep a tray in the refrigerator for an afternoon pick-me-up. They keep well chilled, travel beautifully, and because the center is not overly wet, they hold up for several days in a sealed container. For me, making these always brings back memories of standing at my grandmother’s kitchen counter, rolling little sweets and sneaking one or two before they were fully set.
When I first shared these at a potluck, they vanished within minutes. Family members loved that they were not overly sweet like many store-bought candies, and guests appreciated how portable they were. Over time I learned small tweaks — like chilling the centers thoroughly before dipping — that make the process smoother and the coating neater.
My favorite part of this recipe is how many variations it supports — sometimes I add a splash of vanilla, other times a hint of orange zest or a tablespoon of cocoa for a deeper flavor. Family members often ask for a batch with extra toasted coconut on top, and friends have adopted these as their go-to homemade gift because they travel so well. Little tweaks over the years have made the process faster and the look neater: chilling in single layers, using a small scoop for consistency, and tapping off excess chocolate with a second fork.
Store the coated bites in a single layer or separated by parchment sheets in an airtight container in the refrigerator for up to two weeks. For longer storage, freeze them in a single layer on a baking sheet until solid, then transfer to a sealed freezer bag or container for up to three months. Thaw in the refrigerator overnight before serving or let sit at room temperature for 10–15 minutes. Avoid repeated temperature changes to prevent condensation on the chocolate shell.
If you want a dairy-free version, swap sweetened condensed coconut milk and use dairy-free chocolate chips. For a firmer center, reduce the condensed milk by 1–2 tablespoons; for a softer, fudgier interior, add an extra tablespoon. Shortening in the coating can be replaced with fractionated coconut oil for a coconut-forward flavor, though the chocolate snap will be slightly softer. If only large flake coconut is available, pulse it briefly in a food processor to mimic desiccated texture.
Present these on a simple platter lined with doilies for a party, or pack them into small gift boxes with tissue paper. Pair with espresso or a cup of strong tea — the intense chocolate and coconut stand up nicely to bold beverages. Garnishes such as a light dusting of cocoa, a sprinkle of toasted coconut, or a single flaked sea salt crystal on each piece elevate the presentation for special occasions.
Variations of chocolate-coated coconut confections appear in many cuisines — from homemade truffles in European traditions to coconut sweets in Caribbean and Latin American home kitchens. The method of combining shredded coconut and sweetened condensed milk to form a sweet, moldable center is a common technique for no-bake confections and reflects a global love of simple, portable sweet treats that require minimal baking.
In winter, add a pinch of warming spices like cinnamon or cardamom to the base; for spring and summer, grate in citrus zest (orange or lime) for freshness. For a festive look, dip half the pieces in white chocolate and half in dark, or drizzle contrasting chocolate lines across the finished bites. These small changes tailor the flavor to holidays without changing the straightforward method.
Make the centers up to three days ahead and keep chilled until ready to dip. If preparing for gifting, coat and set, then layer the bites between sheets of parchment in a tin; they’ll remain crisp and attractive for several days. For faster assembly, enlist helpers to roll centers, melt coating and dip in assembly-line fashion.
These little chocolate coconut bites are effortless, adaptable and endlessly shareable — they’ve become a small ritual in my kitchen and I hope they make their way into yours. Make a batch, try a variation, and pass them along; their simplicity is part of their charm.
Chill the centers until firm before dipping to prevent the chocolate from melting through.
Use a small cookie scoop for uniform-sized pieces and even setting.
If chocolate seizes, add a teaspoon of neutral oil and stir until smooth.
This nourishing chocolate coconut balls recipe is sure to be a staple in your kitchen. Enjoy every moist, high protein slice — it is perfect for breakfast or as a wholesome snack any time.
This Chocolate Coconut Balls recipe makes perfectly juicy, tender, and flavorful steak every time! Serve with potatoes and a side salad for an unforgettable dinner in under 30 minutes.
In a large bowl, mix 1 3/4 cups desiccated coconut and 1 3/4 cups powdered sugar. Add 1/2 cup sweetened condensed milk and stir until a pliable dough forms; adjust with small amounts of coconut or condensed milk if needed.
Scoop or roll approximately 1 tablespoon of mixture into 1-inch balls and place on a parchment-lined baking sheet. Chill in the refrigerator for 20–30 minutes until firm.
Melt 2 cups chocolate chips with 2 tablespoons shortening in a microwave-safe bowl at 50% power in 20–30 second bursts, stirring between each, until smooth. Alternatively, melt over a double boiler.
Dip each chilled ball into the melted chocolate, allowing excess to drip off, and return to the lined sheet. Sprinkle toppings if desired and let set at room temperature before chilling briefly to finish.
Last Step: Please leave a rating and comment letting us know how you liked this recipe! This helps our business to thrive and continue providing free, high-quality recipes for you.
Leave a comment & rating below or tag
@yumelle on social media!

Juicy chicken meatballs baked with Parmesan and herbs, spooned with marinara, and covered in melty mozzarella on toasted slider rolls. Irresistible for parties.

Twirl eerie-colored spaghetti and top it with gooey, cheese-stuffed monster meatballs complete with olive eyes for a delightfully spooky family dinner.

Silky egg ribbons swirl through savory chicken broth, scented with sesame and scallions. Simple pantry staples, ready in just 10 minutes.
Leave a comment & rating below or tag @yumelle on social media!
Enjoyed this recipe? Share it with friends and family, and don't forget to leave a review!
This recipe looks amazing! Can't wait to try it.
Comments are stored locally in your browser. Server comments are displayed alongside your local comments.

Join to receive our email series which contains a round-up of some of our quick and easy family favorite recipes.
