
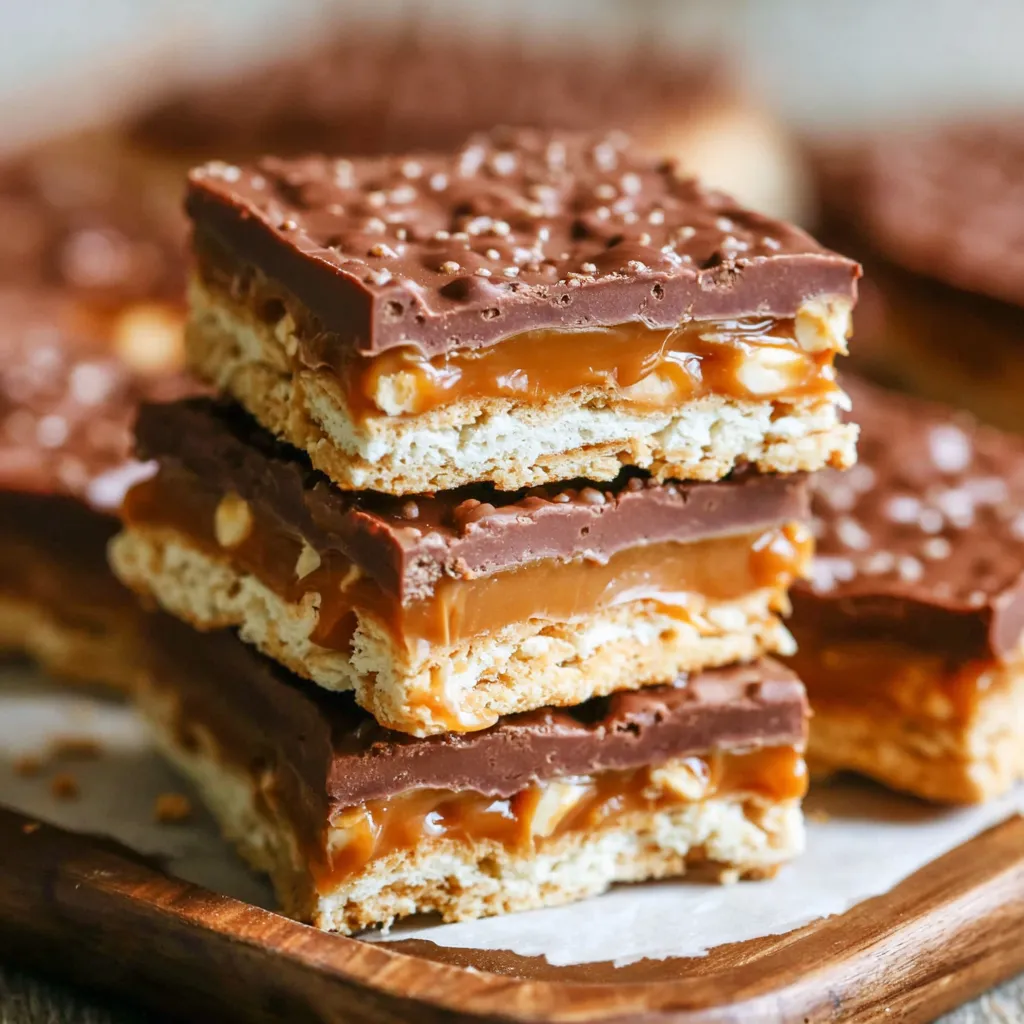
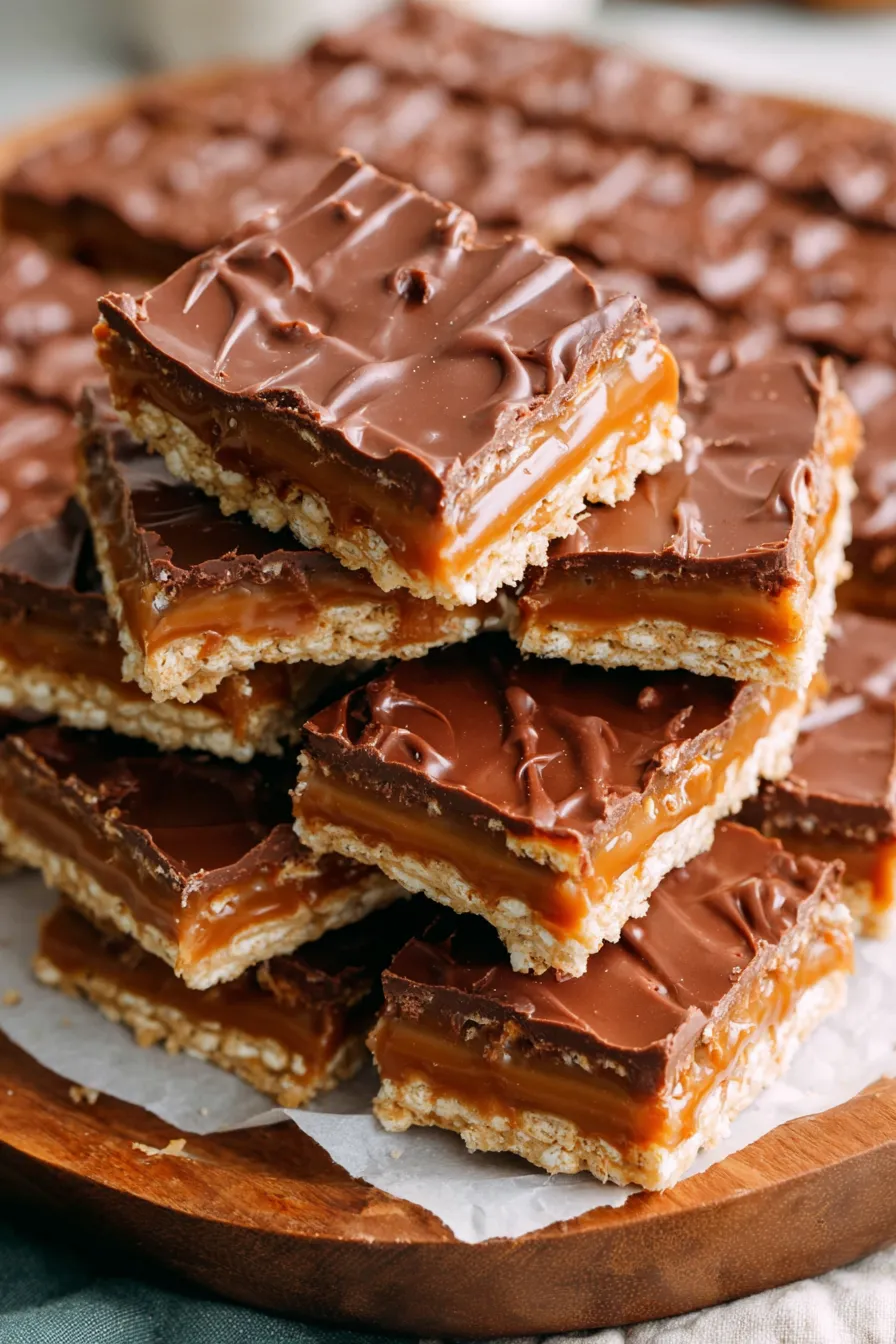
Caramel Cracker Bars

Buttery layers of crackers sandwiched with homemade caramel and topped with a silky chocolate-butterscotch-peanut butter glaze—crunchy, chewy, and utterly addictive.
This recipe for Caramel Cracker Bars is one I first made for a holiday potluck when I was pressed for time but wanted to bring something that would disappear fast. The combination of crisp crackers, warm homemade caramel, and a glossy chocolate-butterscotch topping instantly won over the table—kids and adults both walked back for seconds. I discovered this technique on a busy afternoon when pantry staples were all I had left, and the layered approach turned a few humble ingredients into something celebratory and nostalgic.
What makes these bars special is the balance of textures and the simplicity of the method. The crackers provide a crisp, slightly salty base that contrasts beautifully with the chewy, butter-forward caramel. The stovetop caramel uses evaporated milk for a rounded, not-too-sweet finish, while the melted chocolate, butterscotch chips, and peanut butter form a shiny, sliceable topping. I love that the bars slice cleanly if chilled, and that they travel well—perfect for bake sales, potlucks, or an after-dinner treat.
Why You'll Love This Recipe
- Fast assembly: after a short stovetop caramel, the bars come together in about 30 minutes active time and then chill until set.
- Pantry-friendly: uses club crackers or similar crackers, evaporated milk, and common baking staples—no specialty ingredients required.
- Make-ahead friendly: can be chilled overnight and sliced just before serving, making hosting easier.
- Crowd-pleasing: sweet, buttery caramel with a crunchy base appeals to many tastes and is perfect for gatherings.
- Adaptable topping: the chocolate-butterscotch-peanut butter layer is flexible—adjust proportions or chips to suit preferences.
In my family these bars became a tradition fast—my sister asked me to double the batch the next week. They were the first thing gone at a backyard picnic and are now a requested contribution for every holiday cookie swap.
Ingredients
- Club crackers: 84 crackers (about 3 rows of 9 per layer in a 9x13-inch pan). Choose a standard salted club cracker brand for contrast with the sweet caramel. If using a different pan size, you may need to trim crackers to fit.
- Butter: 1 cup (2 sticks) unsalted butter adds richness and helps create a glossy caramel—use real butter rather than margarine for best flavor and texture.
- Graham crackers: 1 cup, crushed. Adds structure to the caramel and helps it set more firmly; quick pulse in a food processor or place in a sealed bag and crush with a rolling pin.
- Brown sugar: 2 cups packed. Use dark or light brown depending on how molasses-forward you want the caramel; packed measurement ensures the right sweetness and chew.
- Evaporated milk: 2/3 cup. This stabilizes the caramel and creates a creamy mouthfeel without watering it down—do not substitute with regular milk.
- Vanilla extract: 2 teaspoons, stirred in after boiling to preserve aroma and brightness.
- Milk chocolate chips: 1 cup for the topping; choose a good-quality brand for smooth melt and flavor.
- Butterscotch chips: 1 cup to deepen the toffee notes—half-and-half with chocolate creates a complex topping.
- Peanut butter: 1/2 cup, creamy. Adds gloss and a nutty note that pairs with both chocolate and butterscotch. Use a natural-style peanut butter if you prefer a more pronounced peanut flavor.
Instructions
Prepare the pan:Line a 9x13-inch baking dish with parchment, leaving a 2-inch overhang on the long sides. This overhang acts as handles to lift the bars out cleanly for slicing. If you use a jelly roll pan, plan for a few extra crackers per layer and consider trimming crackers to fit rounded edges.Lay the first layer of crackers:Place crackers in three neat rows across the pan for a straight-sided 9x13. Aim for even spacing so the caramel can seep between crackers slightly. If a cracker doesn’t fit at the edge, trim with a sharp knife for a snug fit.Make the caramel:In a large heavy-bottomed saucepan, combine 1 cup crushed graham crackers, 1 cup (2 sticks) butter, 2 cups packed brown sugar, and 2/3 cup evaporated milk. Set over medium heat and stir constantly to prevent scorching. Bring to a steady boil, then reduce heat slightly and boil for 7 minutes while stirring without interruption. Constant stirring helps prevent graininess and ensures an even texture. Remove from heat and stir in 2 teaspoons vanilla.Assemble the layers:Pour half of the hot caramel evenly over the first cracker layer; it will spread and fill gaps. Immediately top with a second layer of crackers, then pour the remaining caramel over that layer. Finish with a third layer of crackers pressed gently into the caramel to ensure adhesion. Work quickly while the caramel is hot for best adhesion.Prepare the topping:Place 1 cup milk chocolate chips, 1 cup butterscotch chips, and 1/2 cup creamy peanut butter in a microwave-safe bowl. Heat for 1 minute, stir thoroughly, then continue in 10-second bursts, stirring after each interval until smooth. Use a spatula to spread the warm mixture evenly across the top layer of crackers. Smooth the surface for neat bars.Chill and slice:Refrigerate the pan until the topping is firm, at least 1 to 2 hours. Use the parchment overhang to lift the block from the pan and place it on a cutting board. Use a sharp chef's knife warmed under hot water and dried to make clean slices—wipe between cuts to prevent dragging chocolate smears.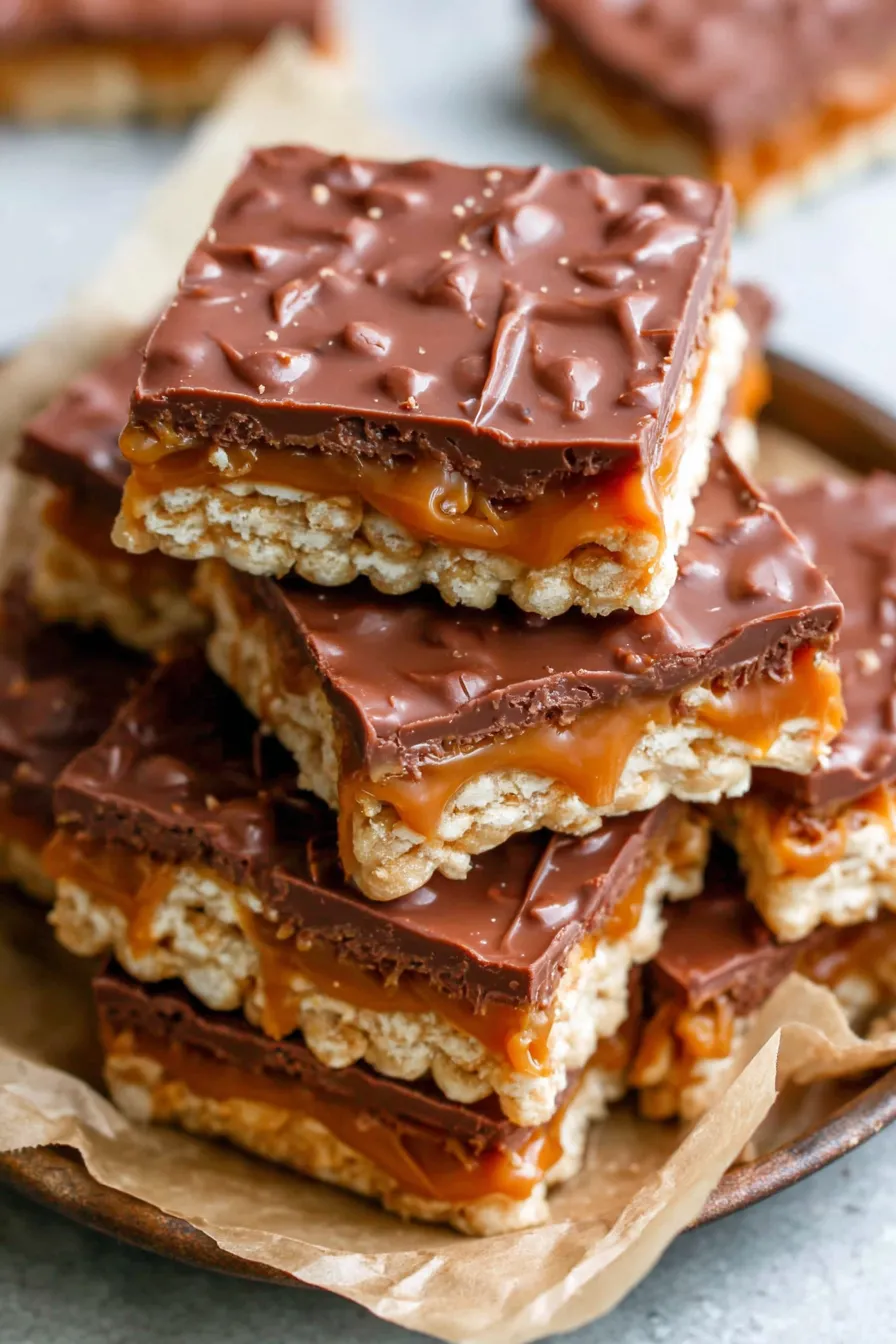
You Must Know
- These bars keep well in the refrigerator for up to 10 days when stored in an airtight container—they also freeze well for up to 3 months if individually wrapped.
- High in energy: expect roughly 250–350 calories per bar depending on size; they are rich in butter, sugar, and chocolate so serve in modest portions.
- The caramel is stabilized by evaporated milk and crushed graham crackers; boiling 7 minutes cooks off moisture making the caramel chewy rather than runny.
- For clean slicing, chill thoroughly and use a warm, dry knife—the heat prevents the chocolate top from cracking while the dryness prevents sticking.
My favorite part of this treat is how quickly it evokes nostalgia—every time I bring a pan to a gathering someone will say it reminds them of a childhood favorite. Once I swapped in dark chocolate and toasted pecans for a version that was a hit at a fall bake sale; the base method is very forgiving, which is part of its magic.
Storage Tips
Store bars in a single layer if possible in an airtight container in the refrigerator. Layer parchment between tiers to prevent sticking. At room temperature they will soften and can become sticky, so refrigeration is recommended for maintaining a firm texture. For longer storage, wrap individual bars tightly in plastic wrap and freeze in a sealed container. Thaw in the refrigerator overnight for best texture; bringing them to room temperature for 15 minutes before serving restores chew without melting the topping.
Ingredient Substitutions
If you need to adjust ingredients, swap club crackers for saltine crackers for a slightly different salt profile, or use graham cracker crumbs substitute with digestive biscuits if available. For a nut-free variation skip the peanut butter and increase butterscotch chips by 1/2 cup for sweetness and texture. To reduce sweetness slightly, use semi-sweet chocolate instead of milk chocolate. Avoid replacing evaporated milk with regular milk—the caramel may not set properly.
Serving Suggestions
Slice into small rectangles and serve on a platter garnished with a light sprinkle of flaky sea salt to contrast the sweetness, or dust lightly with cocoa powder for a more sophisticated presentation. Pair with coffee or a simple cold milk for an old-fashioned dessert table. These bars work equally well as individually wrapped treats for gift baskets. For a party, serve alongside small bowls of sliced fruit to balance richness.
Cultural Background
Layered confection bars like these have roots in American home baking traditions where pantry staples are transformed into decadent treats. The combination of crackers or cookies with boiled caramel and chocolate is a common theme in many community cookbooks and has evolved into numerous regional variations—some use coconut, nuts, or different chocolate blends to reflect local tastes.
Seasonal Adaptations
In summer, swap the peanut butter for almond butter and scatter toasted sliced almonds on top for a lighter note. For the holidays, fold in 1/2 teaspoon of ground cinnamon into the caramel and sprinkle crushed peppermint candies on the chocolate before it sets. In autumn, add a handful of chopped toasted pecans between the caramel layers for a toasty contrast.
Meal Prep Tips
Make the caramel and assemble the layers earlier in the day, then chill until just before the event. The topping can be melted and spread just before guests arrive so the bars look freshly made. To speed slicing for large groups, use a bench scraper dipped in hot water and dried between cuts to create straight edges quickly.
These bars are a dependable, crowd-pleasing treat that reward attention to simple technique. A minimum of fuss yields a maximum of flavor—give them a try and make them your own.
Pro Tips
Use a heavy-bottomed saucepan and stir constantly during the 7-minute boil to prevent scorching and graininess.
Line the pan with parchment and leave an overhang for easy removal and cleaner slicing.
Warm and dry your knife between cuts to slice clean bars without dragging chocolate.
If you prefer less sweetness, substitute semi-sweet chocolate for milk chocolate or reduce the butterscotch by 1/4 cup.
This nourishing caramel cracker bars recipe is sure to be a staple in your kitchen. Enjoy every moist, high protein slice — it is perfect for breakfast or as a wholesome snack any time.
FAQs about Recipes
How long should I chill the bars before cutting?
Yes — after chilling for at least 1 to 2 hours the bars will firm and can be sliced. If the topping looks soft, chill longer.
How do I store leftovers?
Store in an airtight container in the refrigerator for up to 10 days; freeze individual bars for up to 3 months.
Tags
Caramel Cracker Bars
This Caramel Cracker Bars recipe makes perfectly juicy, tender, and flavorful steak every time! Serve with potatoes and a side salad for an unforgettable dinner in under 30 minutes.
Ingredients
Base and layers
Caramel mixture
Topping
Instructions
Line the pan
Line a 9x13-inch baking dish with parchment paper leaving an overhang for easy removal later.
Lay crackers
Arrange 27 club crackers in three neat rows to form the first layer, trimming any crackers to fit snugly if needed.
Make caramel
Combine crushed graham crackers, butter, brown sugar, and evaporated milk in a large saucepan. Bring to a boil over medium heat, then boil for 7 minutes stirring constantly to avoid scorching. Remove from heat and stir in vanilla.
Assemble layers
Pour half the caramel over the first cracker layer, top with a second layer of crackers, add the remaining caramel, and finish with a third cracker layer pressed lightly into the caramel.
Prepare topping
Melt chocolate chips, butterscotch chips, and peanut butter together in a microwave-safe bowl in 1 minute then 10-second intervals, stirring until smooth. Spread evenly over the top layer.
Chill and cut
Refrigerate until firm, at least 1-2 hours. Use parchment overhang to lift from pan and slice into bars with a warm dry knife for clean edges.
Last Step: Please leave a rating and comment letting us know how you liked this recipe! This helps our business to thrive and continue providing free, high-quality recipes for you.
Nutrition
Did You Make This?
Leave a comment & rating below or tag
@yumelle on social media!
Categories:
You might also like...

Chicken Parmesan Meatball Sliders
Juicy chicken meatballs baked with Parmesan and herbs, spooned with marinara, and covered in melty mozzarella on toasted slider rolls. Irresistible for parties.

Spooky Spaghetti Monster Meatballs
Twirl eerie-colored spaghetti and top it with gooey, cheese-stuffed monster meatballs complete with olive eyes for a delightfully spooky family dinner.

10-Minute Egg Drop Soup
Silky egg ribbons swirl through savory chicken broth, scented with sesame and scallions. Simple pantry staples, ready in just 10 minutes.
Did You Make This?
Leave a comment & rating below or tag @yumelle on social media!
Rate This Recipe
Share This Recipe
Enjoyed this recipe? Share it with friends and family, and don't forget to leave a review!
Comments (1)
This recipe looks amazing! Can't wait to try it.
Comments are stored locally in your browser. Server comments are displayed alongside your local comments.

Hi, I'm Hannah!
What's Popular

30-Minute Meals!
Join to receive our email series which contains a round-up of some of our quick and easy family favorite recipes.