
>>

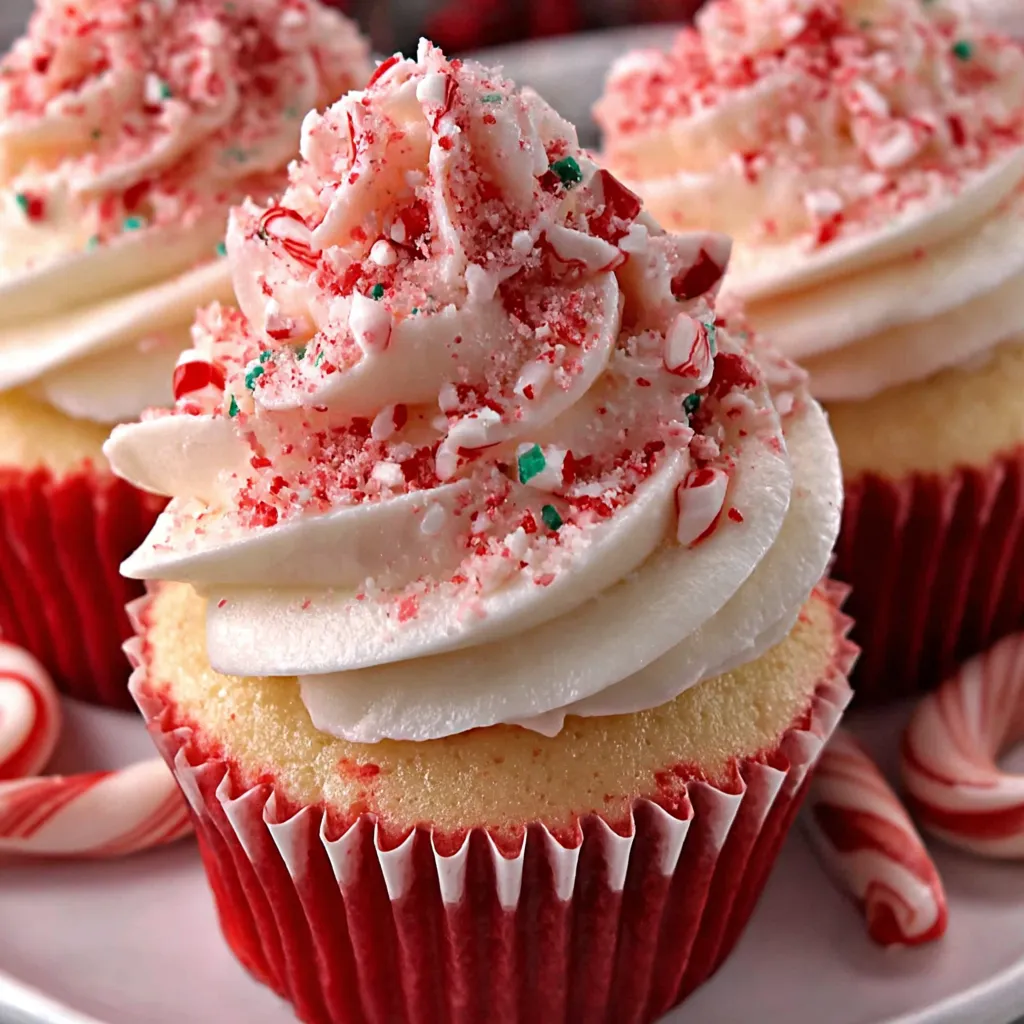
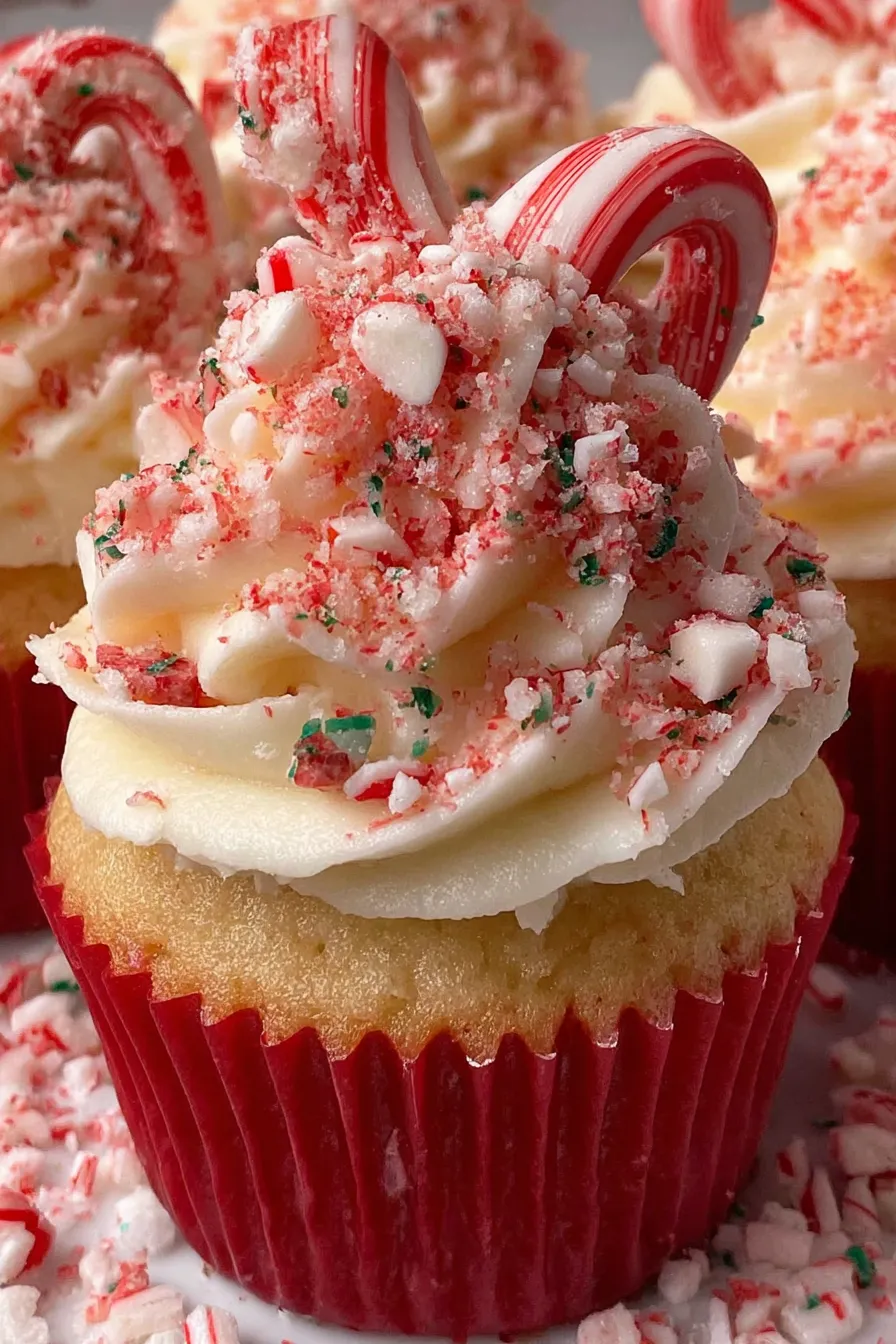
Festive white and red swirl cupcakes topped with a creamy peppermint buttercream and a little candy cane sparkle. Perfect for holiday gatherings and easy to make ahead.
This is my go to holiday treat whenever the season calls for something cheerful and snackable. I first made these peppermint swirl cupcakes the winter I wanted a bakery style treat that did not require complicated techniques. The result was exactly what I wanted, a tender white cake with a moist crumb and a bright peppermint frosting that delivers both cool flavor and a nostalgic crunch. I remember making a double batch for a neighborhood cookie swap and watching kids and adults alike pick their favorite swirl pattern before diving into the frosting.
The texture of the crumb is soft and springy because I follow the cake mix instructions closely and do not over mix. The frosting is rich but airy thanks to chilled butter beaten slowly at first and brought to volume with confectioners sugar and a splash of heavy cream. The peppermint extract keeps the frosting lively without being sharp, and the little pieces of candy cane or course peppermint sugar add a pleasing contrast in texture. These are approachable enough for novice bakers and special enough for holiday tables.
I first learned how to paint the inside of the piping bag with gel color from a pastry class I took years ago. The trick elevates the presentation and creates a neat candy cane stripe when you pipe. My family loves the way the stripes peek through the frosting. Every holiday party I bring these to, someone asks for the recipe and then reports back with their own spin on the topping.
One of my favorite aspects of this treat is how forgiving the method is. If you overfill a cup a little the bake time increases by a few minutes and the texture remains pleasant. When I bring these to holiday parties I often hear that the peppermint flavor is nostalgic without being overpowering. Family members have told me it tastes like snow days and cozy sweaters, which is exactly the kind of reaction I aim for when baking seasonal sweets.
Store finished cupcakes in a single layer in an airtight container in the refrigerator for up to three days. If you need to keep them longer freeze unfrosted cupcakes on a tray until firm, then transfer to a freezer safe bag for up to three months. Thaw overnight in the refrigerator and frost when ready to serve. For best texture let refrigerated cupcakes come to room temperature for about 20 to 30 minutes before serving so the frosting softens slightly and the crumb becomes tender again.
If you need dairy free options substitute a non dairy stick spread in place of butter for the frosting and use full fat coconut cream instead of heavy cream. Choose a vegan vanilla and peppermint extract labeled vegan. For gluten free, use a certified gluten free white cake mix and follow package instructions. To reduce sweetness for a less sugary frosting cut the confectioners sugar by one quarter cup and increase heavy cream by one teaspoon while tasting as you go to maintain structure.
Present these cupcakes on a tiered stand or arrange them on a wide platter dusted with a little extra peppermint sugar for sparkle. They pair beautifully with a simple hot chocolate or a lightly brewed black tea to balance the sweet peppermint. For a festive centerpiece, add small edible holly leaves or a thin strip of candied orange peel for a complementary citrus note. These cupcakes are perfect for cookie swaps, classroom parties, or as a sweet finish to a holiday dinner.

The combination of white cake and peppermint evokes a modern holiday aesthetic influenced by European candy traditions. Candy canes trace back to the 17th and 18th centuries as simple sugar sticks and evolved into the iconic red and white striped cane. Baking them into cupcakes is a contemporary twist that blends the nostalgia of peppermint candy with American style party baking. The visual red and white contrast also mirrors classic holiday color schemes and has become widely used in seasonal baking across North America.
For winter gatherings keep the peppermint focus. For other seasons swap the peppermint extract for lemon or almond and tint the batter accordingly for spring or summer events. During autumn try a cinnamon buttercream and use crushed ginger snap for garnish instead of candy cane. The same technique of alternating batters works with any color pairing so you can adapt the look for birthdays or themed parties easily.
If you are preparing for a large event bake cupcakes one to two days ahead and store them unfrosted in a covered container at room temperature. Prepare frosting the day before and refrigerate. On the day of the event bring the frosting to room temperature and rewhip quickly to restore volume before piping. This saves time and keeps your decorations fresh. Transport cupcakes in a single layer in a container with shallow sides to protect the swirls.
These cupcakes are simple to make yet pack a lot of personality. They are a dependable holiday favorite and a great way to introduce novice bakers to piping and simple decorating techniques. Enjoy creating your own swirl patterns and have fun sharing them with friends and family.
Sift confectioners sugar before adding to the butter to ensure a smooth buttercream.
Paint gel color inside the piping bag with a small brush to create the candy cane stripe effect.
Cool cupcakes completely before frosting to prevent the buttercream from melting.
If frosting becomes too soft, chill the bowl for 15 minutes and re whip to restore structure.
This nourishing candy cane peppermint cupcakes recipe is sure to be a staple in your kitchen. Enjoy every moist, high protein slice — it is perfect for breakfast or as a wholesome snack any time.
This Candy Cane Peppermint Cupcakes recipe makes perfectly juicy, tender, and flavorful steak every time! Serve with potatoes and a side salad for an unforgettable dinner in under 30 minutes.
Position oven racks in the upper and lower thirds and preheat oven to 175 degrees Celsius. Line 18 cupcake cups in two standard muffin tins with paper liners.
Prepare the cake mix following package instructions for eggs, oil and water. Divide batter into two bowls and tint one portion with red gel food coloring until the desired shade is reached.
Alternate spooning white and red batter into liners until about half full. Each cup should hold approximately 45 to 60 milliliters of batter.
Bake for 18 to 20 minutes rotating pans halfway through. Check doneness with a toothpick. Cool completely on a wire rack before frosting.
Beat softened butter and kosher salt on medium speed until creamy then add sifted confectioners sugar in two batches. Add heavy cream, vanilla and peppermint extract and beat on medium high for two minutes until light and fluffy.
Paint two thin lines of red gel inside a piping bag fitted with a 1.27 centimeter round tip, fill with frosting and pipe onto cooled cupcakes. Garnish with mini candy canes or coarse peppermint sugar.
Last Step: Please leave a rating and comment letting us know how you liked this recipe! This helps our business to thrive and continue providing free, high-quality recipes for you.
Leave a comment & rating below or tag
@yumelle on social media!

Juicy chicken meatballs baked with Parmesan and herbs, spooned with marinara, and covered in melty mozzarella on toasted slider rolls. Irresistible for parties.

Twirl eerie-colored spaghetti and top it with gooey, cheese-stuffed monster meatballs complete with olive eyes for a delightfully spooky family dinner.

Silky egg ribbons swirl through savory chicken broth, scented with sesame and scallions. Simple pantry staples, ready in just 10 minutes.
Leave a comment & rating below or tag @yumelle on social media!
Enjoyed this recipe? Share it with friends and family, and don't forget to leave a review!
This recipe looks amazing! Can't wait to try it.
Comments are stored locally in your browser. Server comments are displayed alongside your local comments.

Join to receive our email series which contains a round-up of some of our quick and easy family favorite recipes.
