
>>

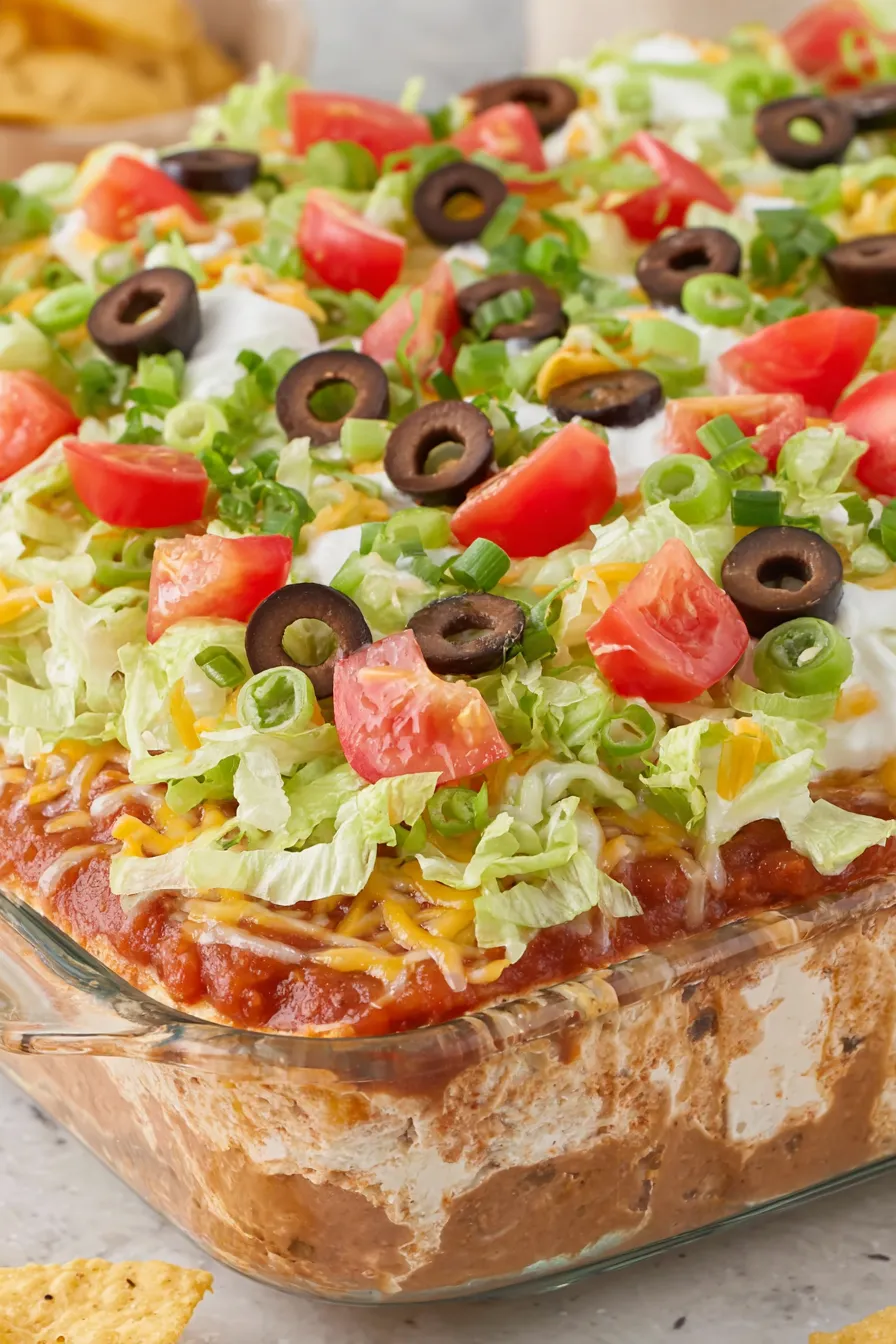
A crowd-pleasing, no-cook seven-layer dip layered with refried beans, guacamole, seasoned sour cream, salsa, cheese, lettuce, olives, tomatoes and green onions—perfect for parties and weeknight snacking.
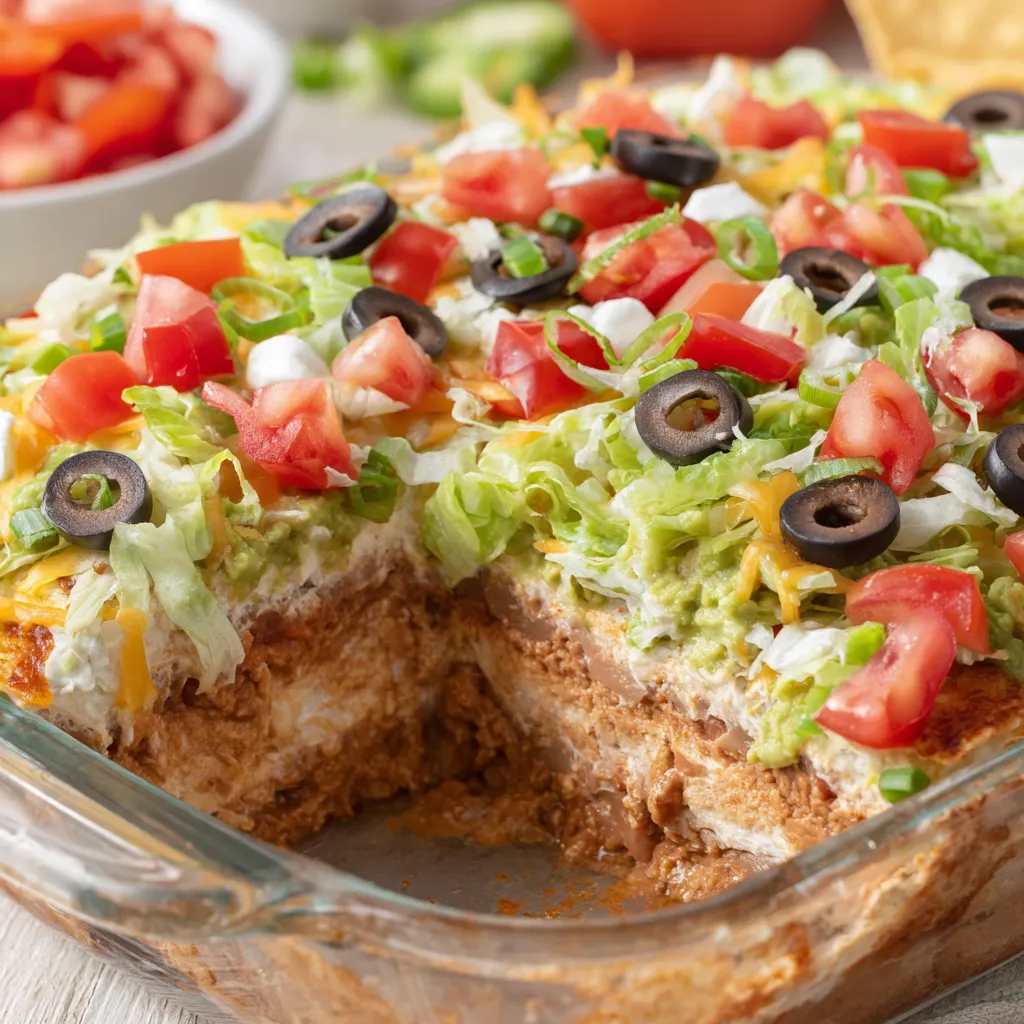
This seven-layer dip has been a celebration staple in my house for as long as I can remember. I first made this version on a busy game day when I wanted something fast, colorful, and satisfying—something that would travel well to a potluck and disappear within minutes. The first time I layered the creamy refried beans, bright guacamole, tangy seasoned sour cream, drained chunky salsa, melty fiesta cheese, crunchy lettuce and salty olives, I knew it had become a keeper. Every bite delivers a pleasing balance of creamy, tangy, crunchy and salty textures.
I discovered a few small tricks along the way that make this simpler and tastier: thinning the canned refried beans slightly with water makes them spread smoothly without breaking the guacamole layer; draining the salsa prevents watery runoff into the sour cream; and chilling the assembled tray for at least an hour helps the layers set so they scoop neatly with tortilla chips. This recipe is forgiving—using store-bought ingredients like Freshness Guaranteed guacamole and Great Value taco seasoning keeps it quick while still delivering excellent flavor. It’s the kind of dish that brings people to the table and sparks conversation, whether it’s for a Super Bowl party or a cozy family gathering.
In my experience, guests always comment on the fresh tomato-and-onion finish—the final layers make the dip pop visually and flavor-wise. The one-hour chill time is key; the layers knit together and each scoop has a bit of everything. We’ve served this at birthdays, game nights and casual barbecues, and it’s rarely left over.
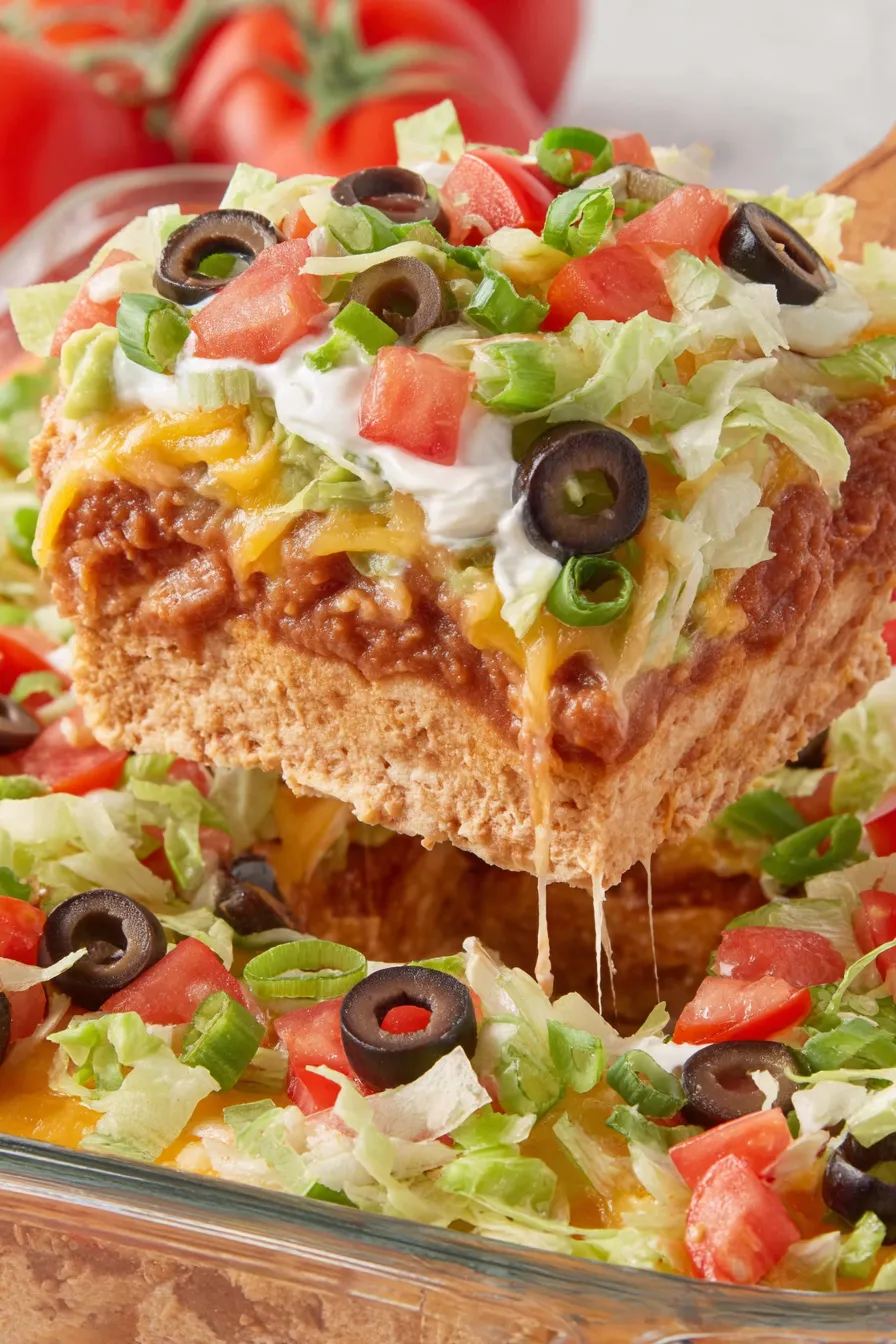
My favorite aspect of this tray is how the seasoned sour cream bridges the rich guacamole and savory salsa—every scoop tastes like a composed bite from a restaurant platter. Family and friends always reach instinctively for the edges first, where there’s a neat balance of bean, guac and topping. If you’re serving a crowd, I recommend doubling the tortilla chip supply.
Store the assembled tray covered tightly with plastic wrap or an airtight lid in the refrigerator for up to 48 hours. After about a day the shredded lettuce will begin to soften and the tomatoes may release a little juice; to preserve texture if making ahead more than 24 hours, hold the lettuce, tomatoes and green onions separately and add them just before serving. Use a shallow, airtight container for leftovers and consume within two days. Reheat is unnecessary—serve cold or at cool room temperature straight from the fridge. If you want to refresh leftover servings, add a sprinkle of fresh shredded lettuce and sliced green onions to revive the crunch.
For a dairy-free version, use dairy-free sour cream and vegan cheese shreds; swap guacamole for an avocado mash with lime and salt. To make it spicy, replace mild salsa with medium or hot salsa and use a hot taco seasoning packet—or stir in a dash of hot sauce to the sour cream layer. If you prefer a lighter tray, use light sour cream and reduced-fat cheese, though texture and richness will be milder. For gluten-free assurance, check taco seasoning and salsa labels or use single-ingredient spices (chili powder, cumin, paprika, garlic powder) to season the sour cream.
Serve with sturdy corn tortilla chips for scooping and a platter of sliced jicama, cucumber, and bell peppers as healthy dipper alternatives. For a festive spread, set the tray in the center with small bowls of extra chopped cilantro, lime wedges, and pickled jalapeños so guests can customize their scoops. Pair with margaritas, iced tea, or a light Mexican lager. For a fuller meal, serve alongside grilled chicken fajitas, warm flour tortillas, or a tray of nacho-style potato skins.
The layered dip format evolved in American party cuisine as a riff on classic Tex-Mex flavors—combining staple elements like beans, avocado, sour cream and salsa into one shareable dish. While not a traditional Mexican preparation, the seven-layer presentation borrows familiar ingredients and arranges them to highlight texture contrasts and visual appeal. Over time the tray has been embraced across the U.S. as a go-to appetizer for gatherings—each household often has its own preferred layer order and signature twist.
In summer, swap roma tomatoes for sweet heirloom or cherry tomatoes and use a bright pico de gallo in place of jarred salsa for peak freshness. In winter, choose heartier toppings like pickled jalapeños and roasted corn to add depth. For holiday gatherings, add colorful bell pepper ribbons or pomegranate seeds for a festive look, and consider mini versions in ramekins for easy individual servings. The base formula adapts well—adjust the heat and toppings to reflect seasonal produce.
For easy meal prep, prepare the bean base, seasoned sour cream, and guacamole the day before and refrigerate separately in airtight containers. On the day of serving, assemble the layers, top with lettuce and delicate ingredients, then chill for at least 1 hour. If transporting, place the tray in a shallow cooler with ice packs and add the final green onion and tomato garnish upon arrival to preserve texture. Use a shallow 9x13 dish for even layering and easy scooping.
Bring this tray to your next gathering and watch it disappear—it's reliably popular, easy to assemble, and endlessly adaptable. Once you try the simple tricks in this post, the classic seven-layer dip will become one of your most requested go-to dishes.
Thin the refried beans with only 3 tablespoons water for a smooth spreadable consistency—too much liquid makes the layer slide.
Always drain salsa thoroughly in a mesh strainer to prevent watery layers; let it sit for a minute and gently press if needed.
Chill the assembled tray for at least 1 hour so layers set and scoop cleanly; add lettuce and tomatoes right before serving if making more than 24 hours ahead.
This nourishing the best 7 layer dip {easy recipe} recipe is sure to be a staple in your kitchen. Enjoy every moist, high protein slice — it is perfect for breakfast or as a wholesome snack any time.
Recipe data validation failed
Please check the recipe data format. See console for details.

Juicy chicken meatballs baked with Parmesan and herbs, spooned with marinara, and covered in melty mozzarella on toasted slider rolls. Irresistible for parties.

Twirl eerie-colored spaghetti and top it with gooey, cheese-stuffed monster meatballs complete with olive eyes for a delightfully spooky family dinner.

Silky egg ribbons swirl through savory chicken broth, scented with sesame and scallions. Simple pantry staples, ready in just 10 minutes.
Leave a comment & rating below or tag @yumelle on social media!
Enjoyed this recipe? Share it with friends and family, and don't forget to leave a review!
This recipe looks amazing! Can't wait to try it.
Comments are stored locally in your browser. Server comments are displayed alongside your local comments.

Join to receive our email series which contains a round-up of some of our quick and easy family favorite recipes.
