
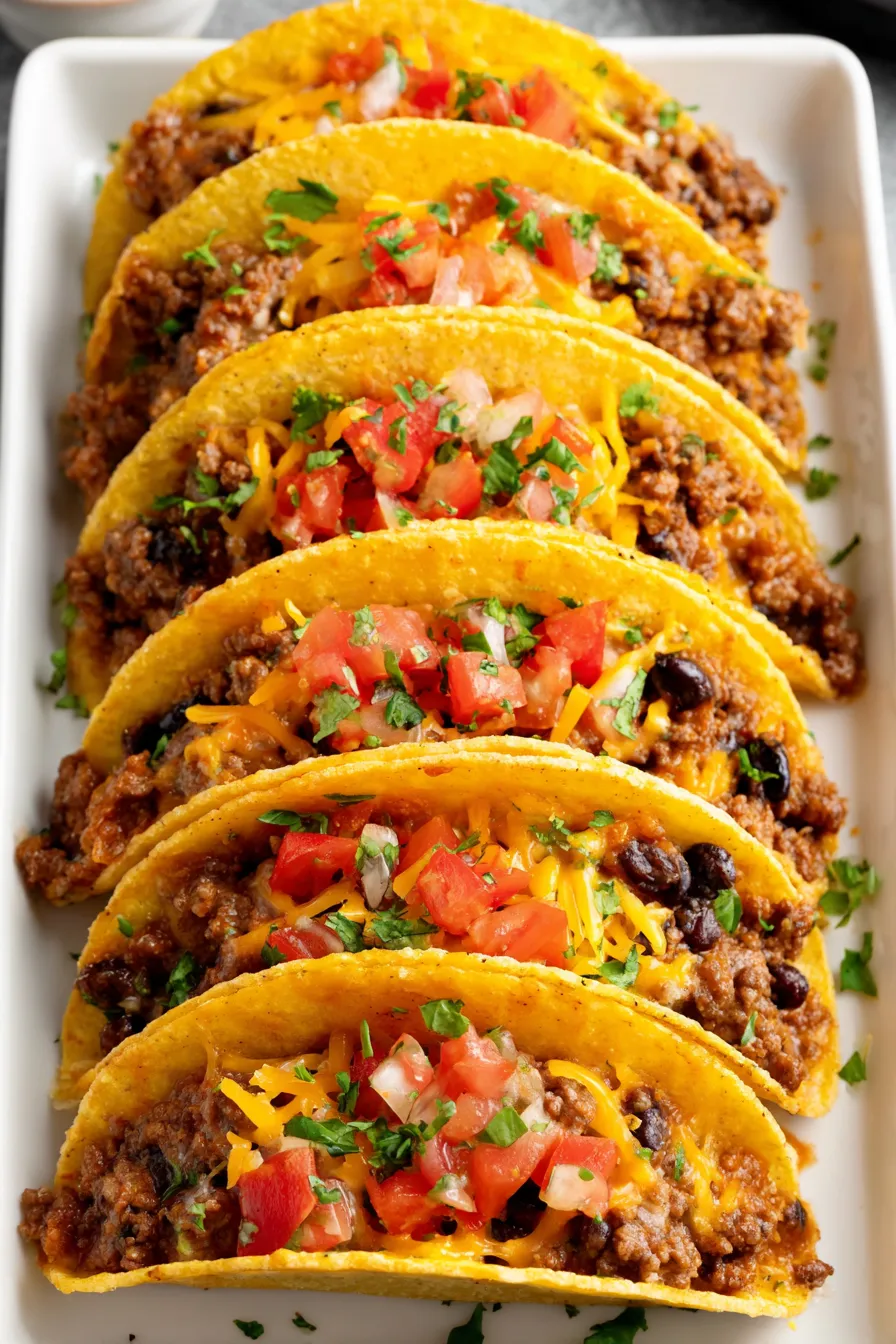
Baked Tacos

A crunchy, cheesy tray of baked tacos filled with seasoned beef and black beans — ideal for busy weeknights and crowd-pleasing dinners.

This baked tacos dish has been my go-to for busy weeknights and low-fuss gatherings. I first landed on this version the night I needed something that felt like takeout but could be assembled in a flash from pantry staples. The combination of seasoned ground beef, plump black beans, and melty cheddar tucked inside sturdy Stand 'N Stuff shells gives a perfect balance of crunch and lush, saucy filling. It’s the kind of recipe that transforms a handful of simple groceries into a satisfying, shareable meal that everyone garnishes to their liking.
I discovered this preparation while experimenting with ways to speed up taco night without losing texture. Baking the assembled tacos briefly crisps the shells and melts the cheese while keeping the filling moist — especially when the meat is finished with a splash of broth and a touch of cream cheese. I love that it’s forgiving: swap in ground chicken, use canned beans, or choose a sharper cheddar for more bite. Family and friends always ask where I hid the recipe card; it feels like a small party every time it comes out of the oven.
Why You'll Love This Recipe
- Ready in about 30–40 minutes, this approach turns taco night into an oven-baked, hands-off meal that frees you from standing over the stove while still delivering crunchy shells and melty cheese.
- Uses pantry staples — canned black beans and diced tomatoes with green chilies — so you can assemble quickly without a grocery run.
- Stand 'N Stuff or similarly shaped hard taco shells hold more filling and make the tray presentation simple: line them in a 9 x 13 inch dish and bake.
- Make-ahead friendly: the beef filling can be prepared a day in advance and reheated; shells and cheese go in just before baking for best texture.
- Crowd-pleasing and customizable: offer toppings like salsa, sour cream, shredded lettuce, and avocado for guests to personalize each taco.
In my household this recipe became the “everyone’s happy” option — my teenager loaded his with extra avocado, while my partner loved the slight creaminess that the optional cream cheese adds. It’s quick, flexible, and reliably hits that comfort-food sweet spot.
Ingredients
- 8–10 hard taco shells: I recommend Stand 'N Stuff for their roomy shape, which makes filling and baking much easier. If you prefer a crispier result, choose a lighter-colored dish for the initial pre-bake so shells don't brown too quickly.
- 1 cup black beans (drained and rinsed): Canned black beans are perfect here — drain well and pat dry to prevent excess moisture that could soften the shells. Low-sodium brands are a great pick so you can control seasoning.
- 1 lb ground beef: Use 80/20 for flavor and juiciness. For a leaner option, 90/10 works, but consider adding a splash more broth to maintain moisture. See notes for a ground chicken swap.
- 1 yellow onion (finely diced): Adds sweetness and texture; cooking until soft concentrates flavors. Red onion will be more pungent and less sweet when cooked.
- 1 oz packet taco seasoning: Store-bought seasoning is convenient; for a homemade blend, combine chili powder, cumin, paprika, garlic powder, onion powder, and a pinch of cayenne.
- 10 oz diced tomatoes with green chilies (undrained): These add moisture and mild heat; Rotel-style canned tomatoes are what I use most often.
- 1/4 cup beef broth: Sub in chicken broth or water if needed — the broth helps loosen the meat briefly so it cooks into the tomatoes and seasoning without drying out.
- 1 Tablespoon softened cream cheese (optional): Adds a silky finish that rounds out the acid from the tomatoes and keeps the mixture from feeling dry, especially with lean meat.
- 1 1/4 cups cheddar cheese (shredded): Sharp cheddar gives great flavor; white cheddar or a Mexican blend both work well.
- Optional toppings: Salsa, sour cream, shredded lettuce, diced avocado or guacamole — these brighten and texturally balance the warm, cheesy tacos.
Instructions
Step 1: Prep the beans and shells Drain and rinse the black beans thoroughly, then spread them on a paper towel-lined plate so excess water is absorbed. Preheat the oven to 400°F. Arrange 8–10 hard taco shells upright in a 9 x 13 inch casserole dish; if using a light-colored dish, bake the empty shells for about 5 minutes to firm them up, or 3 minutes for a dark dish to avoid over-browning. Step 2: Cook the beef and onions In a large skillet over medium-high heat, cook and crumble 1 lb ground beef with the finely diced yellow onion until the meat is fully browned and the onion is softened, roughly 8–10 minutes. Drain off any excess grease to prevent a greasy filling. Step 3: Add seasoning and tomatoes Return the skillet to medium heat. Stir in the 1 oz taco seasoning packet, the undrained 10 oz can of diced tomatoes with green chilies, and 1/4 cup beef broth. Bring to a gentle boil for 1–2 minutes to marry flavors and slightly reduce the liquid, then reduce to a simmer. Step 4: Finish the filling If using, stir in 1 tablespoon softened cream cheese until it melts into the meat, creating a creamier texture. Continue simmering just until most liquid has evaporated and the mixture clings together — you want it moist but not soupy so the shells stay crisp during the final bake. Step 5: Assemble and bake Spoon a layer of the drained black beans into the bottom of each pre-baked shell (this keeps beans tucked beneath the meat). Top beans with several tablespoons of the beef mixture, then sprinkle each with shredded cheddar. Bake uncovered at 400°F for 7–10 minutes, until cheese is fully melted and edges of shells are crisp and lightly golden. Step 6: Dress and serve Remove from the oven, add desired toppings like salsa, sour cream, shredded lettuce, or diced avocado, and serve immediately for best texture. Leftovers can be stored but will lose the fresh crisp of the shells.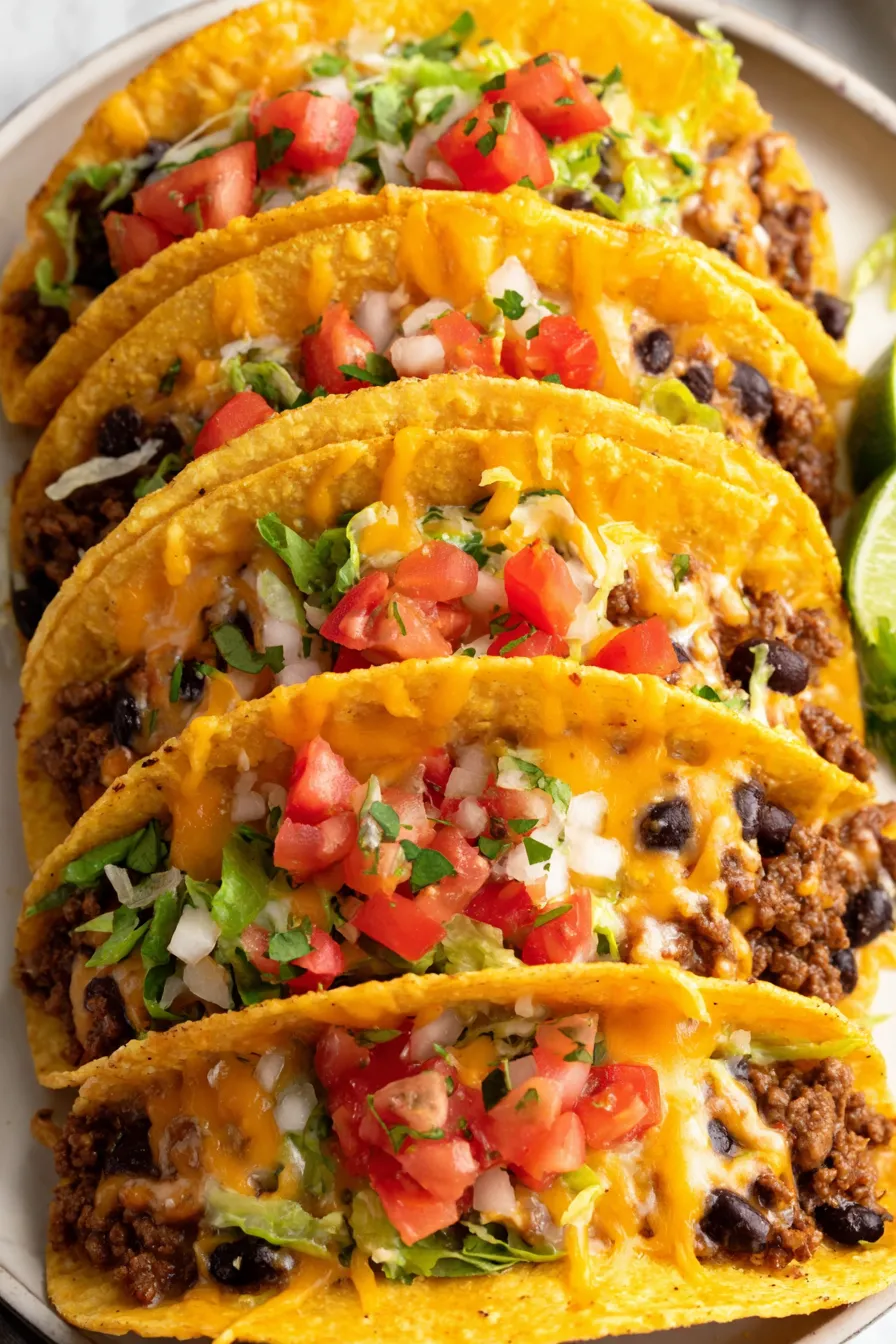
You Must Know
- The tray-bake method crisps shells and melts cheese simultaneously; remove promptly to prevent over-softening from steam.
- Store any unused filling in an airtight container in the refrigerator for up to 3 days; freeze for up to 3 months in a freezer-safe container.
- High in protein from the beef and beans, this dish is satiating — add more vegetables to increase fiber and volume without many extra calories.
- Use low-sodium canned ingredients and adjust salt at the end to keep the sodium in check.
One of my favorite things about these baked tacos is how they become a family build-your-own bar. Friends arrive and immediately start debating toppings — extra avocado or double salsa. The oven step is short enough that the cheese is molten while the shells remain delightfully snap-crisp, and that contrast is what makes these so memorable. It’s also a recipe where small tweaks — a squeeze of lime, a handful of cilantro — elevate the whole plate.
Storage Tips
After serving, let any leftover filling cool to room temperature (no more than two hours at room temp) before refrigerating. Store the beef-and-bean filling in an airtight container for up to 3 days; cheese-topped assembled tacos are best eaten the same day because shells will soften in the fridge. For longer storage, freeze the filling in portioned zip-top bags or freezer-safe containers for up to 3 months. Reheat thawed filling gently on the stove with a splash of broth to revive moisture; assemble into fresh shells and finish under the broiler for 1–2 minutes to re-crisp.
Ingredient Substitutions
If you prefer poultry, swap 1 lb ground chicken or ground turkey for the beef — brown it carefully and add an extra tablespoon of broth or cream cheese to maintain moisture. For a vegetarian version, replace the meat with crumbled firm tofu or additional black beans plus sautéed mushrooms for meaty texture; season generously. Use pepper jack or Monterey Jack in place of cheddar for extra melty stretch and mild heat. To make gluten-free, confirm your hard shells are certified gluten-free corn; some shells contain wheat, so check labels.
Serving Suggestions
Serve these baked tacos with a bright side like cilantro-lime rice or a simple shredded cabbage slaw dressed with lime and a touch of honey. A bowl of fresh pico de gallo and a tray of sliced limes invite guests to customize. For a weeknight meal, pair with a quick mixed greens salad and a pitcher of agua fresca or light beer. Garnishes like chopped cilantro, pickled red onions, or a drizzle of crema add color and balance to the savory filling.
Cultural Background
These oven-finished tacos are a Tex-Mex inspired shortcut that blends traditional taco flavors with American convenience. The idea of baking filled hard shells derives from efforts to make tacos more uniform and easier to serve to crowds, reminiscent of mid-century casserole-style family dinners. While street tacos emphasize warm, soft corn tortillas, this approach celebrates the crunchy shell beloved in many home kitchens and adds a modern baked twist that keeps assembly simple.
Seasonal Adaptations
In summer, replace canned tomatoes with fresh diced tomatoes and add grilled corn or roasted poblano for a bright, seasonal profile. In cooler months, fold in roasted sweet potatoes or caramelized onions to deepen flavor and add warmth. Holiday gatherings welcome a batch with shredded rotisserie chicken spiced with warm ancho chili and topped with cranberry salsa for a festive touch.
Meal Prep Tips
Make the meat-and-bean filling up to 3 days ahead and refrigerate. Pack toppings separately — shredded lettuce and avocado stay freshest when prepped the day you serve. For grab-and-go lunches, portion the filling into containers and include a small bag of shells or crunchy tortillas to assemble just before eating. Reheating on the stovetop with a few tablespoons of broth keeps the texture lively without drying out the protein.
These baked tacos are a dependable, flavorful option for any night of the week. They’re flexible enough to adapt to different diets and busy schedules while still delivering a bright, crunchy finish that makes everyone reach for seconds. Try the variations and make it your signature weeknight crowd-pleaser.
Pro Tips
Pat black beans dry after rinsing to keep shells from softening during baking.
Pre-baking shells in a light-colored dish prevents over-browning; dark dishes heat faster.
If filling seems dry, add 1–2 tablespoons beef broth while reheating to restore juiciness.
Use freshly shredded cheese for better melt and less anti-caking agent than pre-shredded.
This nourishing baked tacos recipe is sure to be a staple in your kitchen. Enjoy every moist, high protein slice — it is perfect for breakfast or as a wholesome snack any time.
FAQs about Recipes
Can I use a different protein?
Yes — use 1 lb ground chicken or ground turkey and add an extra tablespoon of broth or cream cheese to keep the filling moist.
How long will leftovers keep?
Store filling for up to 3 days in the refrigerator in an airtight container. Freeze filling up to 3 months.
Tags
Baked Tacos
This Baked Tacos recipe makes perfectly juicy, tender, and flavorful steak every time! Serve with potatoes and a side salad for an unforgettable dinner in under 30 minutes.
Ingredients
Taco Shells
Filling
Cheese & Toppings
Instructions
Prep the beans and shells
Drain and rinse the black beans and lay them on paper towels to dry. Preheat oven to 400°F and arrange 8–10 shells in a 9 x 13 inch dish; pre-bake shells 3–5 minutes depending on dish color.
Cook beef and onions
Brown 1 lb ground beef with finely diced onion over medium-high heat until cooked through, about 8–10 minutes. Drain excess grease before continuing.
Add seasoning and tomatoes
Stir in 1 oz taco seasoning, undrained 10 oz diced tomatoes with green chilies, and 1/4 cup beef broth. Bring to a boil for 1–2 minutes, then reduce to a simmer.
Finish the filling
Stir in 1 Tablespoon softened cream cheese if using, simmer until most liquid evaporates and mixture is moist but not soupy.
Assemble and bake
Spoon black beans into each shell, top with beef mixture and shredded cheddar. Bake uncovered at 400°F for 7–10 minutes until cheese melts and shells are golden.
Dress and serve
Remove from oven, add desired toppings such as salsa, sour cream, shredded lettuce, or diced avocado, and serve immediately.
Last Step: Please leave a rating and comment letting us know how you liked this recipe! This helps our business to thrive and continue providing free, high-quality recipes for you.
Nutrition
Did You Make This?
Leave a comment & rating below or tag
@yumelle on social media!
Categories:
You might also like...

Chicken Parmesan Meatball Sliders
Juicy chicken meatballs baked with Parmesan and herbs, spooned with marinara, and covered in melty mozzarella on toasted slider rolls. Irresistible for parties.

Spooky Spaghetti Monster Meatballs
Twirl eerie-colored spaghetti and top it with gooey, cheese-stuffed monster meatballs complete with olive eyes for a delightfully spooky family dinner.

10-Minute Egg Drop Soup
Silky egg ribbons swirl through savory chicken broth, scented with sesame and scallions. Simple pantry staples, ready in just 10 minutes.
Did You Make This?
Leave a comment & rating below or tag @yumelle on social media!
Rate This Recipe
Share This Recipe
Enjoyed this recipe? Share it with friends and family, and don't forget to leave a review!
Comments (1)
This recipe looks amazing! Can't wait to try it.
Comments are stored locally in your browser. Server comments are displayed alongside your local comments.

Hi, I'm Hannah!
What's Popular

30-Minute Meals!
Join to receive our email series which contains a round-up of some of our quick and easy family favorite recipes.